Showing posts with label Le Plume II. Show all posts

Thursday, April 19, 2018

Masking Bible Journaling Stamps by Samantha


Hello! Samantha here with you today to share how masking Bible journaling stamps can add even more options to your Bible journaling. 


For this page I used Bible Margins Rejoice Stamp SetWatercolor Twist Pencils, and a black Marvy Le Plume pen. 


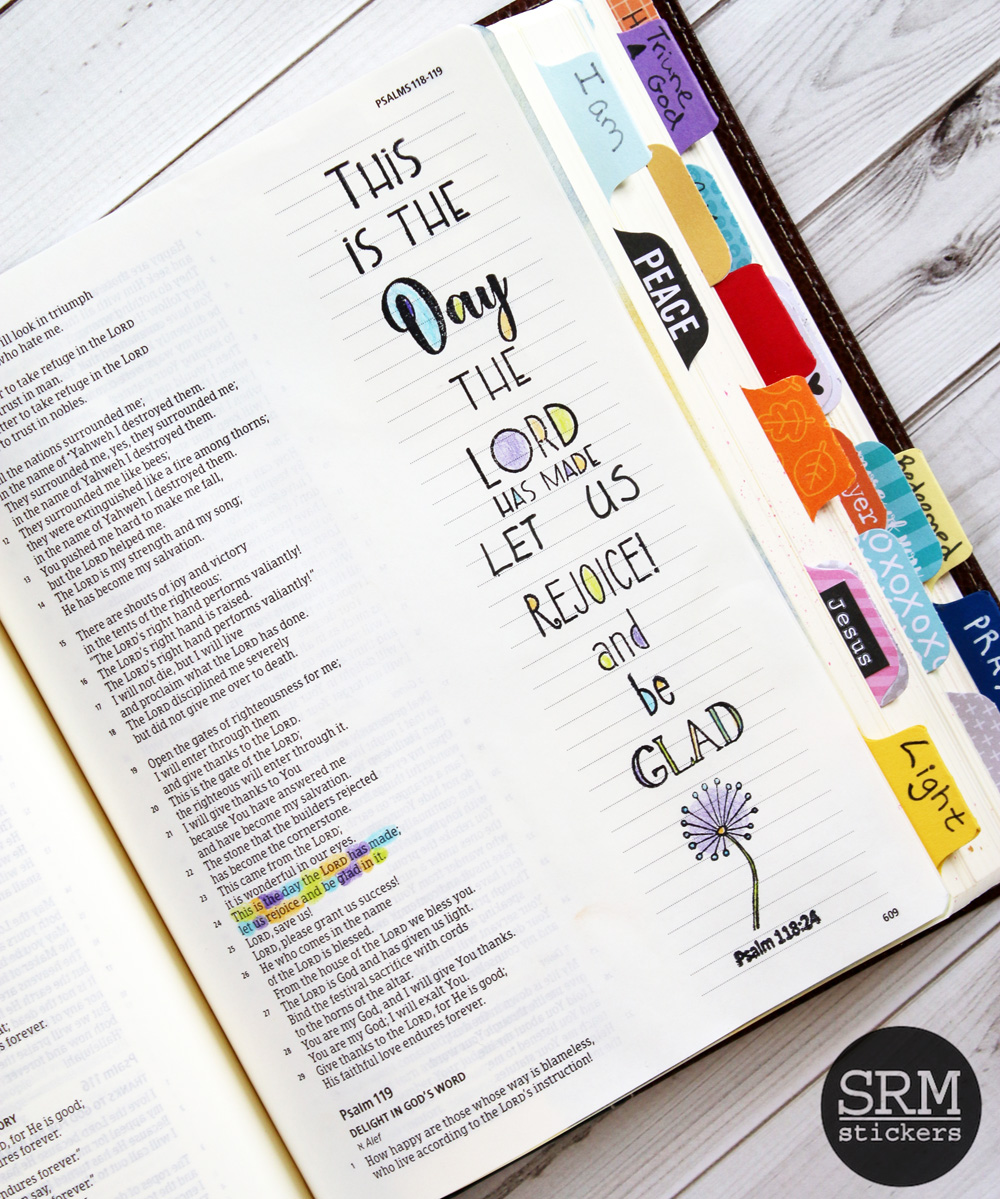
For this page, I wanted to use both the This is the Day stamp (the center stamp) and the words "Rejoice," "and," and "be glad" from the Be Glad stamp (the far right stamp). 


Before inking my stamp, I line it up where I want it to be. Then, I place a sticky note to cover the whole area that I don't want stamped. 


Ink your stamp, and stamp in your Bible. The post it note will mask the area that you don't want inked. 


I repeated the process until I had everything stamped. Then I used my Watercolor Twist Pencils to color in the stamped image and highlight my Bible Verse. 


Masking Bible journaling stamps will have you looking at your stamps in a whole new way! 

Monday, February 26, 2018

Bible Bubbles Bible Journaling Page and Process Video by Karen


The new Bible Bubbles faith stamp set is so cute and perfect for faith planners, cards, quick notes, and the margins of your Bible. 


After putting down a thin layer of acrylic paint for some background color, I used several of the stamps on this page in the book of Joel. 


 Mirroring the stamps, I then drew a larger bubble for my journaling.


I really like how they look clustered together on my page.
The crosses featured on the page are from another new set called Bread of Life.
Watch this process video to see more of these stamp sets and how this page came together for me.


For this project, I used the following SRM products:

Tuesday, December 26, 2017

Bible Journaling Worship & Praise by Karen


One of the main reason I Bible journal is because it gives me the time to meditate on specific words of scripture. While I am coloring or painting or stamping, I am repeating scripture in my mind and contemplating the meaning of these precious words. The creative process draws me in and allows me to linger longer in the Word. 


My page today gave me the chance to target specific words and think about the many reasons to worship and praise our amazing God.


Psalm 29 is a psalm of worship and praise. It wasn't difficult to find many of the words used in this psalm in stamp form on SRM's two "wordfetti-style" faith stamp sets - Daily Devotion and Scripture Notes. These two sets contain multiple words that can be used in a variety of ways. 


After lettering "worship" and coloring it in with marker and watercolor twists, I added several word stamps to emphasize some of the words in the Psalm. I also added a star stamp from another set, Child of God. I created the background using the watercolor twists and a water brush. Then, I added a few highlights with my white pen. I really like how this page turned out and am grateful for the time to worship and praise God through Bible journaling. Be blessed!

For this project I used:

Thursday, December 14, 2017

Bible Journaling Worship & Praise by Karen


Hello!  Karen here today to share some of my Bible Journaling with you. 


One of the main reason I Bible journal is because it gives me the time to meditate on specific words of scripture. While I am coloring or painting or stamping, I am repeating scripture in my mind and contemplating the meaning of these precious words. The creative process draws me in and allows me to linger longer in the Word. My page today gave me the chance to target specific words and think about the many reasons to worship and praise our amazing God.


Psalm 29 is a psalm of worship and praise. It wasn't difficult to find many of the words used in this psalm in stamp form on SRM's two "wordfetti-style" faith stamp sets - Daily Devotion and Scripture Notes. These two sets contain multiple words that can be used in a variety of ways. 


After lettering "worship" and coloring it in with marker and watercolor twists, I added several word stamps to emphasize some of the words in the Psalm. I also added a star stamp from another set, Child of God. I created the background using the watercolor twists and a water brush. Then, I added a few highlights with my white pen. I really like how this page turned out and am grateful for the time to worship and praise God through Bible journaling. Be blessed!

For this project I used:

Monday, November 20, 2017

East & West Bible Journaling by Samantha


Hello! Samantha here to day to share some Bible journaling. Today I've got a verse from Psalms, "As far as the East is from the West, so far has He removed our transgressions from us."


For my page I used 2 SRM stamp sets; Bible Backgrounds and Heaven and EarthColorIn Watercolor Pencils, a Reminisce White Gel Pen, a LePlume Black markerSticker Stitches in white, and some stamping inks. 


I used my colored inks to sponge on a soft background of blue, purple, and orange. I then stamped the crossed arrows stamp from Bible Backgrounds with the same colored inks.


I used a mixture of stamps from the Heaven & Earth stamp set and the black LePlume marker to write the verse in the margin of my page. I used the white gel pen and watercolor pencils to color in the arrows, mountains, and words. I finished up by adding a few white stitches stickers randomly to the edges of my page.


What have you been Bible journaling lately?  

Friday, November 3, 2017

Bible Backgrounds Bible Journaling by Samantha


Hello! Samantha here with you to share a Bible journaling page. Today I have I'm using SRM's Bible Backgrounds stamp set to create my page.


For this page I focused on Jesus calling the first disciples. You can find this in a few different books of the Bible. I just happened to journal this in Matthew. I used Bible Backgrounds to create my pattern in the margin. I love how easy it is to create a repeating pattern with the Bible Backgrounds stamp set. It make the set so versatile! I used ColorIn Colored Pencils in dark blue, light blue, and purple to color in random fish in the stamped pattern. I used the same pencils to then highlight my text and create a border around the page.


I used a Le Plume black marker to write the text "Follow Me, and I will make you fish for people." I really like the "Follow Me" part of this text and wanted to highlight it. I decided that stamping the word "follow" from Scripture Notes down the margin would be a great way to accomplish this.


I can't wait to create more backgrounds with the Bible Backgrounds stamp set! 

Thursday, October 26, 2017

Over the Rainbow Party by Jenn


Hi friends, Jenn here! My oldest daughter is about to turn 7 and has asked for a bright colorful rainbow unicorn party, so today I will be sharing some fun ideas that are sure to put a great big smile on your face!

Yesterday I shared my planner pages that had lots of details about my daughter's birthday.  Today I am sharing lots of things that I created for the party.  Ready for inspiration?  Let's go!


First up lets talk about the invitations... I used a plain white cardstock and stamped the star bunting and celebrate from the birthday planner stamps in clear embossing ink then embossed with white. I noticed I had the exact number of colors in the rainbow as stars so I used the color in Le Plume markers and colored them onto a a clear acrylic stamp block and used them like watercolor with my water brush. At the bottom I added the same colors over the embossed celebrate words to make the words pop off the page and also bring more color to the invite.


I really wanted to create treat bags or favor bags for the party....I used the glassine bags and filled them with colorful skittles and tied a little bakers twine around them with a yellow scalloped circle with the words Rainbow seeds. That was it...super simple, cute and will be fun to display.


I hope I have sparked a little creativity and inspiration in you all. I love seeing what you create with the beautiful SRM sticker products so please share using #srmstickers on instagram and Facebook....looking forward to seeing what you all create!

Materials used:

Wednesday, October 25, 2017

Rainbow Birthday Week by Jenn


Hello friends, Jenn here! I am very eager to show you a very special week in my planner this month, my daughter's 7th birthday.  Bring on the confetti, cake, rainbows and sunshine and lets jump on into this super bright cheerful spread.


I began by pulling out my planner stamps, rainbow washi, birthday stickers, and a little fun rainbow scrapbook paper cut to the boxes of my erin condren planner (1.5"x2"). I really like having a weekend banner in my planner spreads, so I chose this adorable star garland from 'Birthday Plans'. To color in the stars I used my le plume II markers colored onto an acrylic block picking up the color with my waterin blending brush. I used this same technique to color in the coffee cup on my Friday. One more quick technique ...if you love the look of patterns and no whitespace planning try using small stamps to create patterns. Washi tape is my secret to clean lines and perfect looking boxes...just be very very careful when removing and repositioning the tape it is very easy to pull the top layer off the paper.


I hope this gives you a little inspiration and perhaps a new technique or two to try. Be blessed sweet friends as you plan your beautiful life...each day is a gift spend and share it wisely.


Products Used:

Tuesday, October 17, 2017

Lettering Technique with Bible Background Stamps by Karen


Hello!  Karen here today with some techniques and a video too! 


Today I'm sharing several ways I utilized SRM's Bible Backgrounds stamp set this week. My favorite technique was using the "amen" Bible background to dress up plain white letters. 

After cutting the letters from plain white cardstock in my die cut machine (you could use your white or light-colored stickers), I randomly stamped on top of them before removing them from the cutting mat. Next, I added a bit of marker wash to give them colors that coordinated with my faith planner layout for the week. 

To watch me complete this technique and to see a few more ideas using the Bible Backgrounds stamps, watch my process video below!


Here's a close-up of my letters in my planner.


For this project I used:

Wednesday, August 30, 2017

Polke Dot Bag/Card Holder by Angie


Hello!! Angie here again with a fun way to give a card!


 I wanted to use the black polka dot cotton bag instead of an envelope to hold my card.


I started with a scalloped circle punch out in a teal blue color and added a 'Love You' sticker to the center. To add some embellishment to the circle, I used the small flowers from the Just Believe stamp set. I stamped them with archival ink, watercolored them using the watercolor markers and pencils and then fussy cut them. Quick, easy and so cute!!


For my card, I used some bright pink cardstock from my stash and just trimmed it down so that it would fit inside of the bag. I used another scalloped circle punch out to tie the card and bag together. This time I used the larger flower and branches along with the butterflies from the Just Believe stamp set. I watercolored them as well and cut them out. The top of my card was looking a little plain, so I used a scalloped sticker stitch to fill in the space. I placed a best wishes clear sticker at the bottom to complete my card. 

What fun a fun way to give a card instead of the traditional envelope!

Tuesday, August 8, 2017

Planner Stamps in Bible Journaling by Samantha


Hello! Samantha here to share some recent Bible journaling I've created. I'm doing a little something different today as I'm using planner stamps in my Bible journaling.


For this page, I used the new Seasonal Plans Planner Stamps, ColorIn Watercolor Pencils, a black Le Plume marker, and colored ink pads.  


I love to use my watercolor pencils to highlight the text in my Bible that I'm journaling about. Since this was a bit of poetic praise I change colors of pencil as the thought changed.  


Since the section I was focusing on was about the seasons, I used the Seasonal Plans stamp set to add the names of the seasons and an icon for each season as framing for this section of highlighted scripture. 


Finally, I used the journaling margin of my Bible to add "He changes the times and Seasons" with my black Le Plume marker. Then I added some pops of color by coloring in some of the letters with my watercolor pencils. 

As you can see, using planner stamps in Bible journaling is just one more way to get lots of use from your SRM stamps. Have you ever used your planner stamps in your Bible?

Saturday, July 29, 2017

Bible Journaling Book Mark/Tip by Tenia


Here's a special Saturday Blogpost as we say farewell to Tenia Nelson who has been on the SRM Design Team multiple times!  I'm sure that we will be seeing here again! :)  

Tenia's talents are many.  Here lettering is awesome, her stamping and coloring skills are superb!  And her love of SRM Sticker Stitches is one for the record books!  

Thank you Tenia for all that you have done using SRM!  We love you!

-----------------

Tenia here from Jazzy Paper Designs showing y'all some goodness that I created with SRM products....CHECK IT!!!!


I had a BLAST on this Bible Journaling/Hand Lettering project!!! Here are all of the SRM products that I used on this project: Marvy Uchida Le Plume Markers, Old Testament Clear Stamps, Walk By Faith Clear Stamps, Clear Stamp/Big Numbers and Sticker Stitches/Christmas.

Thanks for stopping by and have a great day!!!!

Wednesday, June 21, 2017

Traveler's Journal by Tobi


Hi there, it's Tobi here with a DIY planner using a traveller's journal and of course, SRM stamps. 

Here are some things that have added up to my current planner situation:

~ I've tried the planner thing... I don't get it, OR I'm not good at it. 

~ I've recently gotten into hand lettering and have started to collect journals to practice in. 

~ I had a very stressful month and kept a notebook of everything i had to remember and keep track of and it really worked for me. 

So, because of these factors, I thought i would continue with the notebook/hand-lettering/journal format, but organize it a little better using various stamps and supplies. 


So I've got my day divided into three zones: 
1) School (I'm a teacher)
2) After school - which includes clubs and rehearsals/performances
3) dinner (we have meal-plans)


As much as I can, I try to fill in the spots using bounce lettering (the style of calligraphy I am working on) so I can practice as many letter combos as possible. 

Here's a mostly blank page so you can see how it looks before I fill it out:


Thanks for stopping by, I hope this was inspiring! 

Supplies: