Showing posts with label Kraft Box. Show all posts

Tuesday, May 1, 2018

Graduation Shaker Tag & Gift by Shelly


Hey y'all! Shelly, here.
Today, I'm sharing a fun and simple graduation gift with you.


I started with my gift box. I used a SRM Stickers kraft box and a large SRM Stickers patterned bag for 'wrapping paper'. Simply cut the patterned bag on the sides and lay flat. Then wrap your box. Easy peasy, right?!...


Next, I made a shaker tag. I used a fun die along with some silver glitter cardstock and some sequins. Once I done with my shaker part, I added a simple SRM Stickers 'grad' sticker. Which I placed on a piece of cardstock underneath along with some foam tape and then placed it on my tag. After I added it to my gift. Fun and simple, yeah?!...

Thanks so much for stopping by!
Enjoy your day!

SRM Stickers supplies:
Large Patterned Bag-Striped Black and White

Thursday, November 16, 2017

Gift Wrapping by Shantaie

Hello!  Shantaie here today to share some gift wrapping ideas!


I'm one of those people who cherish the opportunity to wrap gifts, I make an event of it, and truly find it to be a joyful activity. That being said I know not everyone feels the same way I do, so I thought I would share a couple of ways to add beauty to simple packages that are so pretty that you may just convert.


Let's start with a simple square kraft box Before opening the box add a joy stamp from Big Merry in a row of three with versamark ink and gold embossing powder, heat set and open box. To add a fun ribbon detail I cut a small slit in the box front bottom, and wind around to tie on top


Kraft boxes come in a ton of different sizes and I reccomend have them on hand for every occasion, but I especially stock up before the holidays.


We all love the ease of a gift bag, and if you've never given any thought to flat bags as an easy but beautiful option for gifts allow me to share with you my love of these bags!! They come in many sizes, colors and patterns


Like the box above I used a stamp to add a sentiment and embossed it with gold powder, the gift was added and I folded the top of the bag over, and tied a bow, to that I added a spray of die cut branches and a lovely gold ornament tag with a sticker from Fancy Sentiments Christmas and a spattering of pearl dot accents.


Gift wrapping can be easy if you start with a few simple basic containers, and a little crafty fun! 

Thursday, September 14, 2017

Mixed Media Halloween by Tobi


Hi there, it's Tobi Crawford here with some mixed media fun! Halloween is a great reason to get a little messy with your projects, and it's fun to let loose and experiment a little.

I used a 3x3x3 Kraft box as my base. Before I assembled it, I did some stencilling, and misting and created a fun little background for the vampire (Sizzix). 


(For all of the stencilling I used Tim Holtz Distress Oxide Inks)

Once all of the sides were decorated, I folded the box into place and added the sentiment and vampire!


Thanks for stopping by! 

Thursday, April 20, 2017

God Is With You Card & Gift Box by Amber


Hello everyone! It's Amber here, today I'm sharing this stamped religious card and mini kraft gift box. 


The other SRM design team members have been sharing some amazing Bible journaling pages lately using some of SRM's newest religious stamps. I haven't gotten around to using the new sets much so I thought I would use the Child of God clear stamp set & the Just Believe clear stamp set to create a card and matching gift box.

I started with a kraft card base and die cut a large pierced rectangle out of some white cardstock. I stamped a flying angle reaching for a star in the center of my white cardstock and added the "God Is With You" sentiment from the Child of God stamp set right above my angel. I also stamped some fancy text over the entire background in a light brown and added some distressed stars to the right side of my panel to created a visual triangle. To finish I misted the entire panel with some Tattered Angles Sea Shell Glimmer mist to add a vintage look to my piece.


I love creating little matching gift boxes or gift bags to go along with my card so I thought I would create one to along with today's card. I folded and assembled a 3"x 3"x 2"Kraft Box from the shop and added some stamping all around the middle portion of my gift box with SRM's Just Believe stamp set. I tied a light teal ribbon around my mini gift box and my card and matching gift box were complete.


 I hope you enjoyed my post and project today. Thanks for visiting!
SRM Supplies

Saturday, December 24, 2016

Hello & Happy Holidays by Amber

Welcome to a special SRM Blog post for Christmas!  Our designers made so many wonderful Christmas projects, we wanted to share them with you right up until Christmas!   Today's post from Amber Rasmussen is sure to bring a little cheer! 


Hello everyone! It's Amber here, today I have a fun Christmas card and 4" x 4" kraft gift box to share. 


I started my card by folding an A2 sized  kraft card base and die cutting a pierced rectangle out of some white cardstock. I set my kraft card base aside and started working on my stamping. I randomly stamped my little Christmas images in some Memento Tuxedo black ink and colored them with some Spectrum Noir markers. I adhered my stamped panel to my kraft card base and added a white die cut label with a Happy Holidays sentiment sticker from SRM's Fancy Christmas Sentiment sticker sheet. 


The little tag I created to match my card was super easy to make. I die cut my tag out of some white cardstock, randomly stamped my little Christmas images, and colored them. Once I had all my images colored I added a white die cut label with the same Happy Holidays sentiment sticker I used for my card.


Of course I had to have something to add my matching tag to so I pulled out one of SRM Stickers 4" x 4" x 4" Kraft Boxes and started decorating it. Before assembling the gift box I took one of the Hello sentiment stamps from SRM's Big Hello clear stamp set and stamped it in black ink around all four edges and the top portion of my box. Once all my stamping was done I assembled the box, added my gift inside, tied some red twine around my gift box, and added my tag. That's it, super easy, right? 

SRM Sticker Supplies
Red Jute Twine

Thursday, November 3, 2016

Thankful Gift Box by Tobi


Hi there! It's Tobi, sharing a fun little fall-inspired project. 

I find I can never have too many gift boxes ready-to-go. Today I'm sharing a quick little creation that's perfect for any Autumn gift-giving occasion. 


I started off by assembling the 3x3x3 kraft box.  


I then cut my font and shapes from Chalkboard Vinyl with my Silhouette Cameo and stuck them to the top of the box. 

It looks so sharp against the kraft!! 
 

I then decorated the box with pretty papers and a few embellishments. 


Gluing twine is a snap with the Mono-Multi glue applicator! 

Friday, October 7, 2016

Happy Fall by Tanya


Hello everyone!  Tanya here today to share a sweet fall gift idea with you.  Fall has to be my favorite season of the year and I love creating and sharing small gifts to celebrate this wonderful, colorful time of the year. I really love the way this one turned out:


Doesn't that make you ready for Fall?


I started with the 6 X 4.5 inch Kraft Box.  After assembling my box, I inked up the edges with brown ink. Next, I cut panels of printed paper just slightly smaller than the sides and top of my box. I inked up those edges also and used a one inch circle die to create the notch on the front panel. I stamped the word "happy" onto the front panel in brown ink using the BIG Birthday stamp set.


After adhering all the panels, I wrapped this fabulous burlap ribbon around my box (I love the texture it adds).  Next I added the word "Fall" and those pump pumpkins that I cut out on my Silhouette.


I love the size of this Kraft Box!  My full sized candle, a tube of lotion and a small hand sanitizer all fit perfectly! 
 
Thanks so much for stopping by today.  Have a great day and I'll see you soon.
 

Tuesday, April 26, 2016

SRM Disney Gift Box by Angi


Hello again SRM fans! Angi from Twenty Five Smiles here! 
I've got a fun project for all of you Disney fans out there. 


The last time that I was at Disney World I bought a bunch of key chains in hopes of using them on craft projects. I finally came up with a fun idea. Here it is! It's a gift box designed to surprise the kiddos with a trip to Disney.

I layered the top of an SRM kraft box with lacea doily, and a scalloped punch piece. I then took off the metal key loop and adhered the Minnie shaped key chain on top.


I filled the box with candy and placed a message inside that reads -"Surprise! We are going to Disney!" Your kids can use the key chain on a backpack during your trip too!

I hope you liked my little gift idea. Be sure to check out all of the great products in the SRM Store!

Thursday, December 17, 2015

Christmas Reindeer Ornament and Gift Tag by Angi


Merry Christmas SRM fans!
  Angi Barrs here with a fun holiday craft project!


I made an ornament and gift tag using the Stickers by the Dozen - Christmas set.  You can use it on just about everything during the holidays. 

I even used a sticker on a wood piece this time around. I purchased it at my local craft store. I simply added a reindeer embellishment and sequins. The sticker stays on smoothly on the wood too.


I didn't stop there. I also used a sticker from the same set to make a little gift tag. Be sure to grab a kraft box and doilies too. They coordinate so well with DIY gift tags.


I love playing with all the SRM Christmas themed products!

Thanks for stopping by!

Wednesday, November 11, 2015

SRM Stickers Christmas Wrapping by Annette


Happy Day SRM Stickers Friends...
Annette Allen here with you today.

SRM Stickers Blog - SRM Stickers Christmas Wrapping by Annette - #christmas #giftwrap #stickers #kraftbox #clearstamps #janesdoodles #tistheseason #twine #solidtwine
Today I am making my own wrapping paper.

I am playing with: SRM Stickers

SRM Stickers Blog - SRM Stickers Christmas Wrapping by Annette - #christmas #giftwrap #stickers #kraftbox #clearstamps #janesdoodles #tistheseason #twine #solidtwine

The paper I used is from Ikea. It is a roll of paper for kids to doodle on. First I did all the stamping. It inked up perfectly. Bonus it is super cheap.

SRM Stickers Blog - SRM Stickers Christmas Wrapping by Annette - #christmas #giftwrap #stickers #kraftbox #clearstamps #janesdoodles #tistheseason #twine #solidtwine

Next I cut out each and every little candy sticker from Stickers By the Dozen Take 2 Christmas.  I just love these little candy images. 

SRM Stickers Blog - SRM Stickers Christmas Wrapping by Annette - #christmas #giftwrap #stickers #kraftbox #clearstamps #janesdoodles #tistheseason #twine #solidtwine

I wanted to add just a little more with this fun sentiment from Stickers By the Dozen Christmas.

SRM Stickers Blog - SRM Stickers Christmas Wrapping by Annette - #christmas #giftwrap #stickers #kraftbox #clearstamps #janesdoodles #tistheseason #twine #solidtwine

Now we are getting somewhere.
Well I think that just about does it.

SRM Stickers Blog - SRM Stickers Christmas Wrapping by Annette - #christmas #giftwrap #stickers #kraftbox #clearstamps #janesdoodles #tistheseason #twine #solidtwine

Now it is time to wrap this cute SRM Stickers Kraft Box 3x3x3.

SRM Stickers Blog - SRM Stickers Christmas Wrapping by Annette - #christmas #giftwrap #stickers #kraftbox #clearstamps #janesdoodles #tistheseason #twine #solidtwine

This paper wrapped perfectly around and now time to add a fun pom pom using The Twinery: Solid Peapod Twine. I looked up on Pinterest to see how to create this fun pom pom and I have to say it was so easy to make.  Got to love Pinterest for tips on how to make stuff.

SRM Stickers Blog - SRM Stickers Christmas Wrapping by Annette - #christmas #giftwrap #stickers #kraftbox #clearstamps #janesdoodles #tistheseason #twine #solidtwine

I thought it needed just a little more so I added this adorable Santa from Jane's Doodles: Tis The Season! and I colored him green.. why not right? I kind of had a green theme going on here so I went with it. Now it is time for you to give this a try. 

Make sure and share with us on SRM Stickers Flickr page HERE.

Thanks for stopping by.
Happy Holiday Crafting. 

Friday, November 6, 2015

Give Thanks Gift Box by Cathy


Hi SRM Fans!  Cathy here with you today sharing a simple little gift box for Thanksgiving filled with a few treats for your Thanksgiving Day hostess.  We all need a little chocolate pick me up with all the stress of the holidays.  I created my little gift box with a  SRM 4x4x2 Kraft Box, all  you have to do is decorate.  You can literally do this is minutes just before you head out the door.  I cut the Give Thanks using my Silhouette Cameo, added a few leaves and a heart button.  You can use paper or vinyl!

SRM Stickers Blog - Give Thanks Gift Box - #kraft #box #stickers #fall #autumn #thanksgiving

Fill the inside with a delicious treat!

SRM Stickers Blog - Give Thanks Gift Box - #giftbox #kraftbox #quickcard #thanksgiving #DIY

And for just a bit more fun I added patterned paper and a SRM Thanksgiving Sentiment to the inside of the box.

SRM Stickers Blog - Give Thanks Gift Box - #giftbox #kraftbox #quickcard #thanksgiving #DIY

Thank you for joining us today at SRM!


Tuesday, August 25, 2015

Birthday Kraft Box by Amy


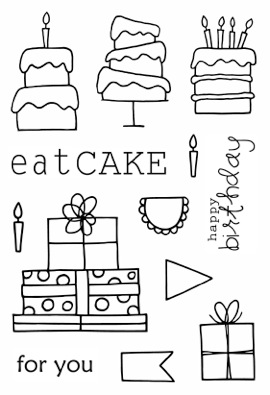
 Hello everyone!!  This is Amy here and I am excited to share this fun birthday project with you today using the new Jane's Doodles Eat Cake stamp set and the 2x2x2 Kraft box.

SRM Stickers Blog - Birthday Kraft Box by Amy - #birthday #giftbox #clearstamps #birthday #twine #doiliy #kraftbox

I started by stamping the box with the stamp set in a clear ink.  I love the festive stamped pattern!   Then I assembled the box and added a 4" White Lace Doily to the top, tied it all up with some Strawberry and Marigold Twinery bakers twine and started working on the tag.

SRM Stickers Blog - Birthday Kraft Box by Amy - #birthday #giftbox #clearstamps #birthday #twine #doiliy #kraftbox

I stamped the image onto a tag that I die cut from white cardstock, colored it in with my Copic markers and added a few white pen accents.  I layered it onto another yellow tag and then put a button on top and adhered it to my package.  I felt that it was missing something, so I die cut some yellow flowers, layered them together, and then added a rhinestone to the middle and put it in the middle of the bow.  

Here's the stamp that I used on this project.


Thanks for letting me share with you today!
Join us again tomorrow for more SRM inspiration!