Showing posts with label Live Life. Show all posts

Tuesday, February 27, 2018

Snowman Layout by Melanie


Welcome, welcome! So glad you could drop by today :) We are in the thick of winter here--which actually means lots of rain and an occasional snowfall. My son is so happy to see the snow and will immediately want to go outside to build a snowman. So, I thought it would be fun to document that with our first snowfall of the season this winter.

As you can see, it took most of the snow in our yard to build the snowman! But he sure looks happy doesn't he?

 I used several different sticker sheets to enhance the layout. The sticker stitches always come in handy to define edges or add some depth.

SRM has quite a few stickers available for winter-theme projects. I appreciate how the colors on the sticker sheets coordinate across the line. That way I can mix and match from several options.


Thanks for stopping by today! We are hoping for some more snow soon. Let the snow-dancing commence!

Labels By the Dozen #63005 Bright Blank
Sticker Stitches #58003 Sticker Stitches Black
Sticker Sentiments #51009 Winter
Freestyle #50001 Winter
Live Life #49004 Calendar Year

Friday, November 10, 2017

12 Days of Christmas Countdown Advent Calendar


Hello!  Shanna here again with a fun and festive Christmas project!!  

In my house we have a tradition of a countdown advent calendar... Similar to the chocolate ones you see in stores, we like to give little treats and toys as part of the fun!  I have varied in the past with a full 25 days of fun, or a simpler 12 days of counting fun.  This year, for my 5 year old's first advent calendar I chose to run with the 12 days of Christmas countdown as it will be a little more simplistic for him to follow as he is autistic and the more simplified it is, the less stressed he gets.  


I adored making this fun banner-style calendar with with fun and simple flair!


Here is what I used:
Distress Oxide inks in Lucky Clover, and Candied Apple
Mini Clothespins


I started by stamping directly onto the scallop circles the numbers 1-12 using the BIG Numbers Stamp Set.  I actually ended up embossing them in clear, but it down played the oxide colors unfortunately.  Good news is my 5 year old won't be nearly as critical of them as I am!  


Next was made easy peasy by utilizing the treat bags as the wrapping/holder for the goodies.  We keep things small and affordable.  I picked up a multi pack of trains (his fave) and some figurines from the dollar store along with a couple pencils that are helping him learn to write.  Fun stuff!!  I put candy in my older kids calendars sometimes to mix it up, but for this one I stuck with small toys. 

I folded down the bags to close them and then sealed them using one of the awesome stickers in the SRM Stickers Live Life/Christmas Stickers set!!  Super easy!  I attached my numbers to the bags with some double sided tape and then strung them on the jute twine clothesline-style.  I love how it turned out and will fit on our mantle perfectly this coming December!


What is a fun tradition you like to do in preparation for Christmas??

Until next time!!

Friday, October 27, 2017

Calendar Fun by Angie


Hello SRM friends and fans! Angie here with you today.

The new year will be here soon enough, so why not design a SRM calendar for yourself or as a gift?? SRM has so many amazing stickers and stamps that would look amazing on your calendar!

I started with the adorable 6 x 6 calendar, which is the perfect size for your desk or to sit in a small space around your home. 

I'm just sharing a few of my completed pages but I hope these examples will show you how quick and easy it is to decorate this calendar.


I stamped the months for the whole calendar using the seasonal plans stamps. I also used the small sticker numbers for all of the dates on my calendar pages. 


For the month of January, I embellished the calendar page with the snowflake found on the seasonal plans stamp set. I love that the stamp set has an icon to go with each month. I used some sequins from my stash to add some sparkle to the middle of each snow flake. The 'brrr..it's cold' is a sticker from the Live Life Calendar Year sticker sheet.


For the month of October, I used the adorable candy corn icon from the seasonal plans stamp set. I stamped them using black archival ink and then colored them in with markers. The candy corn border and the 'Happy Halloween' are stickers from the Stickers by the Dozen/Halloween set.


Lastly, November is embellished using the leaf icon from the seasonal plans stamp set and two stickers from the Thanksgiving Express Yourself sticker sheet. 

I hope these simple but functional examples will help you create a calendar that you will look forward seeing the whole year. 


Thursday, October 19, 2017

Pocket Calendar by Samantha


Hello! Samantha here to share a mini calendar project that also makes a great gift. 


For this project you'll need some plastic badge holders (you can find these in any office store or office department of a big box store), card stock, 2018 Mini Calendar Decorative stickers, Black Jute, and an assortment of other SRM stickers to decorate your calendar pages (I used A Year of Memories 2018Stickers By the Dozen ValentineLive Life Calendar YearStickers by the Dozen PatrioticExpress Yourself SchoolWe've Got Your Sticker TreatsSticker Sentiments Shine Your Light, and We've Got Your Borders Christmas).

If you're give this as a gift and want to create a matching gift bag you'll also need a cotton bag with gold dots and Fancy Sticker Sentiments Birthday.


I make one of these every year to keep in my purse (they also make a great desk calendar). The best part is they can look completely different every time you make them. Choose any card stock or patterned paper that you like for your pages, and choose coordinating stickers. 


This year I chose to use kraft paper that had gold or white printing on it. I stuck to only black stickers this year for my calendars and accent stickers, because I like the simple elegant look of black on kraft. 


I tied all of the pages together with coordinating jute. Again, I used black, but depending on the card stock or patterned paper you use, you can pick any of SRM's beautiful jute colors. 


These make an awesome (and inexpensive) gift. If you want to dress it up a bit for gifting, it will fit perfectly in a cotton bag

Monday, October 16, 2017

Baby's First Christmas Layout by Giorgia


Hello SRM friends, Giorgia here with a new layout for you.
Have you already started thinking about Christmas?
I sure am! So, to get in the Christmas mood I am scrapping some pictures from our family lunch last year.
Do you remember my lovely nice Greta?
I made a layout to remember her first Christmas: she was only a month old and she was really adorable in her cute festive dress.


To create the layout I used many SRM stickers Chrismtas themed products: check out Chrismtas category in the shop, it is full of amazing items!
I chose a background paper that perfectly matched my picture colors, and started decorating: I chose to stick with traditional Christmas colors.
I layered the picture on patterned papers and used SRM stickers to add interest to the page.


 I added some wood veners to add texture.


I adhered circles stickers on white cardstock, fussy cutted them and adhered them with foam tape to make them pop from the background and add depth. I love this technique, it is one of my go to in almost each layout!


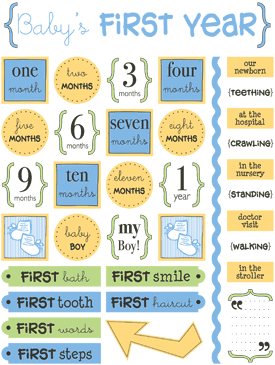
I used small calendar numbers stickers to create the date on a sticker label, I handwrote the journal with black pen from Le Pen 4 Piece Set - Dark Colors and added the word Christmas from the Baby first year stickers sheet.


Friday, September 29, 2017

Shake It Up Baby Card by Shantaie


Hi!  I'm Shantaie and I want to share a few different ways to use SRM stickers the way you would use a stamp, patterned paper, even an envelope seal!


When we think about stickers sometimes we think about the ease of use ....and rightly so, but we can also think about the versatility and function of clear stickers. 


For my baby card I knew I wanted to make a sweet little shaker card, I cut 3 circles and used the three stars from the free style baby boy sheet as the base of my shaker, this takes the place of stamping AND coloring in one simple step! Saving me time, space, and money... yay!


I filled my windows with micro beads, sequins, and glitter. I used a double bow of jute and added a strip of white cardstock with a fancy sentiment on it, again in place of a stamped sentiment. Just below a little piece of the baby boy border.


Don't forget to add stickers to the inside of your cards to tie your sentiment or greeting together, here I have again used the baby boy we've got your border as well as the free style baby boy for the main greeting, adding both color and a fun font, SRM stickers are designed to work together, so the fonts are easy to read and are really pretty!


To create a handsome gift card holder I folded the top of this little kraft dots bag. Close to the bottom a strip of leftover patterned paper was added, and a layer of bitty stars and a strip of that we've got your border baby boy a star is born saying ties it together. 


I just love the live life baby's first year sheet and I used another circle sticker from that sheet to add color, and again a sweet dual font. 


I plan to put this in with the card as it is flat and will fit inside the embellished envelope. New parents can use a gift card to stock up on all those supplies that seem to always be needed!

I encourage you to look at SRM stickers as not just an easy way to decorate but as a really useful tool in your creative projects. 

Monday, September 25, 2017

Back to School Card Set by Tobi


Hi there, it's Tobi Crawford here! As a teacher I always have a need for school-related cards, especially at the beginning and the end of the year. Councillors, admin, and fellow teachers need a special "kudos" this time of year, and small little note-cards are the perfect token of appreciation. 


Each card is a little different (that's for me - so I don't get bored), but also because I wanted to switch up the sentiments slightly to be a little more personal. 


The formula is easy: 

 1) ruled patterned paper
2) lined patterned paper
3) apple stickers (Live Life: School)
4) sentiments (Fancy Sentiment: Thanks)
5) twine (Solid Maraschino)

Thanks for stopping by!  See you again soon!

Thursday, September 21, 2017

Mixed Media Fall Decor & Video by Karen


Hello!  Karen here today with a mixed media project and a video too.  


I love fall and can't help creating a project or two featuring fall's rich colors. Today I'm sharing a fun mixed media project with lots of layers! 
Watch this video to see this project come together.


The finished project with all its yummy layers, including: paper, paint, washi tape, clear stickers, stamps, vinyl, and jute twine.


I'm ready to decorate for fall. Are you, too?


For this project, I used:

Monday, September 11, 2017

Coffee for the Teacher Gift Idea by Shanna


 Hello SRM friends!  
This is Shanna here to show you a great back to school gift for your favorite teacher!  

Back to school is a stressful time for everyone, teachers especially.. How better to show your gratitude and appreciation for their time and dedication with our children than to brighten there day with a little caffeinated lovin'??


I am a huge coffee drinker, but realizing not everyone is as avid a java-junkie as I am, a gift card seemed the way to go for my son's teacher for the first day back to school so she could pick her favorite treat out... I started with asking my local coffee shop for a clean cup and lid to be used as packaging for the gift, and went from there.  The stamps in the Coffee Plans set are perfect for any coffee related craft, this one being no exception!  I stamped an array of coffee words and icons on my gift card holder that I had previously cut out on my Silhouette Cameo, and then heat embossed my main sentiment to give it a little bling and dimension.


I needed a tag, and loved grabbing a couple of the Scalloped Circle Punched Pieces and the Reminisce white gel pen for a chalkboard feel tag for the teacher. Added a dry embossed strip of coffee cups layered with a sticker from the Live/Life School stickers set.  Quick, simple, and ADORABLE!


After the gift card holder was complete it was time to package!  YAY!  I placed a red apple in the base of the cup with some tissue paper filler under it and topped the cup off with some Starbucks K-Cups for fun.  An apple for the teacher is tradition right?? My little guy sure does think so!


I love how quick this came together, and how much my little guy enjoyed writing a note to his teacher in the card!  I opted to tie a bow with some jute twine for my final touch and added the tag with the twine. My little guy loved giving this to his teacher the first week of school!  


What do you like to make teachers??  Let me know in the comments!  

Until next time...

Materials used:
Live/Life School stickers

 Silhouette Store file: 3d Gift Card Box

Friday, August 25, 2017

Life is Pure Adventure Layout by Giorgia


Hello SRM friends, Giorgia here and today I am sharing a layout with you.
 I love making layouts.  It is my favorite way to preserve memories.


I scrapped this picture of my hubby in front of a mural.  The picture had great colors and I matched them with papers and SRM stickers. I adhered some of them on white cardstock and then fussy cut them, to make them pop from the background. Use foam tape to adhere to give an extra pop! 


 I adhered one sticker directly on the picture: I love the subtle transparency of SRM stickers!


One of my favorite SRM products are We've got your border stickers. I added a lot of them! 

Until next time,

ciao, Giorgia
SRM products used