Showing posts with label Planner Stamps. Show all posts

Tuesday, August 8, 2017

Planner Stamps in Bible Journaling by Samantha


Hello! Samantha here to share some recent Bible journaling I've created. I'm doing a little something different today as I'm using planner stamps in my Bible journaling.


For this page, I used the new Seasonal Plans Planner Stamps, ColorIn Watercolor Pencils, a black Le Plume marker, and colored ink pads.  


I love to use my watercolor pencils to highlight the text in my Bible that I'm journaling about. Since this was a bit of poetic praise I change colors of pencil as the thought changed.  


Since the section I was focusing on was about the seasons, I used the Seasonal Plans stamp set to add the names of the seasons and an icon for each season as framing for this section of highlighted scripture. 


Finally, I used the journaling margin of my Bible to add "He changes the times and Seasons" with my black Le Plume marker. Then I added some pops of color by coloring in some of the letters with my watercolor pencils. 

As you can see, using planner stamps in Bible journaling is just one more way to get lots of use from your SRM stamps. Have you ever used your planner stamps in your Bible?

Monday, August 7, 2017

Linen Bags! by Michele


Good morning friends, Michele here with a fun holiday project!  I am totally loving these new linen bags! The polka dots totally slay me!  I often pull inspiration from the stuff collected on my desk from other projects, like these red flowers. This was my starting point. 


I decided to punch a black tag and stamp and emboss the little cup and sentiment from the Fall Plans Planner stamp set.   I loved the little checkerboard pattern and stamped that between them for a bit of interest.  I dabbed my finger in a bit of white ink and ran it over the edges to give a chalk board effect.  ( A technique I hadn't used in a LONG while!) ;) 


I added green glittery leaves and gold twine nestled under the flower. 


For the holidays I will slip a few packets of hot cocoa in each bag and leave it 
on one of my co-workers' desks to brighten their day!


Friday, July 14, 2017

Watercolor Planner Page by Christine


Hi there SRM Fans!  Christine joining you today with an agenda page from my July Planner!  I love to use my planner to play with techniques before I dive into them on other paper crafts and this page is the perfect example of that!


I wanted to play with a marbled watercolored look and so I did just that!  But I also did some filling in with watercolors and drawing.  I combined a traditional watercolor set, Watercolor Twist Pencils and a blending marker to achieve the look I wanted. 
Here's a video to show you my process:


I always like to have something with the whole month in my spreads so it that it's easy to look at dates without having to flip thru. The Mini Decorative Calendar sticker was perfect for that.  Doesn't it look pretty up against that marbled background too???


Being on a weight loss and fitness journey, the Clear Planner Stamp/Healthy Plans has a whole new level of usefulness for my planner. I love these fun little words to add inspiration to my page! I also used the Clear Stamp/Planner Banner set to add to my To Do List.


Be sure to check out the newest release in the planner stamp section of the store....there's so many great new options!

Monday, June 12, 2017

New Products Introduction - Day #1 - Planner Stamps


Hello!  And welcome to a week of new product introductions on the SRM Blog.  Today we have 7 new stamps for use in your planners, on calendars, scrapbook pages or in your card making. 

We wanted to create some stamps that are unique and have not been done before and I think that we've got a great selection from which you can choose. 

First up is our delicious new "Coffee Plans" Stamp.  For those of you who love coffee, this stamp is a must!  Don't you love all the different little coffee cups and containers.  And the expressions too!  Great for planning your coffee dates & perfect for your coffee cards too!  Enjoy!


Next up are our "4 Seasons Stamps" for 2018.  We have a stamp for each season of the year with mini calendars included for the 3 months each season.  And lots of wonderful images and some fun borders too!  You'll want them all!  And for you coffee, cocoa and tea lovers, you'll notice a steaming cup or refreshing glasses included in each set's images. 

First is our "Winter Plans" stamp!  How fun is that!  You get the 3 months of the season plus lots of images perfect for the season. This one would be great for creating mini calendars, cards, scrapbook pages or altered items.  


Spring has sprung on this fresh and fun stamp called "Spring Plans"!  Love all the spring images!


Ready to make some "Summer Plans"?  Here you go!  This one is sure to cause a splash with it's fun images and border, perfect for the season.  


And here comes "Fall Plans" with Back to School, Halloween and Thanksgiving fun!


And here's a stamp called "Seasonal Plans" with all the months and a perfect image to go with each month plus images for the 4 seasons!  


And the last stamp in our new June 2017 collection is called "Everyday Plans" perfect for your planner everyday and all year long!  


So, which of these planner stamps is your favorite?  Leave a comment on the blog and on Facebook for a chance to WIN it. 

Be sure to come visit us tomorrow when we introduce our new Bible Journaling Stamps. 


SaveSave

Tuesday, March 14, 2017

Hello Sunshine by Shelly


Hey y'all! Shelly, here! 
Today, I'm swinging on in sharing a simple and sweet 'Spring' themed card with you! 


I started with my background. Which I randomly stamped on my flowers and then did some heat embossing with them. Once done, I used some watercolor pencils and added my colors to the flowers. After, I added some 'blue' around my flowers and in between the blank spaces. 


Once I had my watercoloring done and dried, I added it to my card base. To finish my card off, I added my sentiment on a piece of kraft cardstock, added a little bit of jute twine and some light yellow sequins. Simple and sweet, yeah?!...

Thanks so much for stopping by!
Enjoy your day! 

SRM Stickers supplies:

Jute twine

Monday, February 27, 2017

Mr. & Mrs. Congrats Card by Amber


Hello everyone! It's Amber here, today I'm sharing this Congratulations card I created with SRM's Wedding Plans Clear Planner StampChild of God Clear Stamp, and Quick Cards/Congrats sticker sheet. 


Weddings are always a happy event so instead of using the traditional all white and pastel color combo I used a bunch of bright bold colors. I had lots of fun creating this card. Below I have a quick tutorial on how to recreate the pink canvas flower I created for my card front.


Step 1. Cut a circle out of some white canvas or fabric.


Step 2. Cutting from the outside in cut your canvas circle into a spiral. Your spiral does not have to be cut perfectly. 


Step 3. Working from the outside in start to roll your canvas into a flower. In the beginning start with a tight roll, as you continue to roll your canvas into a flower loosen up the roll a bit. The tighter you roll your canvas the smaller your flower will be and the looser you roll your canvas the larger your flower will be.


Step 4. This is what your flower will look like when you are finished rolling it. I add a little drop of hot glue to the bottom to hold my flower together.


Before rolling your flower you can mist, paint, or distress your canvas or fabric. I misted my flower with some Tattered Angels Gerber Baseboard Mist and painted it with with some clear pink glitter paint. I also added three stamped leaves to the bottom of my flower. 


Once my flower was dry I added it to the bottom right of my stamped piece. For the stamped portion of my card I stamped a bunch of different words and images from the Wedding Plans Clear Planner Stamp and colored them with some Spectrum Noir Markers. I just lined all the words and images I wanted to use up on my stamp block and repeatedly stamped them onto some white cardstock. To finish my card I added a large Congrats sticker from the Quick Cards/Congrats sticker sheet and stamped three little hearts in black from the Child of God Clear Stamp set. 

SRM Sticker Supplies

Tuesday, January 17, 2017

Planner Stamps Not Just for Planners by Michele


Hello crafty friends! Michele here with a birthday card using the Birthday Plans, planner stamps. These little stamps are so versatile and perfect for creating a fun background!  I stamped them in a water color safe black ink.  I used my Zig Clean color markers. In between the images I added touches of gray for shadows. I  added a bit of shimmer and shine using glossy accents and glittery Stickles. 


I stamped the sentiment on a strip of paper in pink and added a bit of black and white twine.  I used a small felt circle and sequin for the center of my bow.  


It's fun to think about other uses for our stamps!  Here's the one I used!


Thank you so much for stopping by! 

Tuesday, November 8, 2016

2017 Mini Calendar Gift Set by Shantaie


Hello!  Shantaie here today with a fun idea. I challenged myself to create a more updated look and use of the traditional mini calendar, and to make it pretty enough to give as a gift. I set myself up for quite the challenge. After all paper crafters have been creating mini calendars for many years, how could I do possibly anything that hasn't already been done?

The answer was I couldn't. Not really. So I sought not to reinvent it, but to reinvent the way I might use a mini calendar in my daily life. I would most likely use it in tandem with my daily/ weekly planner, and I figured I would want it to be happy, colorful and loose so I could attach the month to my planner or on my desk.


What I came up with is 12 separate and distinct 3 X 4.5" pages cut from bristol, stamped in black with splashes of gellato in silver and pink. 


For January and February I used the love birds stamp set and for march birthday plans stamp set.   As you create your calendar pages, it is perfectly fine to stamp into the calendar area as long as you don't have large areas of solid black. The mini calendar is a clear sticker so your design will come right through! 


April's flowers are from the just believe stamp and May's sentiment is from love one another.  I love the big bold happy on June from the aptly named "big Happy" stamp set! 


For July I used Noah's ark and August Autumn blessings September (one of my favorite pages) uses the healthy plans stamp set.


We revisit Autumn blessings for October and Big Thank you for November, finishing up the year with Big Merry for December. 

I popped my calendar into a glassine bag, decorated it with patterned paper, ribbon, twine, a pom-pom and a sticker and my gift is ready to give!


 A mini calendar set not reinvented, but revamped maybe!
This bold and useful calendar is just a little different from the ones I might have made years ago, and 2017 is already looking pretty good! 

Here are all of the SRM goodies I used in my project.  


Oh what a lovely stash!

SaveSave

Thursday, October 13, 2016

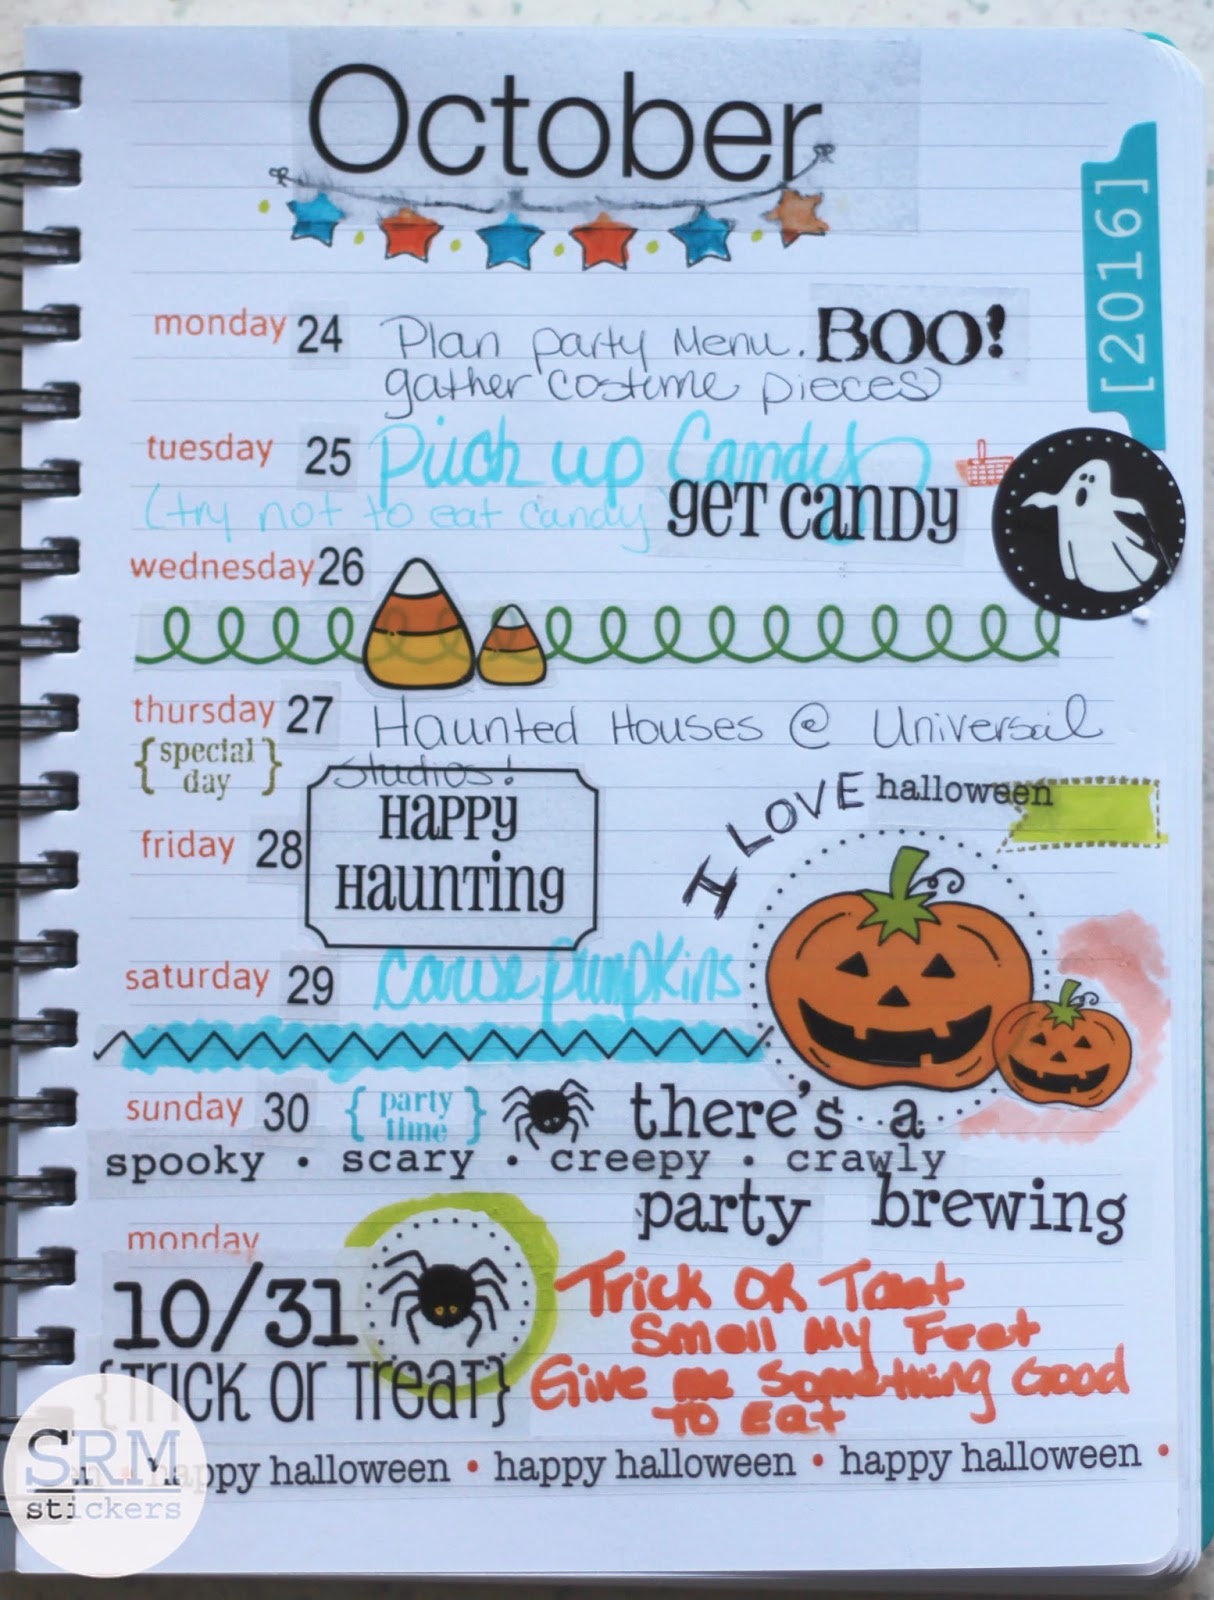
October Planner Pages by Shantaie


I am a planner. True story. 
I am not organized by nature and work quite hard work to keep track of my daily and weekly tasks...well I don't work hard anymore because planners keep me on track and more productive than I ever thought I was possible of. 


I used to keep a "to do list" with lines and line of things to do {more busy work than actual productivity} There are tons of planners, and articles on how to use planners, I have read more than my share of them,  but......I have a secret to confess. I have not made my planners fun or used my creative supplies before now!!! { I know!!!!} 


How is it possible that a long time paper crafter like me has resisted this awesome creative outlet? Fear. I was kind of intimidated by the idea of pairing my super structured planner with fun and art. {trembles in her chair}


This is my very first attempt, and although I could have reworked it to be perfect for this assignment, I chose to show you how easy it is, and even though I'm not a pro page planner designer just yet, I'm still super happy with it!!!


How is it possible that a long time paper crafter like me has resisted this awesome creative outlet? Fear. 
I was kind of intimidated by the idea of pairing my super structured planner with fun and art. {trembles in her chair} This is my very first attempt, and although I could have reworked it to be perfect for this assignment, I chose to show you how easy it is, and even though I'm not a pro page planner designer just yet, I'm still super happy with it!!!


I am totally committed to using my SRM planner stamps every week, and I can't wait to share my pages with you in the future!!!!! 

Planner stamps, SRM stickers, and LePlume markers made my page quick, fun, and useful.  Here's a list of the SRM stickers and stamps I used: 

Tuesday, September 27, 2016

Simple Brush Lettering & Lunch Box Notes by Karen


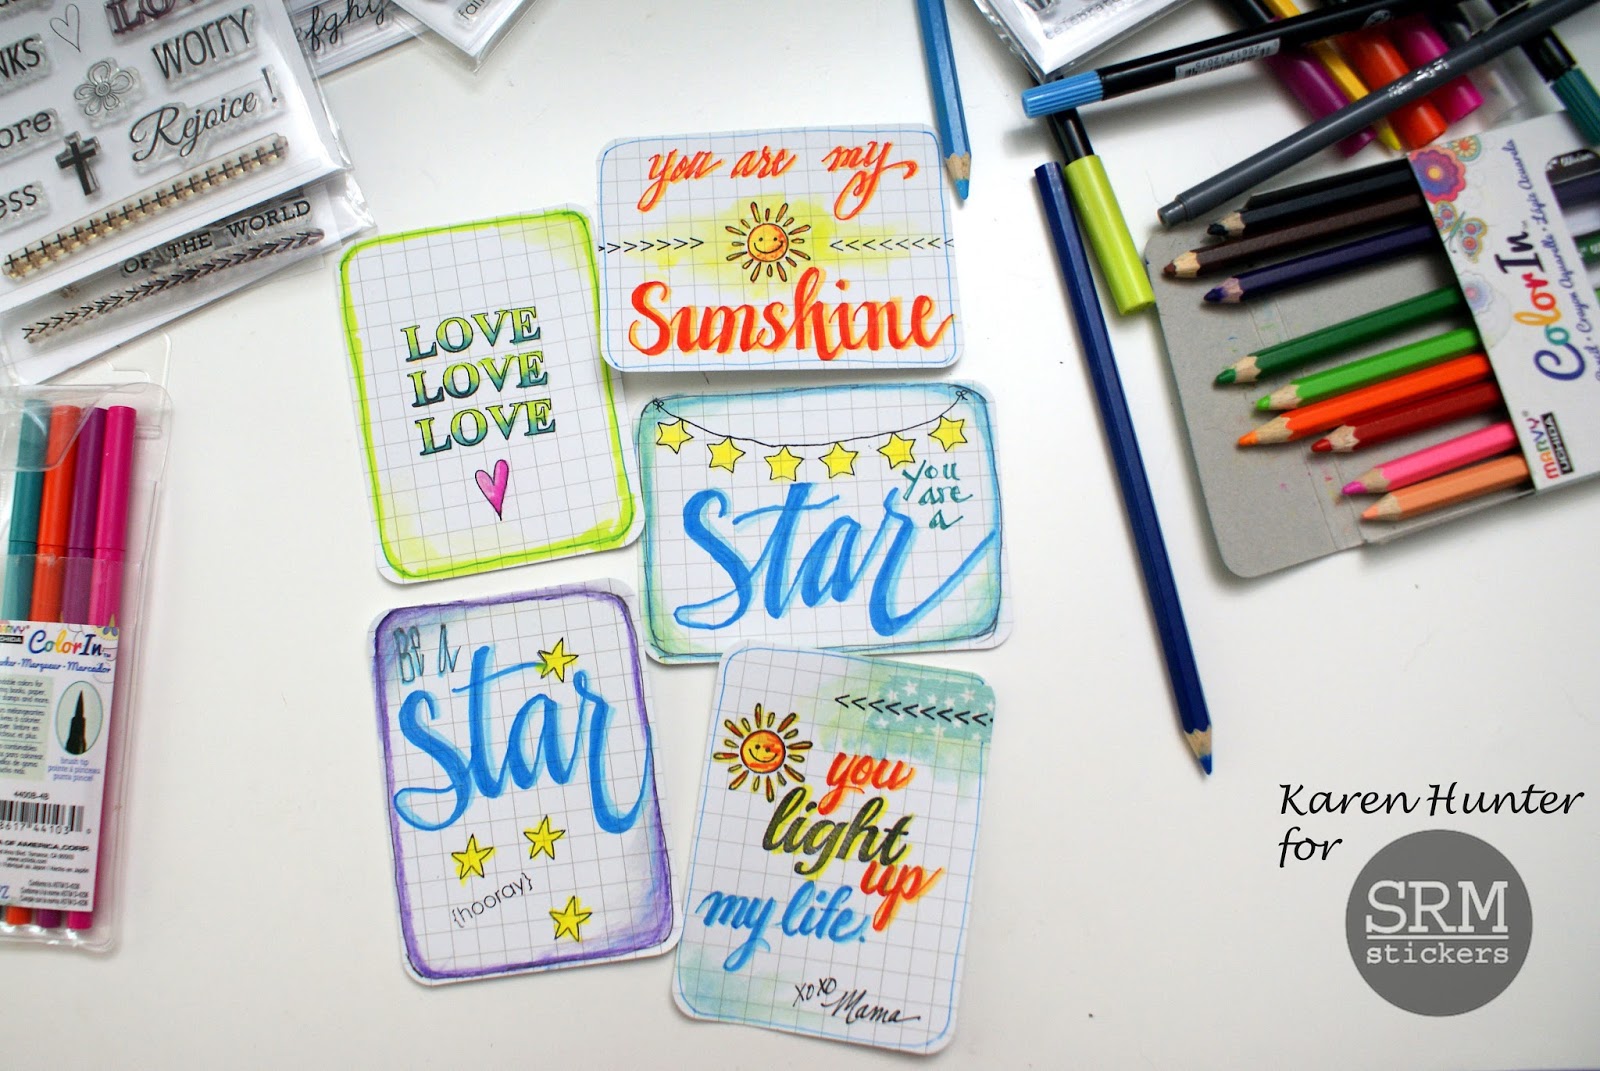
Hello!  Karen here today to share a little treat that I made for my daughter.  I love stashing little notes into my daughter's lunch bag. Sometimes it's just a quick little message scribbled on a scrap of paper, but I also like to pre-make cute notes to tuck in for her to discover and let her know I'm thinking about her and think she's amazing.


My SRM Faith and Planner stamps are giving me great inspiration for these notes. I used several stamps, brush markers (LePlumeII) and my ColorIn watercolor pencils to create a set for next week.


I've gotten lots of comments complementing my lettering on my Bible journaling pages. I'm no expert and I have to admit to having trouble achieving the look I want with just a brush marker. However - the dual tipped markers give me a great "cheater strategy" in getting the brush lettering look I like. Take a look at my simple brush lettering technique using Marvy Uchida LePlume II dual tipped markers in this video.


Now you can make your own little notes - for lunchboxes, the bathroom mirror, to send in the mail, or leave one for a coworker to find. Enjoy!


For this project I used:
SaveSaveSaveSaveSaveSave
SaveSave