Showing posts with label Stickers by the Dozen. Show all posts

Friday, April 6, 2018

Spring Cards in Gift Box by Angie


Hello SRM friends! Angie here with you again today to share some spring cards and a cute box to gift them in!!


I made all three cards using stamps from the Just Believe stamp set. For the blue card in the middle, I stamped the flowers and leaves on vellum. Then I used watercolor markers and water to give them the watercolor look. Then I just fussy cut them out. I placed the flowers and stems vertically down the card and used foam under the smaller flowers to add some dimension. 


I made the blue background by using distress oxides and water to give it the bleached look. I added some gold and pink ink mist splatters as well. 


The word 'spring' is from the Seasonal Plans stamp set.


For the front of this pink and white card, I added this fun doodle stamp from the Stamped Stitches set. I love how it adds so much to the card will such little effort!! I stamped and fussy cut the flower and stems and gave the card a fun edge by using a punch to make the scalloped border. 
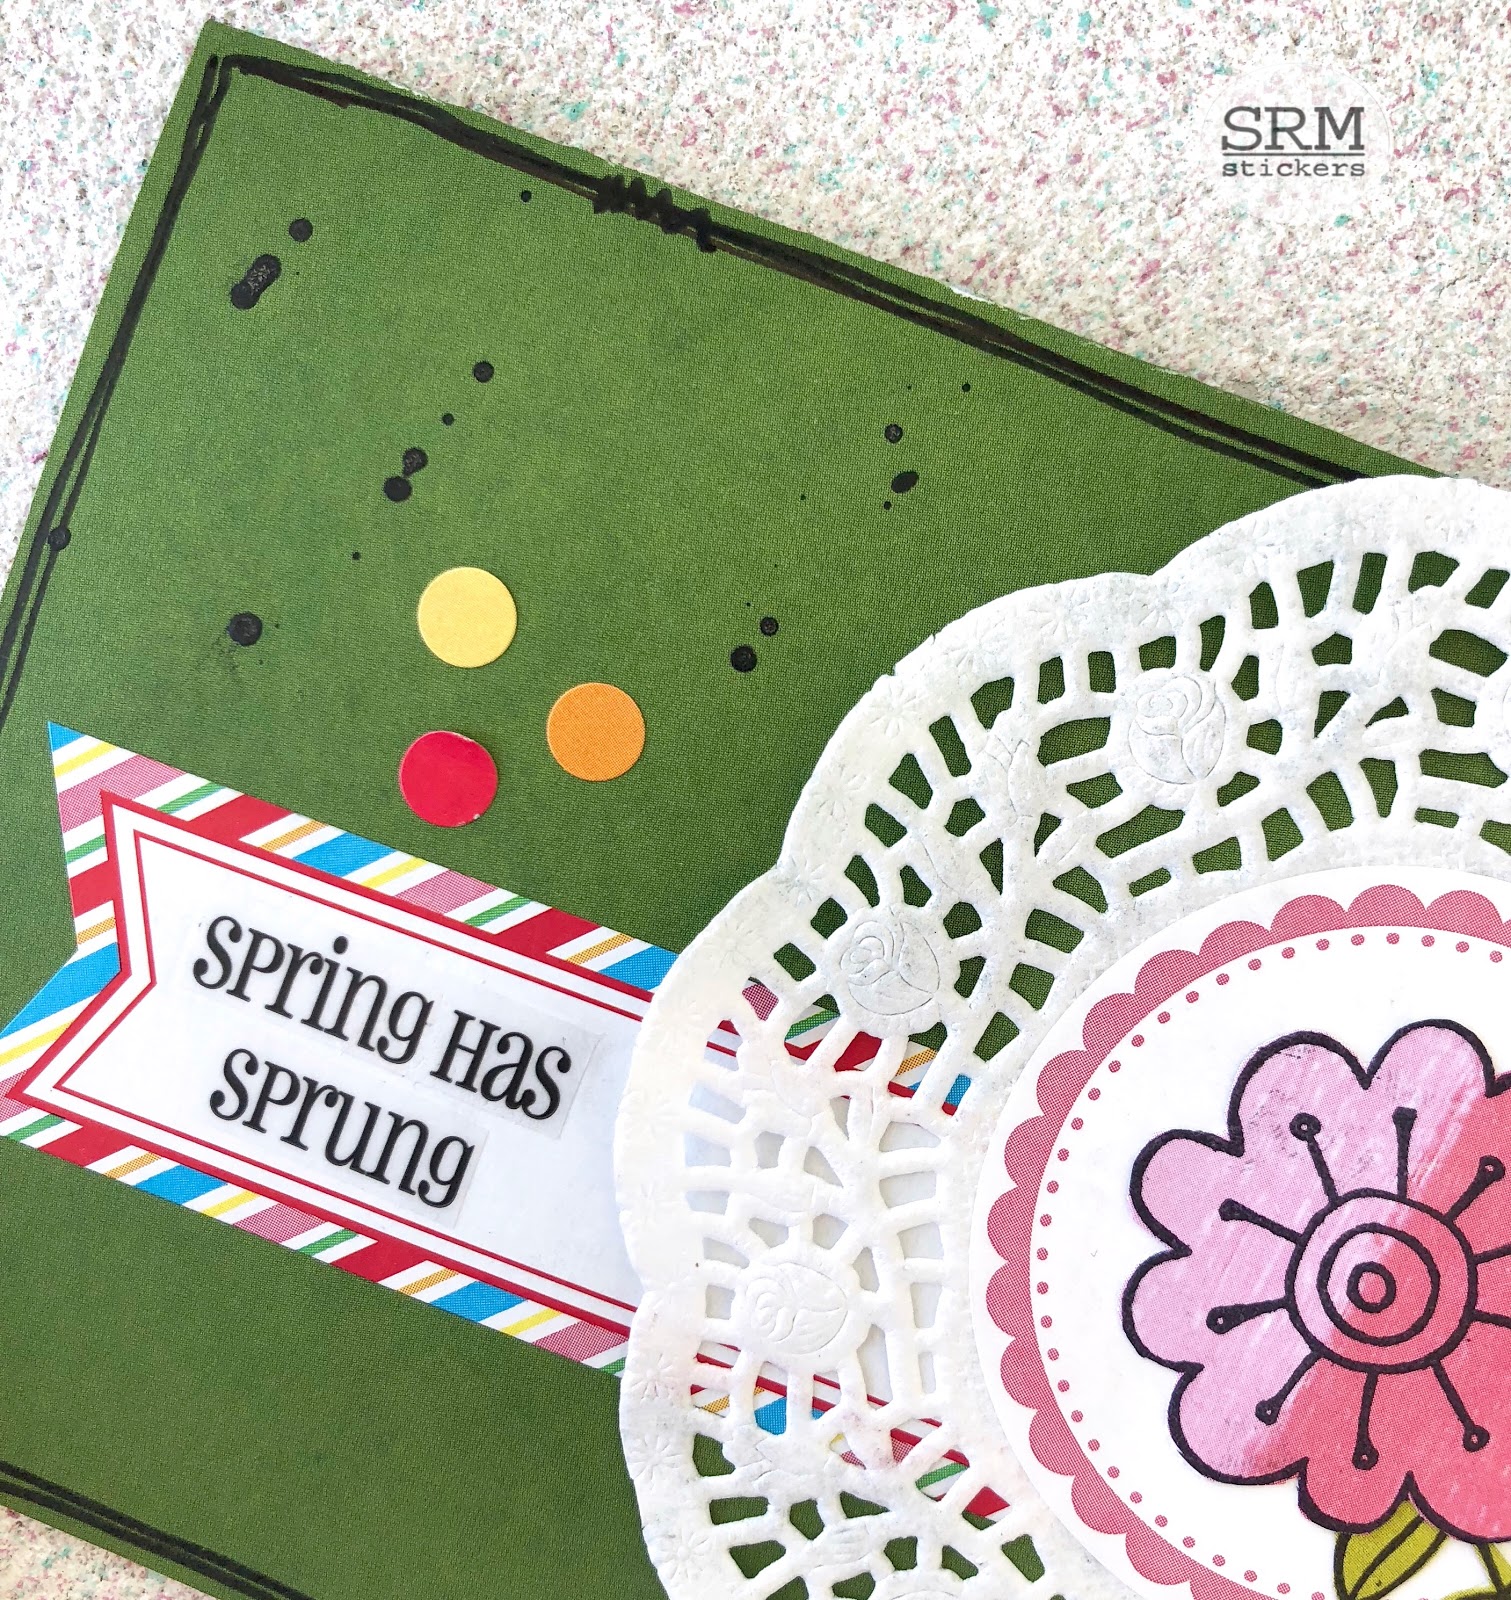

The green card uses lots of fun SRM products such as the small lace doiliesbright blank labels by the dozen and the Easter Express Yourself stickers. 


For the gift box, I used the A2 Clear Card Box. I punched two holes in the top and simply threaded the twine through the holes and made a bow. SRM has lots of twine to choose from. The flower borders on the box are from the Thank You Stickers by the Dozen set and the green label in the middle is another Labels by the Dozen sticker. I added another fussy cut flower, stem and a bird to finish off the box. 

Thank you for visiting the blog today. I hope my project gives you some inspiration to create your own!!

Monday, March 12, 2018

Textile Foil Cards & Video Using Laser Printer and Laminator by Karen

Hello!  Karen joining you today.  I've been having a great time discovering different ways to use the new textile foils from SRM. Today I'm sharing some of my favorites. 


To make these cards, I found free online images and imported them into a (Word) document. There I resized them and recolored to make sure they would print out dark and black. I printed each image onto card stock using a laser (toner) printer. It is key that the image prints with toner ink (not an inkjet printer).   


I then ran my image with foil covering it through my personal laminator. The heat of the laminator adhered the foil only to the printed image. After a short cooling off, I simply peeled the foil away to leave the shiny image.


I'll walk you through it in this process video. But I have to warn you, though, you may become addicted to this easy and quick foil application technique!


Thanks for watching - I hope you are inspired to use textile foil in your projects!
SaveSave

Tuesday, February 13, 2018

Reckless Love by Jenn


Hello lovelies, Jenn here! February is a month where we focus on love...the love we have for one another and the love our heavenly Father has for us. I was recently listening to a beautiful worship song called "Reckless Love" and the words sunk deep into my heart, and I knew instantly I needed to document this in my journaling Bible.

I used a new to me technique using paper heart doilies, and gelatos. I used a little washi tape to help hold the doilie in place while I used my finger to rub the gelato color into the paper and over the grooves of the doilie. I will warn you be super careful with how hard you rub the doilie I rubbed a little too hard and tore mine. To make the gelato a little more permanent and a little less likely to move around the page I spritzed it with water and left it to dry. I love the subtle look of the texture on the background of the page. I pulled out my Daily Devotion bible journaling stamps and stamped a few words and added a few simple wordfetti stickers. I wanted a few more visiable hearts on the page ...I used the Stickers by the dozen Valentine hearts and a strip of the I love you phrase under my marked verse.


Luke15:4-7 MSG "Suppose one of you had a hundred sheep and lost one. Wouldn't you leave the ninety-nee in the wilderness and go after the lost one until you found it? When found, you can be sure you would put it across you shoulders, rejoicing, and when you got home call in your friends and neighbors, saying, 'Celebrate with me! I've found my lost sheep!' Count on it- there's more joy in heaven over on sinner's rescued life than over ninety-nee good people in no need of rescue."

Our heavenly Father loves you and I so much and He is willing to do anything to save us! He is love, and it boggles my brain. I love the lyrics to the song "Reckless love"... "it chases me down, fights till I'm found, leaves the ninety-nine. I couldn't earn it, I don't deserve it, still you give yourself away. oh the overwhelming, never ending, reckless love of God." I pray that love envelopes you and fills you with awe and amazement. As you go through the month and even the year I hope you abide, walk, and dwell daily in God's wild love!

Thursday, February 8, 2018

Share the Love by Jenn


Hi ya friends, Jenn here! I am going to give you a few fun ideas for your childrens Valentines day cards. These are really quick easy ideas you can whip up and they will look super adorable. Everyone loves the handmade touch! These fun Valentines are a sure way to light up little faces...so lets get started!


Card idea #1: This card I stared with a piece of white cardstock cut to 3.5 inches by 5. I then cut two 1inch slits at the bottom so once completed you can weave the sucker stick between the slits. I simply handlettered a few words and used some adorable stickers from the Stickers by the Dozen set.


Card idea #2: Using a fun colored cardstock I hand drew a simple butterfly wing shape and cut it out. Then I added some fun stickers and a little Valentines message. I cut two slits in the center of the wing shape in order to slide my sucker in. 


Card idea #3: I cut a 3 inch circle out of cardstock paper and punched holes at the bottom and top to slide the sucker stick through. I added a little Valentine sentiment and a couple cute stickers. 


I really love how these turned out and had so much fun making them. My kids loved watching and helping me add the stickers and sliding the suckers into place. This would be such a fun activity to do with your kids. When it comes time to hand out these handmade cards they will be beaming with pride and those sweet ones who receive them will be thrilled! Enjoy your Valentines holiday with those you love. See you next time!


SRM Supplies Used:

Wednesday, February 7, 2018

Trio of Valentine Cards by Shanna


Hello SRM friends!!  Shanna here again with some fun new cards using a few of the adorable stickers SRM has available for Valentine's Day!  Perfect to give to a few special somebodies in your life!!  
Hope you enjoy!


Here are the 2 sheets I chose to use that helped make all 3 cards!

Supplies Used:
SRM Red jute twine
Candy Apple Distress ink
Fired Brick Distress Oxide ink
Pink Shimmer Spray


...and here they are!!


This is a standard A2 card base in white, double matted and spritzed with shimmery pink color spray, the sentiment was popped up with pop dots on an additional piece of white cardstock.  I love the sparkle the shimmer mist provides as a backdrop! The treat bag was great envelope for gifting this card..I love using non-traditional envies for my cards, I added the doily last minute, it fit perfect!!


This mini card is 2x3 in size, with distress inks smoothed in a watercolor background.  Absolutely one of my favorite techniques and super easy! Adding the age-old sentiment "Be My Valentine" was a no-brainer!!  A few heart sequins added the perfect touch! Loving the lacy linen bag as my envelope...it even has a little room left for some sweet treats!

\
Lastly, a 3x3 card that slid perfectly into this linen dotted bag!  Another dose of ink smooshing worked great to frame up the fun heart in the middle.  The border stickers are a fun way to frame up a small project as well!  The polka dot bag was a great match for an envelope, I can slide in some sweet treats or even a gift card if I wanted to!  


Here are all the cards ready to give to a special Valentine!

What type of cards or gifts are you making for YOUR Valentine this year??  

Until next time...

Friday, February 2, 2018

Birthday Gifts with SRM Tubes by Giorgia


Hello SRM friends, Giorgia here with an idea for a sweet birthday gift: many of my colleagues celebrate birthday in January, so I made them a little something.
 SRM mini tubes are my go to when I need a cute package for chocolates and sweets: how cool is that you can see through the tubes and be amazed with all the sweetness inside? It really screams open me, eat me!

I filled SRM mini tubes with chocolates and I decorated them with Stickers By The Dozen/Birthday stickers by wrapping around them different strips.
Then I embellished the tubes with jute twine and other stickers. 


I adhered clear stickers on punched pieces and on white cardstock that I cut in a banner shape. In just a few minutes I created a cute gift to brighten my colleague's day and celebrate them!


Until next time,


ciao, Giorgia


SRM products used 
SaveSave

Monday, January 29, 2018

Valentine's Banner by Angie


Hi friends! Angie here with you today to share a cute idea for Valentine's Day.


I made this  banner using just a few simple supplies.

I used the red heart doilies, white lace doilies and the scalloped punched pieces as the basis for my banner. I just layered them up and attached them together with a little glue. 


I used some chipboard letters from my stash to spell the word 'love.' I gave them a coat of black paint and added some black glitter on top of the wet paint. Once the letters were dry, I glued them in the center of the scalloped pieces.


On the two end pieces of the banner, I layered the doilies and scalloped pieces as before and then placed a heart sticker from the Valentine's themed stickers by the dozen set in the center. 


I strung the banner together using some black twine.
Give it a try!! This would make a fun project to do with your kids! 

Friday, January 19, 2018

A Little Valentine Treat by Giorgia


Hello SRM friends, Giorgia here today with you to share an idea for quick Valentines gifts.One of my favorite SRM products are the clear boxes, especially the pillow boxes: they are cute and perfect to embellish with SRM clear stickers!


I gathered my Valentines themed stickers (I also used the heart from Princess sticker sheet) and I applied them on the pillow box.


Then I filled it with some chocolates, and in just few minutes I had a cute little gift for my husband to brighten up his day.

Thanks so much for stopping by, enjoy your day!
Until next time,
ciao, Giorgia

Wednesday, January 17, 2018

Mustache You to be my Valentine by Shantaie


Hello!  Shantaie joining you today with some Valentine treats! 
I know it's cliche' to say "I love Valentines day" but it's one of my favorite celebrations!  My girls are far beyond classmate Valentines, so I like to make little gifts for my staff to hand out as a sweet little reminder that I appreciate them.


Most of my team are college students, so I can really have fun with the style of Valentines. I think these could work for almost anyone! My focus was on a little treat using the tubes to fill with candy. For the holder I used this cut from silhouette enlarged to fill the 12x12 cutting mat. I used the base only, and added patterned paper and round prints to embellish. 


I layered onto white punched pieces with foam tape, I also added hearts from the stickers by the dozen Valentine onto white cardstock and placed in the center of the printed circles. Tp top that off I added a bit of we've got your border sentiment to a skinny strip and adhered it in the center of the heart


For the mustache version I used the sentiment from that same stickers by the dozen valentine.  I used for the hearts on the sweetheart version. To add a bit of fun a die cut mustache is popped with foam tape and would be cute with a spring wobbler too! 


I love using tubes to make favors, give treats and even to store my crafty supplies! I have used them for years and each time I give one as a gift I am always thrilled at the excited reaction to them. 


Seeing someone smile is (to me) the best part of giving a Valentine! 
XOXO 

Monday, January 15, 2018

Valentine Treat Bags by Shelly


Hey y'all! Shelly, here.
Today I'm stopping in to share some fun and simple Valentine treat bags with you! 


I started with using some small kraft bags and filled them with a little bit of goodies. To close them up, I added a couple tags. Which I simply added a 'Be My Valentine' sticker to white cardstock and made a banner out of it. To add a little bit of 'pop' I hand drew on some little 'dashes/stitches' using a pink pen. For my smaller tag, I added a fun background of arrows using the Bible Background stamp set in a light mint color ink. Then, I used the Walk by Faith stamp set for my heart and after did a little fussy cutting, then added it to my tag. 


To finish everything off, I made a little bow using some twine and then a mini staple to hold everything together. Easy peasy, right?!...

Thanks so much for stopping by!
Enjoy your day!

SRM Stickers products:

Small Patterned Bags

Friday, January 5, 2018

Valentine Gift Idea by Shanna


Hello SRM Friends!  
Shanna here again today with a great gift idea for your favorite Valentine this year!! 


I modified a file intended for a tube of chapstick and ended up with a fabulous holder for SRM's versatile plastic tubes!  This project could be easily altered for any holiday or occasion, but I especially enjoyed making a Valentine out of it.  The size even allowed me to sneak in a gift card for the special recipient!


I got to use some fabulous Valentine's stickers available from SRM in this project!  One of my favorite things with SRM's stickers is that the sets all tend to coordinate, even though the are separate sets.  So even though I used stickers from 4 different sheets, they all look like they came in the same set when put together on a project, PERFECT! :)  


I used some of the Red and Natural Jute twine for a fun and easy addition, and was able to tie my "tag" to the top of the bag too!


The inside of the box has a pop out piece that the tube slides perfectly into, and I added a few stickers to decorate the panel for the gift card, and actually affix the gift card to the panel as well!


Materials Used:
Jute Twine
Cardstock


Hope you all enjoyed this fun project!  Let me know if you have any questions :)

Have a wonderful Valentine's Day!!