Friday, April 28, 2017

Hello Spring Layout by Karen


Hello!  Karen here today to share a special layout.

I love spring! The buds and blooms and return of little critters make for awesome photos. You know what else I love? Combining all kinds of SRM goodies in a layout with those photos! My daughter found this little friend while out playing in the garden a couple years ago and of course I wanted to document the experience.


This layout includes lots of Sticker Stitches throughout. I also grabbed pieces from various sheets - like the white flowers from a Thank You themed set, the "be happy" sentiment from a pastel borders set, and the sticker sentiment layered over the top photo from a school themed set. 


Even though my set of mini monthly calendar stickers is from 2017, I still used it to mark the date on these 2015 photos.  I put my sticker on top of a 3 x 4 card from my stash and circled the specific date of the photos. I wrote the year off to the side. This makes a great large embellishment as well as a creative way to document the date of my layout photos. Thinking outside of the box with your stash of stickers really multiplies the size of your stash!


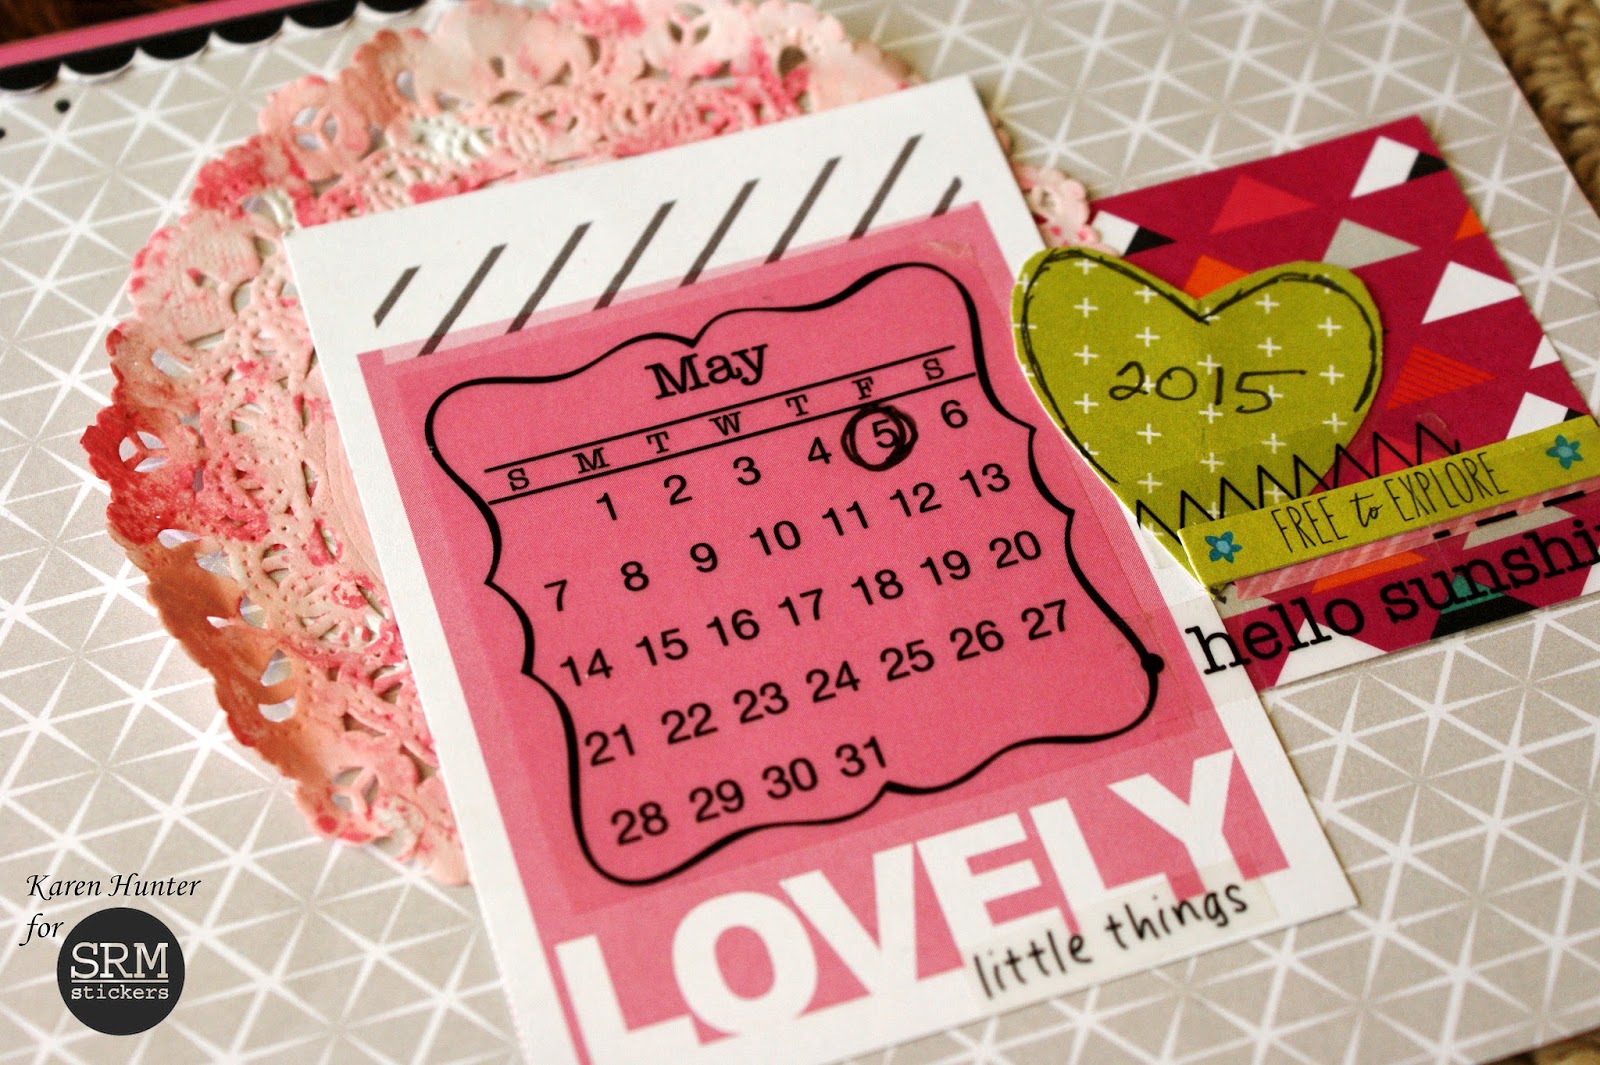
Another great way of adding layers is with the little doilies. I used some watered down acrylic pink paint to coordinate them to my layout and then layered them behind my photos and date card. The way they curl up slightly from the paint adds a fun dimension to the layout, too.

Don't limit yourself to use themed stickers for their original purpose. Many have multiple uses and can be used in all sorts of fun ways on a layout, cards, or other project. How will you use yours?

For this layout, I used:

Thanks for dropping by!  Come see us again soon.

Thursday, April 27, 2017

Simple Card Sets by Shantaie


Hello!  Shantaie here with you today to share some ideas for quick cards.
Some days what we need is a quick card to go, or better yet a quick set of cards at your fingertips!  I'm famous in my circle for being late...(fashionably or otherwise) and these cards a real lifesaver for those times that I have got to get out the door! 


I started with a beautifully simple white card base and embossed each one with an embossing folder.I punched a 1 3/8" circle in the lower right corner and placed a round sticker on the inside of the card. I added the matching sentiment, and wrapped a length of striped twine to make a bow.


To make the set complete I placed four envelopes, and my cards into a clear card box, and added a folded 4" doily and a sticker sentiment border along the top.


When you have such a pretty and simple set of cards ready to go or ready to give, life is truly good!!! 


Wednesday, April 26, 2017

Mother's Day Gift Card Holder by Samantha


Hello! Samantha here with you today to share a Mother's Day gift card holder. I give out a lot of gift cards during the year, so I'm always looking for ways to make them fun and personal. Today I'm using some SRM stamps and watercolor pencils to personalize my gift card envelope. 

My mother-in-law is an amazing gardener, so we often get her a gift card to a gardening store for Mother's Day. With that in mind, I chose the flower from The Lord is Kind and Merciful stamp set to create my envelope. 

I used multiple Marvy Uchida Watercolor Pencils to shade in the flowers. The best part about coloring your envelope yourself is that you can customize the colors to the recipient. For example, I know my mother-in-law loves shades of blue, so I went with 2 different shades of blue, and a purple for the flowers. 


To make the envelope pop a little more, I added a Punched Pieces small white scalloped circle tag.  I also added a "happy day" sticker and a stitched border sticker from We've Got Your Border Bright stickers. I finished it up with a Lavender Jute Twine bow 

This Mother's Day gift card holder is a fun and personal way to give a gift card. How do you like to personalize gift cards? 

Tuesday, April 25, 2017

Hello Card & Gift Bag by Amber


Hello SRM Sticker fans! It's Amber here, today I have a fun colorful floral card and matching gift bag to share. 


I paired a "Hello" sentiment stamp, a fun mint polka dotted patterned bag, and a super cute clear white sentiment sticker from SRM with some stamps in my stash to create my card and matching gift bag.

I started my card by folding an A2 sized pink card base and die cutting two pierced rectangles out of some white cardstock. I set my pink card base aside and started my stamping. I randomly stamped my layered flower images in some colorful mini Tsukineko Inks and some mini metallic Encore Inks. Before adhering my stamped panel I laid it over my pink card base and traced around the inside die cut rectangle so I could see where to emboss my sentiment. I removed my stamped panel and set it aside to heat emboss my sentiment. Once my sentiment was heat embossed I adhered my stamped panel to my card base.


I thought it would be fun to create a matching gift bag to go along with my card so I pulled out a mint colored bag with a large polka dot pattern printed on it, added some white ribbon, and a two layer tag. I stamped the bottom tag to match my card and then layered a second tag die cut out of vellum over it. I added a white clear "Thanks" sticker to the middle of my vellum tag and then tied both tags to my gift bag with some white ribbon. 

SRM Sticker Supplies
Mint Polka Dot Bag
SaveSave

Monday, April 24, 2017

Mother's Day Watercolor Layout by Shelly


Hey y'all! Shelly, here!
Today I'm sharing a sweet Mother's Day layout with you!


I started with my kraft cardstock and simply added my stamped images in white ink. Once done, I used some colored pencils to add color to each stamped image. 


To finish things off, I added a few jewel drops and a white piece of cardstock where a photo can go. Simple and sweet, yeah?!...

Thanks so much for stopping by!
Enjoy your day! 

SRM Stickers supplies used:

Friday, April 21, 2017

Flashback Friday with Laurel Seabrook


Hello!  Today we are doing a Flashback Friday feature with a beautiful Mother's Day Card from Laurel Seabrook.  Enjoy! 

-------------

Laurel Seabrook makes the most lovely layered cards.  What a Spring treat this card is just in time for some Mother's Day inspiration.


For her card Laurel used lots of delicious patterned papers, SRM's Mother's Day Express YourselfMother's Day Quick Card and some Natural Twinery Twine.  YUM!


With Laurel's inspiration and a few SRM Stickers, you can CASE this card and there's plenty of time before Mother's Day to get the job done!

Thursday, April 20, 2017

God Is With You Card & Gift Box by Amber


Hello everyone! It's Amber here, today I'm sharing this stamped religious card and mini kraft gift box. 


The other SRM design team members have been sharing some amazing Bible journaling pages lately using some of SRM's newest religious stamps. I haven't gotten around to using the new sets much so I thought I would use the Child of God clear stamp set & the Just Believe clear stamp set to create a card and matching gift box.

I started with a kraft card base and die cut a large pierced rectangle out of some white cardstock. I stamped a flying angle reaching for a star in the center of my white cardstock and added the "God Is With You" sentiment from the Child of God stamp set right above my angel. I also stamped some fancy text over the entire background in a light brown and added some distressed stars to the right side of my panel to created a visual triangle. To finish I misted the entire panel with some Tattered Angles Sea Shell Glimmer mist to add a vintage look to my piece.


I love creating little matching gift boxes or gift bags to go along with my card so I thought I would create one to along with today's card. I folded and assembled a 3"x 3"x 2"Kraft Box from the shop and added some stamping all around the middle portion of my gift box with SRM's Just Believe stamp set. I tied a light teal ribbon around my mini gift box and my card and matching gift box were complete.


 I hope you enjoyed my post and project today. Thanks for visiting!
SRM Supplies

Wednesday, April 19, 2017

Birthday Countdown Vinyl Sign by Samantha


Hello! Samantha with you today. We make a big deal of birthdays in our family, so I thought it would be fun to make a birthday countdown sign to celebrate the anticipation of an upcoming birthday. 


I wanted to make the sign durable so I could use it for both of my kids and use it year after year. However, that also means I need to be able to change out the photo and count down the days. 


To make the sign durable, I used plywood and painted it in a bright aqua blue. To make the photo easily changeable, I added a small clothespin to the board to hold the photo. I tackled the need to change the countdown number by cutting my star from SRM's chalkboard vinyl. Just write it on and wipe it off! 

I cut "days until my birthday!" from teal vinyl with my Silhouette Cameo. Then I overlayed "birthday!" with gold holographic vinly to really make it pop. To pull everything together, I added some gold holographic vinyl to the clothespin holding the photo. 


This birthday countdown sign is a piece of birthday decor that I'll be able to use for many years to come. My kids love that they can countdown the days, and I love that I can add my favorite photo of the birthday boy! How soon do your kids start counting down the days until their birthday? 

All vinyl used can be found HERE.
SaveSave

Tuesday, April 18, 2017

Crafting with Grandkids by Susan & Sylvie


Today is a very special post because my Granddaughter Sylvie is our guest designer!


What happens when I visit with my grandkids?  Lots of love and hugs and lots of fun crafting!  Today I want to share with you what Sylvie and I made on my last visit with her in Massachusetts.  She loves the Just Believe stamp because last year when I was designing the new Bible Journaling stamps, she helped me design this one! 


And here's what we made!  And boy did we have fun! :)
We made cards, framable art, mini cards, and little notes and I love them all! 


Sylvie taught me quite a bit about stamping and pens.  We had a blast!

Crafting with kids is such fun!  They seem to have a natural feel for color and design and you can learn a lot from them! 

Join us tomorrow for more crafty projects  from our talented design team members. Follow us on Facebook or join any of our groups including groups for Bible Journaling, Planners and Vinyl

Hope you have a crafty day!

SaveSave

Monday, April 17, 2017

Rejoice! by Michele


Good morning!  Michele here with a card using SRM's new stamp set, Heaven & EarthI stamped the clouds on blue card stock using Versamark and embossed it in white. The mountains were stamped and colored with Watercolor Twist pencils. 


I added white snowy mountain tops using a Gel Reminisce pen.  I fussy cut the top of the mountains and layered over my blue card stock with foam tape.  I added a felt circle for my sun and added a few rays using my Copic markers.


I stamped the sentiment in shades of brown and orange.  I added shadows under the word with Copics.  I adhered a few sequins and tied yellow and white twine to add a bit more yellow to my card. 


Thank you so much for stopping by today!

Rejoice in all that you do!

Friday, April 14, 2017

By His Wounds by Karen


Hello!  Karen here today to share something special with you for this Easter season. 


As we approach Easter, I wanted to have a visual reminder for my family to help us focus on the sacrifice of Christ on our behalf. This verse in the Old Testament, which points to Christ, came to mind. 

"But he was pierced for our transgressions; he was crushed for our iniquities; upon him was the chastisement that brought us peace, and with his wounds we  are healed." 
Isaiah 53:5

I wanted to keep it simple and meaningful, so I just grabbed a few supplies. I started with some simple lettering using my black LePen on a sheet of watercolor paper. I lightly drew a few guide lines to keep my lettering straight. These were erased before applying any color.


I started with bit of light purple shading over the lettering with my LePlume marker and then added some stamped borders. Then I decided to add more color with my markers using a plastic baggie, markers, water, and this "smooshing" techniqe (see video tutorial here). 


After a bit more color, a dotted border stamp, and a quick trim, I simply attached it onto a clipboard for display. It reminds us that Jesus loved us so much that He willingly suffered on our behalf to make the full payment for our sins. By His wounds we are healed! On Easter Sunday we will celebrate His victory over sin, death, and Satan. Amen!
A blessed Easter to each of you.

For this project I used:

Thursday, April 13, 2017

Thinking of You Card & Have Faith Treat Bag by Amber


Hello everyone! It's Amber here, today I'm sharing a fun thinking of you card and treat bag for Easter. I 


used a "Thinking Of You" sticker from the We've Got Your Border/Pastel sticker sheet , a "Have Faith" sentiment  sticker from the Sentiment/Shine Your Light sticker sheet, a 4" x 6" Lattice Printed Kraft Bag, and some Light Pink Jute Twine from the SRM Stickers Shop to create my card and matching treat bag.


I started my card by folding an A2 sized white card base in half and adhered some fun printed patterned paper to the entire front half of my card. Next I cut a piece of white cardstock to fit the upper half of my card base and die cut the bottom with a stitched wavy die. I stamped my large Easter image from Northwoods Rubber Stamps in some Memento black ink and colored all of the images in with some Spectrum Noir Markers.  


Once I had all my images colored I added a "Thinking Of You" sentiment from the We've Got Your Border/Pastel sticker sheet and tied on some pink jute twine above my sentiment. 


I love creating treat bags to match my cards, I chose one of the 4" x 6" Lattice Printed Kraft Bags for my project today. There are a ton of fun ones to choose from in the shop. Check them out HERE. I folded the top part of my treat bag down, slipped my "Have Faith" sentiment onto some pink jute twine, and tied the  twine around the treat bag. This bag is really quick and easy to create, you could make a whole set of these in a few minutes. 

SRM Sticker Supplies
4" x 6" Kraft Bags/Lattice Print

Wednesday, April 12, 2017

April Planner Spread by Christine


April is in full swing at our house and it has required lots and lots of organization!  We've got birthdays, holidays, and tons of school commitments!  Christine joining you today with a look at my spread where I used a bunch of SRM Stickers to decorate!

I'm working with a horizontal planner these days (from Paper House Productions) and I like the feel of it.  It's different to get used to decorating but I also like the big horizontal spaces!  My Black Le Pen  got a workout for this spread!


I primarily used the Free Style/Spring set of stickers for the spread.  I didn't want to add to much but I definitely wanted color.  This sticker set has yellows, greens, and blues providing lots of the desired color for the season!  I also pulled out the Stickers by the Dozen/Thank You set to bring in some more daisy stickers!


I'm totally struggling to keep track of dates this month so I decided to add a Standard Mini Calendar sticker to the bottom of the spread so I could keep my eye on the whole month!

How's your planner coming together for April? We'd love to see what you are doing in it!