Showing posts with label Clean and Simple. Show all posts

Friday, December 15, 2017

Joy Ornaments by Shelly


Hey y'all! Shelly, here.
Today I'm sharing some simple Christmas ornaments with you! I think these would be great special gift for someone, too! :)


I kept things very simple. I started with die cutting my snowflakes in three different sizes. For the smallest snowflake I used a silver glitter cardstock and the two bigger ones white cardstock. After, assembled them together. 


Once done, I added my SRM sticker to the center. In this case, joy. I only added my sticker to one side and left the backside showing on the silver glitter snowflake. After, I punched a hole at the top of my snowflake and added some jute twine. Simple, yeah?!...

Also, giving this special gift to someone, you can easily pop them into a patterned glassine bag! ;) 

Thanks so much for stopping by!
Enjoy your day!

SRM Stickers products:


Thursday, November 30, 2017

Merry Christmas by Shelly


Hey y'all! Shelly, here.
Today I'm swinging in to share a fun Christmas card with you! 


I started with my base, which I chose kraft cardstock for. After I did a little cutting with some snowflakes and white cardstock. Easy peasy, right?!...Once done I simply arranged them on my card and then glued them down. 


Next, I added a strip of red cardstock with a 'Merry Christmas' sticker on it. Then added some foam squares on the back and added it to my card base. To top things off, I added a touch of jute twine. Simple and sweet, yeah?!...

Thanks so much for stopping by!
Enjoy your day!

SRM Stickers supplies:

Jute Twine

Monday, November 13, 2017

Christmas Cards - Clean & Simple by Giorgia


Hello SRM friends, Giorgia here and today I want to share some cards I created for Christmas.  I love to create handmade cards, also if I really am not a cardmaker: I love easy cards, and I love clean & simple style, so even if you are a beginner you can create these with me!


SRM Stickers has a lot of Christmas products, take a look in the shop!
I gathered all my SRM Christmas stash and started creating...


To realize this card I used We've Got Your Border/ChristmasI made it clean and simple, with white cardstock base and really few embellishments - I am in love with the cute elf!
To add depth I used foam tape to adhere the elf die cut and to add texture I added 3 tiny wooden stars.


For this one, that is really tiny because I used cardstock scraps to create it, I used a sentiment and the cute Santa  from We've Got Your Sticker/Merry  sheet; on the inside I added a sticker from Freestyle Christmas stickers.


For the third card I covered the white cardstock base with patterned paper, I added a central panel of white cardstock where I adhered We've Got Your Sticker/Merry stickers. Then I glued a small green scalloped piece when I attached a decorated wooden pin. I created a bow with red jute to complete the card.


For the last card I used the same patterned paper than the previous one, but glued on green cardstock base. I adhered a sticker from Fancy Sentiment/Christmas  on a Punched Pieces - 24 Large Scalloped Circle - 2½" - Green that I attached with foam tape to the card. To decorate it I added a button with red jute twine.


In few minutes, with SRM stickers, I created four different cards!
Until next time,
ciao, Giorgia
SRM products used 

Tuesday, December 20, 2016

Festive Card Set by Shelly


Hey y'all! Shelly, here!
Today I'm sharing a festive card set with you, that happens to be easy, too! 


I started by doing some stenciling for my card base. Which I chose traditional red and green inks. After, I did some die cutting for my squares and holly leaves. 


Then once done, I added my sticker to each square die cut piece. And after I simply added my square sticker piece along with two holly leaves to each of my cards. Easy peasy, yeah?!...


Thanks so much for stopping by!

SRM Stickers products:


Friday, October 14, 2016

Halloween Treat Bags by Samantha


Happy (almost) Halloween! Samantha here today with some fun Halloween treat bags that are cute and quick to make! 


I have some teenage nieces and nephews, who may be too old to trick-or-treat, but I still love dropping a little something off for them. Being the crazy aunt has some perks! SRM's embossed kraft bags paired with a variety of Halloween stickers make for a super easy way to package up a little candy for them (or anyone you want to treat this Halloween). 


I chose the 4 x 6 chevron embossed bag, but there are a ton of fun ones to choose from! For decorating my bag, I chose the Halloween Take 2 Stickers By the DozenTrick or Treat Stickers by the DozenHalloween We've Got Your Border, and Halloween Stitches stickers. 


What really makes these bags quick and easy is that creating the Happy Halloween tag takes all of 30 seconds. 


I simply took an orange "Happy Halloween" sticker and a black "Happy Halloween" sticker from Halloween Take 2 Stickers By the Dozen, stuck them back to back, and punched holes through them. It's really that simple! I finished them up with a little black twine to hold everything closed. I added my sticker choices to the front and back side of the bags to make them treat ready. 


Do you have anyone you like to make special Halloween treats for? These Halloween treat bags will make the perfect packaging! 

Sunday, October 9, 2016

Merry Christmas by Shelly


Hey y'all! Shelly, here! 
Well, we all know how fast time keeps going by, right?! ;) With that being said, there's nothing like gearing up for Christmas and starting to make your Christmas cards! (or in my case, 'a' card meaning just one card. lol)


Keeping with my CAS style, I started with adding a little strip of patterned paper to the left side of my card. After, I did some quick and easy die cutting for my fancy holly leaves using gold glitter paper. I then used tiny pieces of foam tape on the back and added it to my card. 


Once done, I added my sentiment on a piece of wood patterned paper, along with a strip of white lace underneath it. After I placed it on my card. And to finish things off, I added a few sequins. 

So what do you think?!...I'd love to know! :)

SRM Stickers supplies used:

Thanks so much for stopping by!
Enjoy your day and see y'all soon! 
SaveSave

Wednesday, August 3, 2016

Anniversary Card by Shelly


Welcome for more fun in introducing our new design team members and sharing some of their craftiness.  Today we welcome Shelly Kurth who was on the SRM Design Team a few years ago.  I've always been a fan of and inspired by Shelly's clean and simple style and am so excited to have her on the team once again.  


Here is a bit about Shelly in her own words: 

Hi! Greetings from sunny Florida! I'm a mother to my four beautiful yet silly kids, as well as a wife to my husband. I started scrapbooking way back in 2003 or 2004...it was a long time ago. ;)  Shortly after I started scrapbooking, I realized that my true passion was in making cards. From that point on I've been hooked! I also love to make sweet little gifts, too! My style is typically clean and simple. However, sometimes I will mix things up a bit and try something new and different. I'm beyond excited to be joining the SRM Design Team and I hope y'all enjoy everything that I share with you! Thank you for having me! :) 

Hey y'all! Shelly, here! 
Today I'm swinging on in to share an anniversary card with you. 

When I was thinking of how to use SRM's calendar stickers, I thought of memorable dates. I had two that stood out most to me, which was my wedding anniversary and my home anniversary. I decided to go with my wedding anniversary.


I started with choosing my patterned papers. I tried my best to stick with more of masculine papers. ;) Once having my papers chosen, I then started piecing things together, though not adhering anything yet. After looking at things, I thought my card needed a little more 'pop' to it, so I added a strip of black cardstock. I also I added a little bit of twine and mini staple to my '2017' banner. After, I placed things on my card. Though before adhering anything, I added a flower sticker on my card base, just to peek out from under the calendar sticker on top. To finish things off, I added a little glitter gold enamel heart to our 'date'.  I'd love to hear what you think?!...Perhaps, I've inspired you to get an early start on your anniversary card, too?! :) 

SRM products used:

Thanks so much for stopping by! 


Monday, July 1, 2013

A Trio of Cards by Shelly and WINNER!


This is the first post of the work of our brand new design team.  We welcome all of these talented ladies and look forward to all their inspiration over the coming year.

We are so excited to introduce you to the work of Shelly Kurth.  Her clean and simple style is so appealing.  Although she usually creates using stamps, Shelly is now definitely into stickers, SRM clear stickers that is. 

Shelly has created for us a trio of cards.  


Using Kraft card stock for her card base, Shelly uses punches and dies to create her clouds, adds SRM clear stickers for her sentiments and adds enamel dots to create more color and dimension.  


Love how the delicate colors of the patterned paper show through the clear "For You" sentiment from SRM's Thinking of You Fancy Sticker Sentiment.  And I love the Fiskars cloud punches that she uses. Don't forget the foam squares to pop up your clouds to give more dimension and interest to you card.  


Simple yet sensational!  That's the style of Shelly Kurth and now it can be yours!  Simply click on this image of Shelly's trio of cards to see all the details.  


Thank you for joining us today on the first day of our new design team's term.  Join us tomorrow when you will meet Ann Molvik, our new knitting and crocheting specialist.  She has created a fun and fabulous project with twine that you will not want to miss!  

----------------

WINNER!  The winner of the Creating Keepsakes Facebook giveaway of all 4 Sticker Stitches is...

ellen s. who said...
These are so fun! My kind of stitching...easy!
Email your mailing addy Ellen and we will send your prize pronto!  Email to:  susan@srmpress.com

Thursday, July 8, 2010

Clean & Simple, by Carole


Card maker extraordinaire and SRM Designer, Carole, is here today with grouping of Clean & Simple paper craft projects using our Quick Card {happy} (#52003) sticker set;


A pair of Clean & Simple cards:


A gift tag:


A mini book:


Carole captured Clean & Simple beautifully! Join me tomorrow for Fun Friday - you know I'll have something special!


jenyfur

Monday, July 5, 2010

Same Sticker 3 Ways by Tanis & Winners!


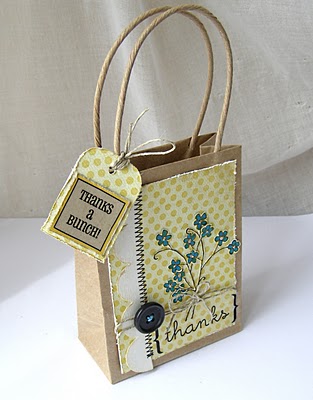
This month at SRM Stickers we'll be showcasing how to use the same sticker 3 ways while we also dive into the Clean & Simple style. Here's Tanis with her take! Tanis used a Quick Card set, {Thanks} #52007, for her Clean & Simple card, tag, and gift bag;


Ready for some winners?! Thank you for taking the time to join us for card sketch challenge and June Contest last month. We love seeing what you can do with stickers! The winner of our card sketch challenge last week is;

TesaB


Our June Challenge Winner and Guest Designer for August is;

Tessa Buys


Congratulations! Please email me with your postal addresses! Join us all week long for more stunning sticker projects. You may be seeing sneak peeks of our new designs pop up as well!


jenyfur