
Hello! Samantha with you today. If you're like me, sometimes you have more photos than you know what to do with. Today I'm going to show you how you can use SRM's patterned bags to get more photos an on layout.
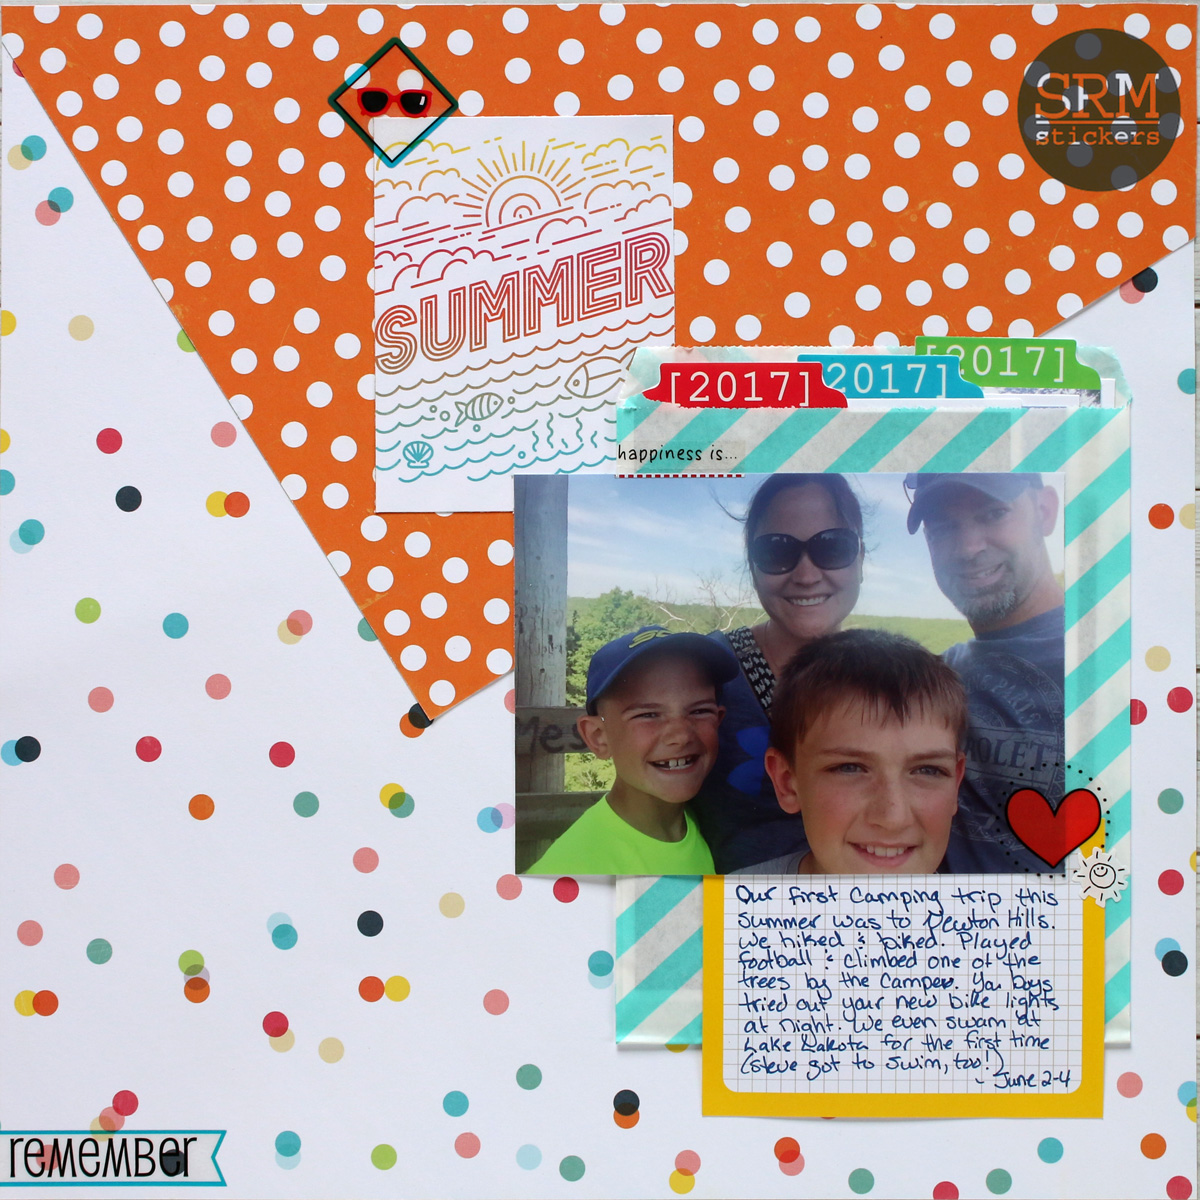
Every year I have multiple camping photos to scrap. Sometimes the photos feel new and fun, and sometimes they feel a bit redundant. However, they tell the story of our summer and I want to scrap them anyways.

I start by pulling all of the photos I want to use. Then I pick my favorite one (like this group shot of us hiking up a tower) and make it my focal photo. All the other photos will go in the patterned bag. I build the layout around my focal photo, and use the patterned bag as a layering piece like I would a piece of patterned paper. Adhere your bag directly to the layout and layer your photo on top.

When your layout is finished, add your extra photos to the patterned bag. I like to back my photos with a bit of card stock, and I used Year of Memories Stickers to add tabs to the tops of my photos. These aren't necessary, but add a fun design element and help draw your eye to the fact that there are photos in the patterned bag.
I also used stickers from Calendar Companions, Stickers by the Dozen Valentine, Planner Icon Stickers, and We've Got Your Borders Bright to embellish my layout.
The best part is, SRM carries a wide variety of sizes, colors, and patterns in patterned bags, so you're sure to find something that works well on any layout. The small bags (like I used here) work great for 4x6 or smaller photos. The medium patterned bags work well for 5x7 photos, and the large bags are perfect for 8x10 photos.

Using patterned bags on a layout is a fun a versatile way to add more photos to your layout!
No comments:
Post a Comment