
If you love Mixed-Media, you are going to love today's post from Angélique Jarrier. She has created covers, front and back, for a photo album or Art Journal. This tutorial is loaded with photos but well worth it! And as an added bonus, Angélique has created a step by step slide show for you. Giving even more details of how to create this fabulous project. Click here for the LINK.

Angélique decided to use the theme of Love using SRM's Fancy Love Sticker Sentiments. Angélique is impressed with how easily the stickers worked on this project, with very good resistance to the paints she used.
First we will show you the finished project. Here is the front.

And here is the back. Notice the SRM "Love" and "I Love You" clear stickers that are woven into this intricate design.

And here is how Angélique created her covers. First you will need two wooden supports or rigid cardboard. We'll start with the front cover of our album.

Angélique used a pre-cut board. Start by pasting over different materials (aluminum foil, paper textures, lace, ribbons) to create the desired surface.

Cover everything (wait for complete drying glue) with effect paint (paint structure or relief).


Once this groundwork done and dry, decorate and give relief with various embellishments such as flowers, charms and beads.


Embellish as much as you want to.

Cover embellishments with same white paint.

Add more embellishments if you like. Angélique loves using salvaged objects on her projects!

Once again, cover in paint.

Once dry, decorate adding color. Angélique likes to use different types of paints and inks including spray inks, metal paints and acrylic paints.


Once paint is applied, let dry and proceed to the second cover. Now we will see how Angélique applies stickers, blending in yet another media in her project. She used aluminum foil to cover the back cover.

Apply the SRM Fancy stickers before painting. Just stick them onto the aluminum foil, cover everything, including the stickers, with paint. Lightly rub stickers to position them. When completely dry, clear the stickers with a baby wipe to make the stickers appear.

Add additional stickers and embellishments to your cover. When in position, cover with paint. As with the front cover, we will use various inks and paints.

TIP: Angélique often likes to create using old clear stamps used. She gives them a second life, adding them into the mix. Here an angle stamp that's been painted.

And there's a butterfly stamp!

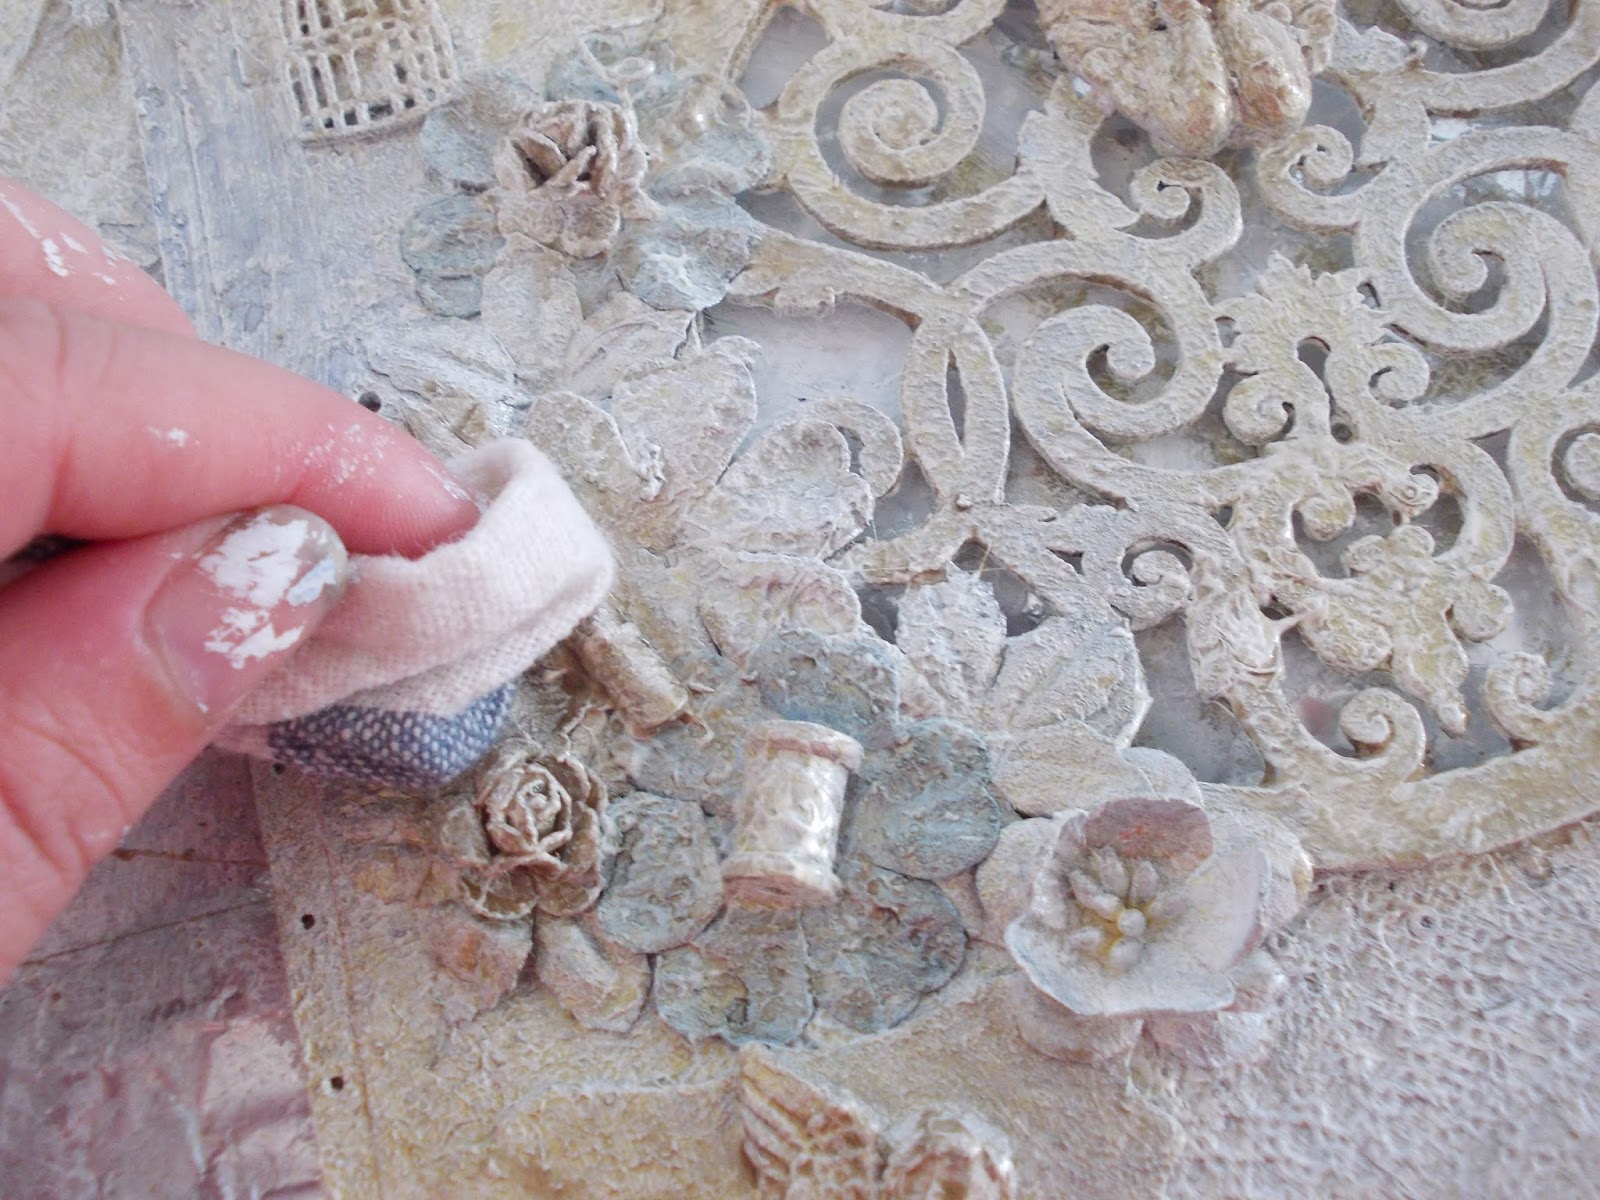
Finally, we will apply with a dry Cut'n new paint colors, to give relief to our project. Apply colors slightly and later wipe with a cloth to create a fade.


And here's the final result after a few hours
So now you are trained! Time to try some mixed media! Be sure to share your Mixed Media project using our stickers on the SRM Flickr. We'd love to see what you create.
5 comments:
it's wonderfull Engie !!!! ;) hihi
j'adooore ma belle !!!
This is a stunning project. Thanks so much for explaining how it was made. I've always wanted to make a mixed media project, but never really known how.
What a great mixed media project!!!!
Such an AMAZING project! :)
This is stunning absolutely love it and has given me a lot of ideas thank you for sharing with us x
Post a Comment