Today we have a treat for you! It's a tutorial from Roberta Rossi creating the most wonderful boxed mini calendar using SRM Stickers and one of our rectangular clear boxes. This project is being featured on Creating Keepsake's Facebook today. Leave a comment here on the blog and you will be in the running to win the stickers and the clear box used in this project!
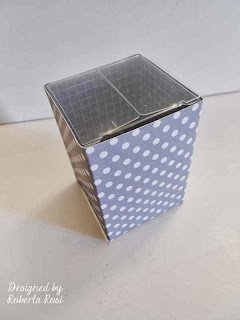
Here is the finished box!
Here are the stickers that Roberta used: Mini Calendar Decorative, 2014 Year of Memories, Bright Borders and Black Sticker Stitches.
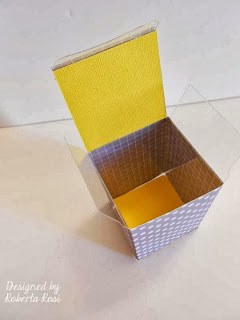
And to hold her Mini Calendar, Roberta used this rectangular clear container.
And now we'll show you how she made it! First Roberta covered the outside with a strip of paper ( 10 ½ " x 3 5/ 8 "). , She also cut 4 squares of paper 2 ½ "x 2 ½ " (two yellow and two gray ) to cover the bottom and the cover of the box which helps the box to become more rigid and sturdy.
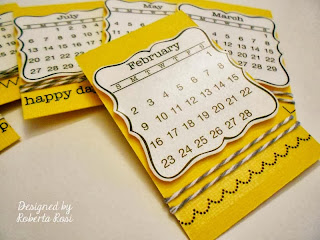
She then cut out 6 rectangles in yellow cardstock (2 ¼ "x 3 ½ ") and adhered the calendar months to the white cardstock. She cut out the months by hand.
With pop dots Roberta put the 12 months, two on each yellow card (front and back and decorated them with Stone twine.
With a Sizzix die Roberta cut flowers in yellow cardstock and she assembled them to make it 3D.
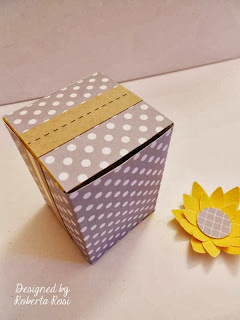
On three sides of the box she attached strips of kraft high ¾ " and decorated with Sticker Stitches.
On the cover of the box I attached the flower and a 2014 sticker mounted on Kraft . And now the box is ready to be loaded with the mini calendars!
Just put the mini calendars inside the box. You will have 6 cards with 12 months and be sure to include a small metal clamp inside as well.
To use as a calendar, simply remove the first month from the box, attach it to the top front of the box with the metal clamp.
Brilliant and beautiful!
Roberta is from Milan, Italy. You know that Milan is the design capital of the world. When someone asks you about the calendar that you made, you can simply say "It's an Italian design!" And it is! Thanks Roberta for this ingenious project. It is truly an inspiration!


26 comments:
beh che dire Roby sei fantastica!!!! il tuo progetto è bellissimo!!! copierò sicuro!!!!! ciao
Wonderful project!
Thank you Roberta :)
many greetings
Chiara
This is a fantastic project! The details are amazing.
Clever idea. Takes less room than a traditional calendar. You can always attach calendar pages for the next year after this year and continue to use the calendar. A good remembrance of a gift.
what a cute idea!!
So cool, great idea!
what a cute idea!!
This is so clever and a nice little gift for someone. Would love to win the stickers!
Great idea. I made something similar for my daughter a few years ago. But I like that you can store all the pieces in one place. You won't misplace them.
Beautiful creation...could change with the seasons
Miticaaaaaa!!! Ti lovvo robyyyy!!!!
Love this idea! Would be a great gift and fun to make!!
Love this mini calander! Great for desk! The stickers are awesome! Love it!
Wow that is fantastic!
Love those stickers
Grandissima Roby! Sei il nostro mito! Carinissimo progetto!
Such an AWESOME project/gift! TFS!
Roby.. che adoro le tue creazioni lo sai a memoria!!! Ogni volta riesci a stupire!!! Dal niente ricavi delle vere e proprie meraviglie!!! <3
This is really neat! Thanks for sharing!
This is so cool what a great idea
What a great project! Looks like fun to make!
Roby!!! ho riconosciuto la tua mano su Pinterest!!!! un mitoooo
baciotti
manu
a wonderful calendar box! Thanks Roberta!
Regina*
I'm glad you enjoyed my project!
Bellissimo progetto le tue creazioni sono super
Post a Comment