Hello! I hope you're enjoying our blog and gathering ideas for your own paper crafting. We're having a lot of fun bringing daily projects to you, using SRM Stickers. Did I mention that we're crazy for stickers?! Have you visited our online store yet? If you have, please tell us what you purchased and what you plan to do with it - we'd love to hear!


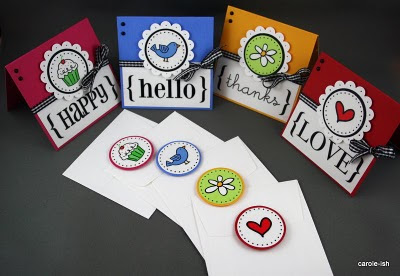
I have a tutorial for you today, using several SRM Stickers from various sticker sets. My sister, LuLu, loves to make cards...but, she likes 'em super quick & easy. I decorated and filled this little magnetic tin for her to use when card making. I filled it with layered card sentiments, just waiting to be attached to a card. She can pop open the tin, grab a coordinating sentiment, and she's good to go!
I started by cutting a 1" strip of patterned paper and adhering it to my tin. I then wrapped it with ribbon, tied a bow, and placed mini glue dots under the ribbon to keep it in place.

I used two different scalloped circle punches along with my 1 1/4" and 1 1/2" circle punches.

I placed my SRM circle stickers onto white cardstock, punched them out, adhered them to a black larger circle, then attached them to scalloped circles using foam dots.

I stacked them inside of the magnetic tin.

Of course I had to make an accompanying card!

I trimmed a piece of chocolate cardstock to 4x8", scored, and folded in half. I cut a 3 3/4" of patterned paper and rounded the edges. I punched two scalloped ovals, and embossed the smaller one. A SRM Sticker greeting was adhered to a piece of patterned paper and trimmed. I gathered coordinating ribbon and gems.


I'll be back tomorrow with a peek at what's in store for March. We have a themed month ahead with GOBS of projects for you. The Designers are hard at work! Until tomorrow...
jenyfur