Friday, September 17, 2010

We've Got Your Sticker!


Not only do we have your sticker today, we've got your card inspiration, too! Before we get to that, let me introduce you to our new We've Got Your Sticker sets;


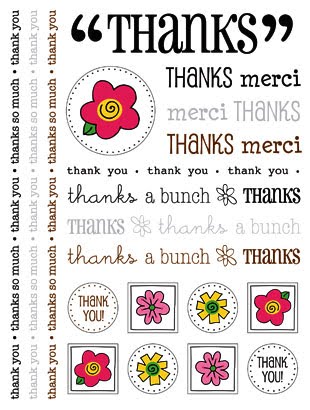


Which one is your favorite? Keep that in mind as you scroll to view our Design Team samples...


by Becky:


by Carole:


by Gina:


by Jenyfur:


by Jen M.:


by Nina:


by Tania:


by Tobi:


Have you decided upon your favorite sheet? Leave a comment, let me know, and a random winner will be chosen to receive ALL of our We've Got Your Sticker sheets! You have until the end of the weekend to comment, winner will be announced on Tuesday. Have a great day!


jenyfur

Thursday, September 16, 2010

Amy's Flower Tutorial

by Amy Heller:

We've had some requests to show you how to create a flower that was on a SRM Stickers card, published in the August 2010 issue of Scrapbook Trends Magazine. You asked, and today we have delivered! So get some scraps and let's get ready to play! (click on images to view them larger)


Supplies:

Scrap patterned paper, cardstock
1.25" Round Scallop Punch (or dies)
Scissors
Distress Ink
1 large Fabric Brad
Hole punch
Adhesive - a good dry one or glue pen

This tutorial demonstrates how to create a 3 1/2" flower. For a smaller flower, simply scale down the size of your original circle template.


Cut a piece of scrap cardstock into approximately a 3" circle. Set aside.

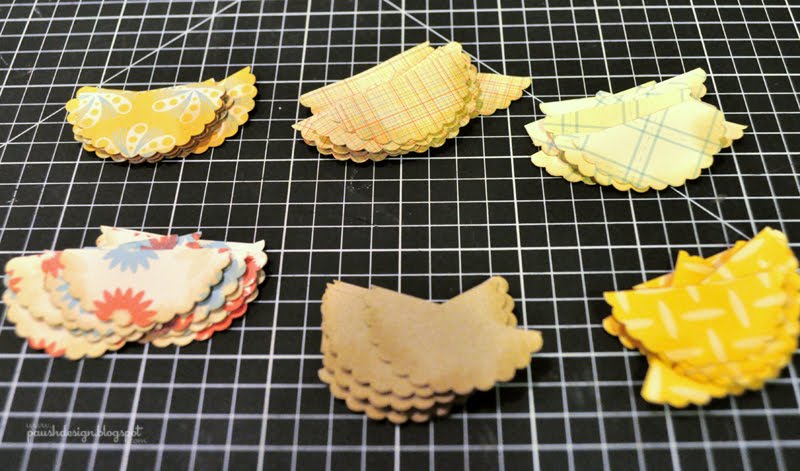
Take 4 largish pieces of scrap patterned paper (coordinating) , and 1 color of scrap cardstock. I used kraft for this part. Make sure you have enough of each piece of paper to create about a dozen or so scallop circles.

Punch out all your circles.

Take your scissors and trim your scallop circles in half.


They should all look about like this.

Ink the edges of all your scallop circles with distress ink. I used Ranger's Antique Linen.

Separate and pile all your pieces so they are easy to find.


Taking your original circle you cut out, apply your adhesive just around the outside perimeter of the circle.

Randomly apply your half circles around the perimeter.

Apply another coat of adhesive on the bottom edge of the first layer as well as on the circle template.

This is where your design eye really needs to kick in. You are going to start layering, the next layer like bricks - so the center of each circle meets at the seam of two adjoining circles from the layer below. Like the last layer you want to make this random, but you also want to make sure that you are balancing the pattern/colors with the previous layer. If you do this too much as a pattern it may not look as natural.


Continue to apply the next layer of half circles.

Repeat the same process. . . .

until you meet the center. Use a whole or two half circles of the cardstock to create the center circle.

Take your finger and gently pull up on each petal of your flower. This will give it dimension and it won't lay so flat on your layout/card. Do this to nearly every petal. Set this part of your flower aside.


Now we are going to create the center rosette. Take a full circle of scallop punched cardstock and distress ink the edges.

Use your scissors to create a swirl from the outside edge to the interior, where you will leave a small circle uncut, as in the photo shown above.

When it is all cut it will look something like this.

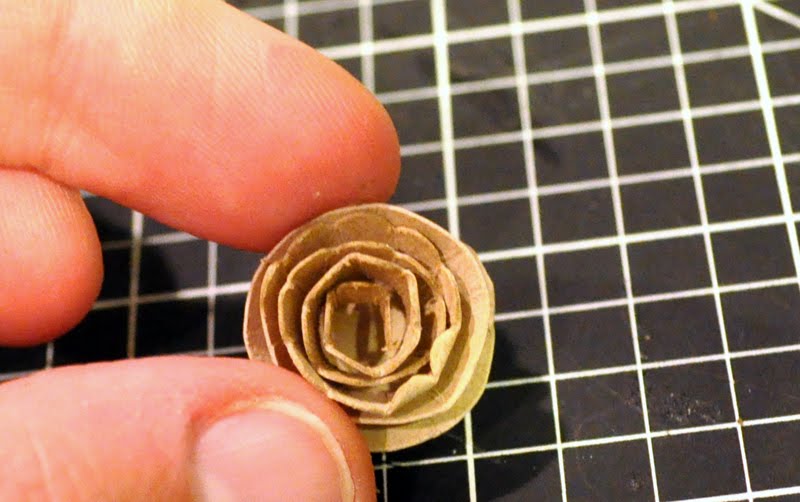
Starting from the outside edge roll the swirl toward the center of the swirl.


When you get to the center it will look something like this. So now, get your brad.

Apply it through the center of your rosette, keeping the attachment open for now.

Go back to your large flower, and using your hole punch, create a center hole that the brad can fit through.

Apply your brad/rosette. And now you are finished!! Easy as that. Now it's ready to be applied to any card or layout you wish!


Wednesday, September 15, 2010

Bold & Bright by Jen M.

Our Designer, Jen Martakis, has been playing with her new Silhouette and SRM Stickers...and we love what she's done! Jen used one of our new "We've Got Your Sticker" sets - Happy (53001). You'll be seeing a lot more from this series on Friday!


Amy's here tomorrow, with a tutorial. It's a remake of a previous technique that received a lot of attention on our Facebook Page. Stop by for a look, it rocks!


jenyfur

Tuesday, September 14, 2010

Back-To-School


How much fun are Back-To-School projects?! Here are a few, if you're in the mood to create a special keepsake for your returning student, or an exceptional teacher... We've got the stickers you need, click HERE to view or full line of school stickers!

by Deana:


by Becky:


Now for the winners from last week's feature! The following readers will receive our new Everyday Boy and Everyday Girl sets, newly released at CHA Chicago!

Wendy Crowe said...
Love all the new projects! I"m always looking for boy page inspiration!
September 9, 2010 5:10 PM

perezmom said...
Those are terrific projects! Lovin those girl stickerrs - as my daughter says so stinkin cute! -Kristin
September 10, 2010 7:41 AM

Congratulations, ladies, please email me with your postal addresses!


jenyfur


Monday, September 13, 2010

Cards by Amy


Welcome to another week of non-stop SRM Stickers inspirational projects. Amy's here today with a grouping of cards that will knock your socks off! We offer SRM Sticker sentiments for any reason, you'll always find just what you're looking for...


I have a few Back-To-School projects tomorrow, and the rest of the week will be jammed with cards, a tutorial, and a Fun Friday Feature. Winners from last week's Everyday Girl and Boy feature will be announced in tomorrow's post. Have a great week, we hope you'll stop by everyday and join us!


jenyfur