Showing posts with label Calendar. Show all posts

Tuesday, November 14, 2017

Mini Desktop Calendar by Emma


Hello sticker fans!  Emma here today to share this cute and simple to make mini desktop calendar.  This would make a lovely gift for anyone who has to sit at a desk all day - why not give them something nice to look at?  (Bonus!  It's also useful!)


To make this item, I have used the #1 top seller on the SRM Store, the 2018 Mini Decorative Calendar sticker set.  This set is so versatile, it can be used in so many ways.  The stickers are clear, so you can add them to any colour paper you like.


I have also used the 2018 Year of Memories sticker sheet to add the year onto my calendar:


So to start, I took a piece of cardboard box and folded into an 'A' shape, and covered with cream cardstock.  I then made a small pocket from the same cream cardstock, big enough to hold a small post-it note pad.  I covered the pocket and the upper part of the calendar with a Turquoise Striped Patterned Bag.


 I cut the individual months from the calendar sticker sheets, and adhered them to white paper.  (Tip: you can also get a cutting die which matches the shape of the calendar stickers perfectly!). Using some strong double-sided tape, I adhered the months together at the top, to create a 'tear-off' effect.  To finish off the calendar, I used the beautiful 'Just Believe' stamp set, and coloured the images with the Marvy Color-In Watercolor Twist pencils.  


 And there you have it, a sweet and easy gift for the desk-bound loved one in your life.
Happy crafting!
Emma


Friday, November 10, 2017

12 Days of Christmas Countdown Advent Calendar


Hello!  Shanna here again with a fun and festive Christmas project!!  

In my house we have a tradition of a countdown advent calendar... Similar to the chocolate ones you see in stores, we like to give little treats and toys as part of the fun!  I have varied in the past with a full 25 days of fun, or a simpler 12 days of counting fun.  This year, for my 5 year old's first advent calendar I chose to run with the 12 days of Christmas countdown as it will be a little more simplistic for him to follow as he is autistic and the more simplified it is, the less stressed he gets.  


I adored making this fun banner-style calendar with with fun and simple flair!


Here is what I used:
Distress Oxide inks in Lucky Clover, and Candied Apple
Mini Clothespins


I started by stamping directly onto the scallop circles the numbers 1-12 using the BIG Numbers Stamp Set.  I actually ended up embossing them in clear, but it down played the oxide colors unfortunately.  Good news is my 5 year old won't be nearly as critical of them as I am!  


Next was made easy peasy by utilizing the treat bags as the wrapping/holder for the goodies.  We keep things small and affordable.  I picked up a multi pack of trains (his fave) and some figurines from the dollar store along with a couple pencils that are helping him learn to write.  Fun stuff!!  I put candy in my older kids calendars sometimes to mix it up, but for this one I stuck with small toys. 

I folded down the bags to close them and then sealed them using one of the awesome stickers in the SRM Stickers Live Life/Christmas Stickers set!!  Super easy!  I attached my numbers to the bags with some double sided tape and then strung them on the jute twine clothesline-style.  I love how it turned out and will fit on our mantle perfectly this coming December!


What is a fun tradition you like to do in preparation for Christmas??

Until next time!!

Friday, October 27, 2017

Calendar Fun by Angie


Hello SRM friends and fans! Angie here with you today.

The new year will be here soon enough, so why not design a SRM calendar for yourself or as a gift?? SRM has so many amazing stickers and stamps that would look amazing on your calendar!

I started with the adorable 6 x 6 calendar, which is the perfect size for your desk or to sit in a small space around your home. 

I'm just sharing a few of my completed pages but I hope these examples will show you how quick and easy it is to decorate this calendar.


I stamped the months for the whole calendar using the seasonal plans stamps. I also used the small sticker numbers for all of the dates on my calendar pages. 


For the month of January, I embellished the calendar page with the snowflake found on the seasonal plans stamp set. I love that the stamp set has an icon to go with each month. I used some sequins from my stash to add some sparkle to the middle of each snow flake. The 'brrr..it's cold' is a sticker from the Live Life Calendar Year sticker sheet.


For the month of October, I used the adorable candy corn icon from the seasonal plans stamp set. I stamped them using black archival ink and then colored them in with markers. The candy corn border and the 'Happy Halloween' are stickers from the Stickers by the Dozen/Halloween set.


Lastly, November is embellished using the leaf icon from the seasonal plans stamp set and two stickers from the Thanksgiving Express Yourself sticker sheet. 

I hope these simple but functional examples will help you create a calendar that you will look forward seeing the whole year. 


Wednesday, April 12, 2017

April Planner Spread by Christine


April is in full swing at our house and it has required lots and lots of organization!  We've got birthdays, holidays, and tons of school commitments!  Christine joining you today with a look at my spread where I used a bunch of SRM Stickers to decorate!

I'm working with a horizontal planner these days (from Paper House Productions) and I like the feel of it.  It's different to get used to decorating but I also like the big horizontal spaces!  My Black Le Pen  got a workout for this spread!


I primarily used the Free Style/Spring set of stickers for the spread.  I didn't want to add to much but I definitely wanted color.  This sticker set has yellows, greens, and blues providing lots of the desired color for the season!  I also pulled out the Stickers by the Dozen/Thank You set to bring in some more daisy stickers!


I'm totally struggling to keep track of dates this month so I decided to add a Standard Mini Calendar sticker to the bottom of the spread so I could keep my eye on the whole month!

How's your planner coming together for April? We'd love to see what you are doing in it!

Saturday, March 25, 2017

March 2017 Planner Goodness by Tenia


It's unusual for SRM to have a Saturday blog post but I just wanted to squeeze in these fabulous planner pages from Tenia Nelson using tons of SRM stickers and stamps!


This was super fun to create!! 
Here's a closeup of one of the pages.  Check out all of those St. Patrick's Day Stickers, Sticker Stitches and Faith stamps.  


And can I just say that I'm loving my Le Pen pens which are perfect for planners!


I hope you enjoy and have a great day!!!!!

-t

Thursday, October 6, 2016

2017 Desk Calendar by Melanie


Hello! Melanie here today to share one of my favorite things -- SRM Calendar stickers! They are so cute and perfect . . . and I love calendars :)

I used the 2017 Decorative Mini Calendars to put together this desk calendar I can use at work. 


Having something small and as a quick reference is very handy for me. And if it is cute, it is an extra bonus!


For each month I used 3x4 inch cards (I have a TON of these in my stash). Then I added the calendars and an embellishment.


The SRM Sticker Stitches worked beautifully to add a finishing touch. They come in several different colors to add a fun pop to your projects.


I used my binding machine and 1/2" coils to connect each of the month pages together. Because it fans out, it sits really nicely on it's own.


This calendar is for me . . . but I can definitely see myself making more for gifts :)

Enjoy your day!

Wednesday, October 5, 2016

8 x 8 Calendar by Tobi


Hi there. It's Tobi here with a quick calendar project. Now, you might be thinking, how can a calendar be "quick"? Well... hehehe... If you only do one month at a time it is!! One reason I got away from scrapbooking is it took me too darn long to finish a layout - and that's when I moved to other, smaller things.

Which brings me to my calendars! I like to do one month at a time, that way I have a pretty calendar all the time, and because I'm doing it throughout the year, I'm constantly changing products and techniques. AND let's face it, it's quick and easy just doing one month!!


I used a whole bunch of SRM goodies on this month! 
An important aspect (for me) when doing a calendar is to get the right patterned papers for the month. These are some old Cosmo Cricket papers I've been hoarding and they are perfect for fall!


I added a whole bunch of stickers to the right panel like a kind oflist. Then to the left are some stamped leaves on grey card stock. 


I don't have a lot planned for October yet (besides a quick trip down to Hong Kong) and a Hallowe'en party, but I'm sure I'll fill it up with more Planner Icon stickers soon! 

That's all for now! Thanks for joining me today. 

Supplies used: 
8 x 8 Calendar

Tuesday, October 4, 2016

Geometric Desk Calendar by Samantha


Hello! Samantha here today to share a project using the 2017 Mini Calendar Stickers. I got the crazy idea that it might be kind of fun to have a 12 sided 3-D shape to put my calendar on. Here's what I came up with for a geometric desk calendar. 


The official name for this type of shape is a dodecahedron. Creating one is pretty simple. You start by cutting 12 circles from card stock. You'll also need a pentagon that fits exactly inside the circle. You use the pentagon as a guide for scoring lines onto your circle. 


 The picture above shows the shapes I'm talking about.


You can see one of my 12 circles on the far left (above) with the pentagon template sitting on top. In the center you see how the circle gets scored around the pentagon template. Finally, on the far right is the finished piece. 


After scoring all 12 sides, I added a calendar sticker from the 2017 Standard Mini Calendar sticker set (but the 2017 Decorative Mini Calendar sticker set would work great, too!) and a coordinating seasonal icon sticker from the Calendar Companion sticker set to each circle. 


Once I had all of my pieces decorated, I just had to adhere them together with a nice strong adhesive. I chose to fold my tabs out, so my geometric shape has "petals". If you want a cleaner shape with flat seams, just fold the tabs to the inside of the dodecahedron instead of the outside.  


I can't wait to use this fun, interactive geometric desk calendar when 2017 rolls around! Where would you put a calendar like this?  And by the way….what a great gift this would make!  

Wednesday, October 28, 2015

October Planner Pages/Calendar by Juliana (and bonus card)


Hello SRM Fans! It's Juliana here with you today and I'm sharing how I've used the SRM Stickers 8x8 Calendar to create my version of a planner. I recently realized that I needed a better way to keep track of some of my DT assignments, along with other important events and activities. Although this project is for October, the idea can work for you throughout the year!

As I was trying to come up with a system that would work for me, I remembered having an 8x8 calendar from SRM Stickers. When I pulled it out, I knew it was just the right size for what I needed. I truly believe you have to find a system that works for you. Some of us have more activities, meetings and appointments in our lives than others, so I encourage you to check out your options and figure out what will work best for you. 

SRM Stickers Blog - October Planner Pages/Calendar by Juliana - #planner #calendar #october #halloween #months #numbers #stickers #DIY

Now, when it comes to decorating your planner or calendar SRM Stickers has you covered! From their wonderful Calendar Month and Calendar Companion Stickers to their We've Got Your Border and Sticker Stitches, you are sure to find exactly what you need!

SRM Stickers Blog - October Planner Pages/Calendar by Juliana - #planner #calendar #october #halloween #months #numbers #stickers #DIY

For my October page, I went with a Halloween theme. Along with the SRM Stickers, I used some colored markers in colors that coordinated with my Halloween theme. It came together so quickly with the help of the awesome SRM Stickers and it has been really helpful for keeping me more organized this month. I will definitely be continuing to use this calendar and I've already started getting my November page ready to go.

So how are you using SRM Stickers in your planner? You can share them with us in the SRM Stickers Planner Sticker Fun Facebook group! We can't wait to see them!

And because I love Halloween so much, I thought to share with you this Halloween card I created using SRM's Jane's Doodles Get Candy Stamp along with clear Sentiments from SRM's Stickers by the Dozen and Sticker Stitches.  


HUGS and Happy Haunting to you all!
Juliana

Tuesday, June 23, 2015

Wall Glass Calendar by Cathy Andronicou


Hello!  Cathy Andronicou With you today!  Family lives are so busy these days it is often difficult to keep track of all that is going on. At our home we have added a glass panel to our wall with an acetate square calendar month behind to help record all the important events for the month.  I'll be using SRM's new Chalkboard Markers. 

I was so excited to discover that my chalk markers work beautifully on the glass.  The thicker markers are great for adding symbols and bold lettering and the fine ones are just perfect for recording events.  And what makes them even more perfect for the job is that the writing wipes off easily with a dry eraser or a damp cloth!


SRM Stickers Blog - Wall Glass Calendar by Cathy - #calendar #chalkboardmakers #fluorescent

On this project I used SRM's Bistro Florescent Chalk Markers both the 6mm & the Fine Tip

I have also done a little video showing how easy it is to write on and wipe off.
Enlarge to view and Enjoy!


Here's some of the products I used on today's project.  And a few others that I plan to use in the future! :)


Thanks for stopping by.  And happy crafting!

Wednesday, November 26, 2014

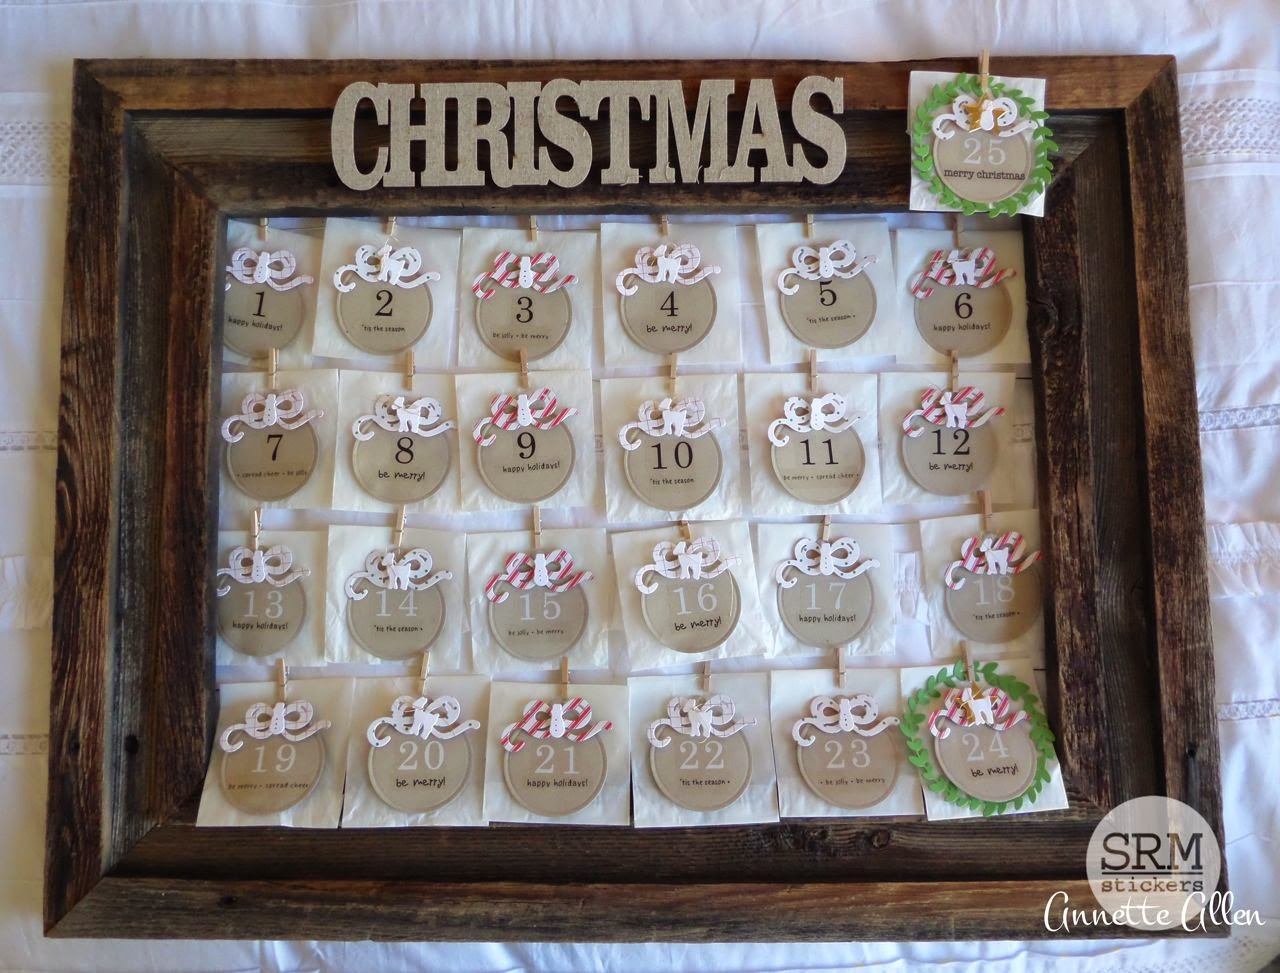
Christmas Advent Calendar by Annette


Good Morning SRM Stickers friends! Annette Allen here with you today to share a fun advent calendar.  What a great way to countdown to Christmas!  Be sure to click on each image to enlarge it and see all the details.

SRM Stickers Blog - Christmas Advent Calendar by Annette - #christmas #calendar #adventcalendar #stickers #glassinebags

I have always wanted to make an advent calendar for Christmas and with all the fun goodies SRM Stickers has to offer well it just came easy. I started with SRM Glassine Bags 3.25x4.75 Flat and used Stickers We've Got Your Number White & Black Large. I used a die for the little kraft ornament.
Next I added some of favorite Christmas sayings from We've Got Your Border Christmas, Stickers By the Dozen Christmas and Stickers By the Dozen Gingerbread Man.

 I folded the Glassine Bags and added a cute clothes pin for hanging.

SRM Stickers Blog - Christmas Advent Calendar by Annette - #christmas #calendar #adventcalendar #stickers #glassinebags

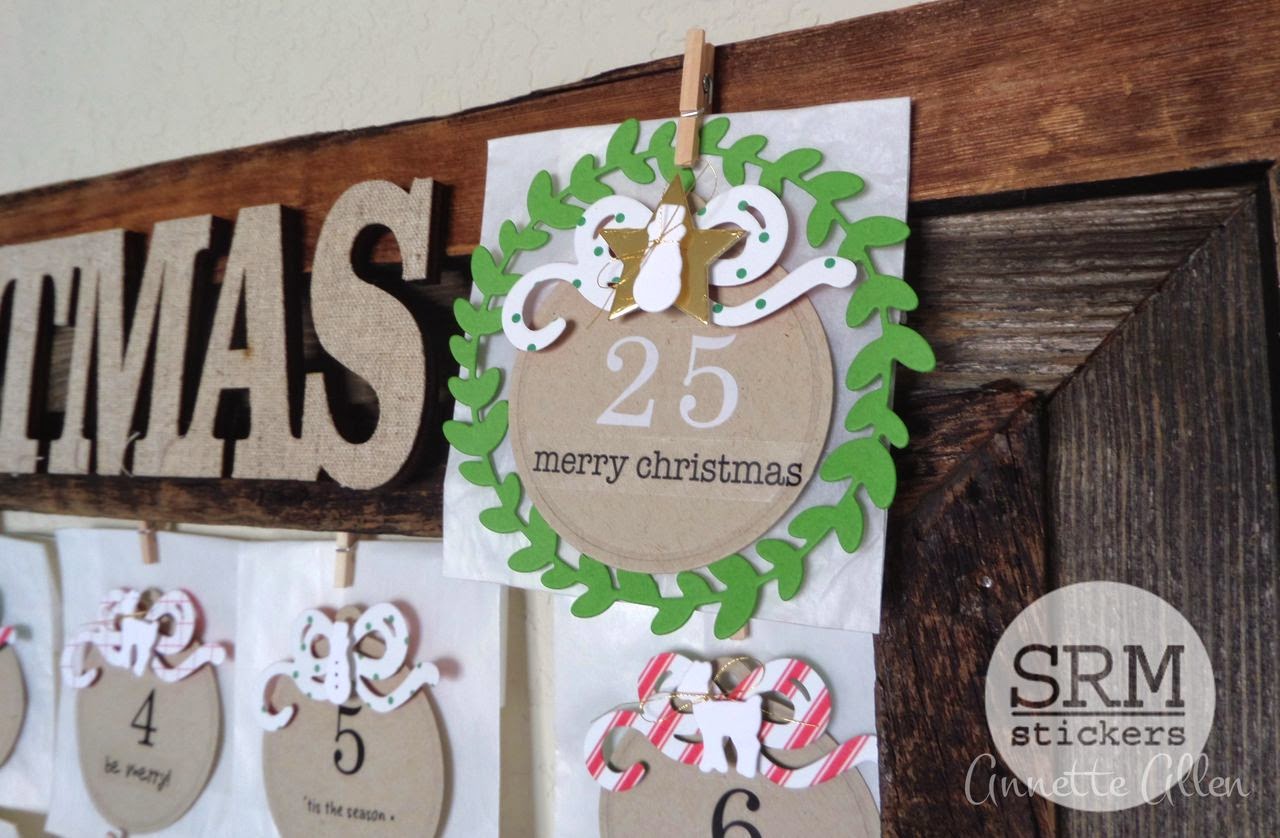
Of course Christmas Eve and Christmas have to be super special so I added a die cut gold star and green die cut wreath. 

SRM Stickers Blog - Christmas Advent Calendar by Annette - #christmas #calendar #adventcalendar #stickers #glassinebags

I thought I would finish each day off with a fun die cut bow rotating each day with a sweet deer wrapped with gold thread and a fun snowman. Hanging them with these little clothespins makes for an easy project. Making this the perfect way to countdown my favorite time of year. 

SRM Stickers Blog - Christmas Advent Calendar by Annette - #christmas #calendar #adventcalendar #stickers #glassinebags

I used an old barn wood frame topped off with a fun Christmas sign. 

SRM Stickers Blog - Christmas Advent Calendar by Annette - #christmas #calendar #adventcalendar #stickers #glassinebags

Now who's excited for Christmas?  It's time to start counting down!
Over this Thanksgiving weekend it might be fun to create a countdown Advent calendar with your family.  What a great project that would be!