Showing posts with label banner. Show all posts

Tuesday, February 6, 2018

Love U Banner by Tangii


Hello, Tangii here.  For today's project, I've made a Valentines Banner.  I've used red, pink and white heart doilies, twine and a few sticker sheets.


The banner is fairly long and hard to photo so below are some close-up shots.  The letters I cut out on my Silhouette machine, I adhered them to the middle of each doily then had some fun with stickers!!!


I used the Valentines Stickers by the Dozen, Valentine Say it with Stickers, and Valentine Express Yourself sheets some of the longer stickers I cut up (the hearts and shorter sentiments).


The Jute Twine is great for making triple loop bows, I used red, black and pale pink.  This banner was so easy and quick to put together, you can easily make one for every season, holiday, event, etc!


Happy Crafting!

Monday, January 29, 2018

Valentine's Banner by Angie


Hi friends! Angie here with you today to share a cute idea for Valentine's Day.


I made this  banner using just a few simple supplies.

I used the red heart doilies, white lace doilies and the scalloped punched pieces as the basis for my banner. I just layered them up and attached them together with a little glue. 


I used some chipboard letters from my stash to spell the word 'love.' I gave them a coat of black paint and added some black glitter on top of the wet paint. Once the letters were dry, I glued them in the center of the scalloped pieces.


On the two end pieces of the banner, I layered the doilies and scalloped pieces as before and then placed a heart sticker from the Valentine's themed stickers by the dozen set in the center. 


I strung the banner together using some black twine.
Give it a try!! This would make a fun project to do with your kids! 

Tuesday, January 24, 2017

Valentine Banner by Amy Heller.


This week, while I am at CHA, we are sending lots of "love" your way!  Today I want to share one of my most favorite Valentine projects!  It's a throwback to 2011 but well worth a re-visit!

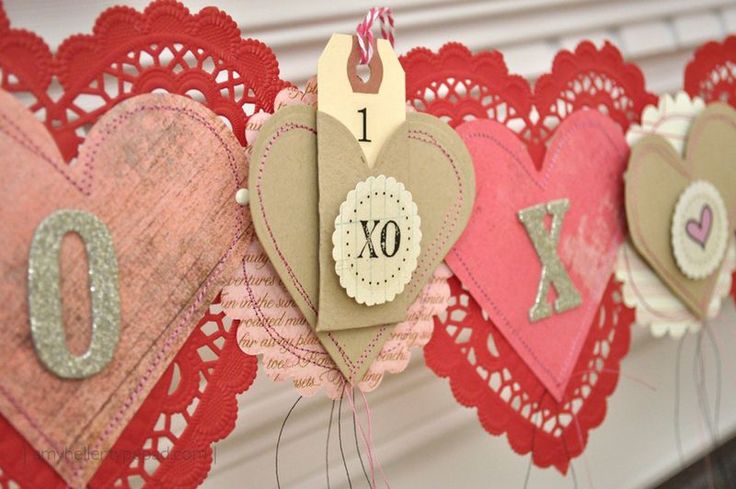
Here's a beautiful banner from Amy Heller using lots of SRM's heart doilies and Valentine stickers.  And don't forget the twine!


I love all the amazing details of this project!


Who wouldn't love this beauty gracing your mantle and a special way of saying "I Love You"?


Check out Amy's original post for all the details!


Monday, October 17, 2016

Crafting with Kids - Boo Banner by Karen


Do you like to craft with your kids? I love to craft with my daughter, but I have to admit - sometimes it's really hard to let her do her own thing without me "directing" her. This month SRM asked me to create a project with kids and let them have fun! And guess what? We both did!


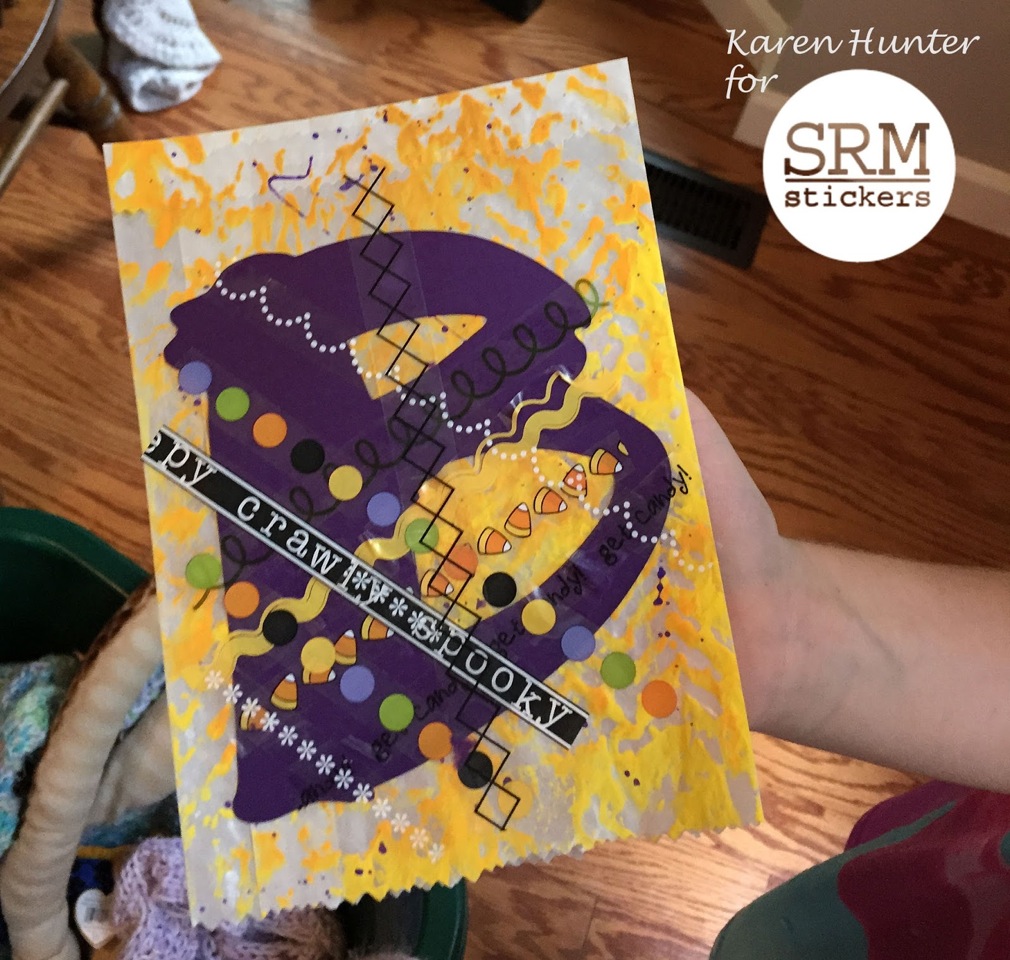
For this "Boo Banner" project I used 5 embossed glassine bags as the banner bases. I added some acrylic paints in yellow and orange for color and texture and let it dry. I let my daughter pick out a font for the letters and cut them out with my die cut machine. 


Then I gathered all my Halloween themed stickers from my SRM stash and handed them over to my daughter. Seriously, her eyes got as big as saucers at the sight of those stickers in her hands! 


I told my daughter to use the border stickers to decorate the bags and then we would add the letters on top. My idea was to keep everything in nice straight lines, but she had her own ideas. So, with a deep breath, I stepped back and let her create. As you can see, she piled on stickers and borders in all directions and you know what? It's awesome! Each piece is fun, colorful and original - just like her.


We attached the pieces to a long black ribbon with mini clothespins. On each mini clothespin we attached a white card stock circle with a happy little spider sticker. For each end of the banner we gathered several lengths of coordinating ribbon.


Letting your kids into your crafting stash can be scary at times, but it's also a wonderful way to celebrate and teach confidence in their own style and creativity. Plus, you'll both cherish the time you get to spend together and have a great project to show off and talk about!

For this project I used:

Friday, September 2, 2016

Burlap & Lace Birdie Birthday Banner by Karen


Hello Karen here today with a fun idea!  Used lots of SRM goodies on this project and they are all listed at the bottom.


We recently were able to celebrate the 70th Birthday of a wonderful and sweet woman - my husband's mom. To add to the day's celebration I created this fun birdhouse themed banner to hang at her party. I really like how the natural look and feel of the burlap ribbon and twine plays with the soft colors and elegant touches of lace ribbon and doilies.


I
used my Cricut to cut the basic banner shapes (3 layers). I cut 4 inch doilies in half and adhered a half on the bottom portion of each base piece and added a row of black stitching sticker at the midpoint. Each two layered letter is adhered with pop dots for added dimension.


I love to add words and phrases to my projects and SRM clear stickers are perfect for doing just that. I used a variety of sticker sheets to find just the right words in just the right sizes to add fun details.


I wanted to add a little bit more to my banner and a strip of the new raw-edged burlap ribbon behind each banner shape added another great layer and natural element. I used mini clothespins to hang the pieces from the new jute twine.  To dress up my banner I also added several lengths of ribbon to each end, including the wired burlap (curled so cute!), white lace, and bit of the blue in a blue striped ribbon from my stash.


For this project I used:
3 colors of cardstock
 White 4" Doilies 
White Lace  
Burlap Ribbon 
Burlap Wired Ribbon 
Jute Twine in white
Sticker Sentiments - Happy Birthday  
We've Got Your Border - Birthday 
Stickers By the Dozen - Birthday 
We've Got your Sticker - Hello 
Stickers By the Dozen - Birthday Birdie 
We've Got Your Border - Sticker Stitches Black 

Thanks for joining me today!  Hope you have a crafty day!

Friday, February 20, 2015

St. Patrick's Day Doily Banner by Christine


I have always wanted to make a banner using doilies and when I saw the new green ones that SRM has I knew it was gonna have to be a St. Patrick's Day banner!  Christine joining you today with a DIY banner that uses SRM's gorgeous green and gold doilies! This project makes me really wish I had a beautiful fireplace mantle - since I don't we have it hanging up in our kitchen entryway.

SRM Stickers Blog - St. Patrick's Day Doily Banner by Christine - #banner #stpatrickesday #doilies #golddoilies #punchedpieces #twine #DIY

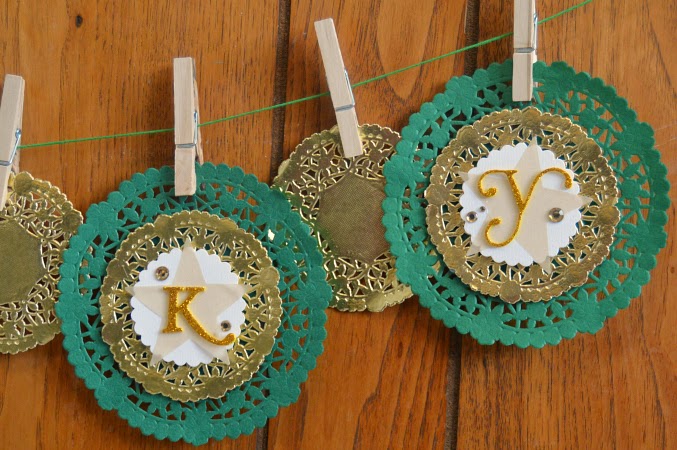
This was super easy to create - let me share with you how I did it!  I used foam adhesive and layered a Gold Lace Doily on top of a Green Lace Doily.  They layer perfectly because the Gold ones are four inches and the Green ones are six inches.  

SRM Stickers Blog - St. Patrick's Day Doily Banner by Christine - #banner #stpatrickesday #doilies #golddoilies #punchedpieces #twine #DIY

I used gold vellum to cut out stars and attached those to Large White Punched Pieces.  These again layered perfectly onto the doilies as they are 2 1/2 inches in size.  Adding letters to spell out LUCKY and some gemstones was the final touch.

SRM Stickers Blog - St. Patrick's Day Doily Banner by Christine - #banner #stpatrickesday #doilies #golddoilies #punchedpieces #twine #DIY

I hung them on a piece of Solid Peapod Twine using clothespins. If the look of clothespins isn't your thing or you don't have any - you could just string the twine through the doilies and make a great banner too!

I love it when companies make such versatile products - good for not just paper crafts but home decor too!  We'd love to see what kinds of projects you are making using SRM Stickers goodies!

Tuesday, January 13, 2015

Valentine Doily Banner by Tessa


Hi!  It's Tessa here with you today!  After taking down my Christmas decorations my house felt so boring.  I decided to spruce it up with some Valentine's decor.  I created a fun and frilly banner for my mantel using an assortment of SRM's Doilies.


This was fairly simple to make. I started by cutting 1" strips of white paper and attaching them end to end until it was the same width as my mantel.  I used a gluestick to glue down the doilies along the long strip of paper.  I varied the size, color, and position of each one for interest. 


Once my doilies were down, I added some large and small scallop punched pieces in pink, red, and white.  I added some heart stickers from the Stickers by the Dozen/Valentine Sticker Sheet to the smaller scallop pieces.  I also added a sprinkling of sequins and a few bows tied with Pink Sorbet Baker's Twine.


I love the variety of doilies in the SRM store - hearts, metallics, large and small!  They are one of my favorite SRM products!  And since I created this banner, SRM has added some new doilies that I love in black, green, red and white.


It didn't take too long to put together and I think it looks great up on my mantel.  I can't wait to add a little bit of red and pink throughout the house now!  Do you decorate for Valentine's Day?  
Thanks for joining me today
-tessa

Thursday, August 14, 2014

Pair of Punched Pieces Cards by Stacey


Hi SRM Stickers friends!
Stacey Schafer here with a pair of cards using SRM's new Punched Pieces and clear stickers.  A friend of mine is expecting her first baby and it's a BOY!  I will keep this in my stash for her when it gets closer to the September arrival!

SRM Stickers Blog - Pair of Punched Pieces Cards by Stacey - #baby #cards #punched pieces #stickers #doilies

I used a delightful White Lace Doily - 4" Round,  Small & Medium Scalloped Circle - Punched Pieces and a Sentiment/Baby sticker!  Do you have any baby arrivals coming up that you need to create a darling card for?!

SRM Stickers Blog - Pair of Punched Pieces Cards by Stacey - #baby #cards #punched pieces #stickers #doilies

And here's another card I made using those fun Punched Pieces!  It's a thank you banner card!

SRM Stickers Blog - Pair of Punched Pieces Cards by Stacey - #thanks #card #punched pieces #stickers #twine #banner

I created a banner using Small Pink Scalloped Circle Punched Pieces decorated with Stickers by the Dozen/Thank You, then finished off with some The Twinery Marigold Baker's Twine.  

SRM Stickers Blog - Pair of Punched Pieces Cards by Stacey - #thanks #card #punched pieces #stickers #twine #banner

For some added pizzazz, there are some extra sentiments and sentiment strips near the top and bottom of the card front.

SRM Stickers Blog - Pair of Punched Pieces Cards by Stacey - #thanks #card #punched pieces #stickers #twine #banner

Have you tried creating a banner with some SRM Stickers?!  It's totally fun!
Thanks for visiting us at the SRM Stickers Blog today!  We love sharing our craftiness with you!

Tuesday, February 11, 2014

Baby Shower Favors by Roberta


Roberta Rosi has created a wonderful baby shower for us today using SRM's new clear bags measuring 8" x 1", the new Take 2 Baby Stickers and some solid yellow twine.  Delicious! 

First, Roberta put some candies in the new transparent bags and decorated them with a big bow of white paper, a tag created by attaching the new baby stickers to white card stock and then tucking the tag under the bow with a piece of yellow twine.  Perfection!

SRM Stickers Blog - Baby Shower Favors by Roberta - #clear bags, #favors #stickers #twine #doilies

The new Take 2 Baby stickers are oh so sweet and perfect for these favors.

SRM Stickers Blog - Baby Shower Favors by Roberta - #clear bags, #favors #stickers #twine #doilies

Roberta used the same stickers to decorate some straws.  Fun!

SRM Stickers Blog - Baby Shower Favors by Roberta - #straws, #favors #stickers #twine #doilies

And using SRM's new doilies as her base, she created a banner to decorate the house, using the same Take 2 Baby Stickers.

SRM Stickers Blog - Baby Shower Favors by Roberta - #clear bags, #favors #stickers #twine #doilies

SRM Stickers Blog - Baby Shower Favors by Roberta - #clear bags, #favors #stickers #twine #doilies

Put them all together and they are oh so sweet!


What a special set of baby treats!  Thanks Roberta for your wonderful ideas!

Monday, May 20, 2013

4th of July Banner by Melanie

It's always a banner day when Melanie Jarocki creates an altered project using SRM Stickers!  Making banners is one of Melanie's favorite crafty pastimes. Here's a banner she put together using some patriotic stickers and twine.  How fun!


Look closely and you will see that Melanie used mini-sentiments from both the Patriotic Stickers By The Dozen and We've Got Your Border on the bottoms of each pennant.  And added the graphic red, white and blue borders along the top of each pennant.  


To add extra dimension to the banner, Melanie placed the flag stickers from Stickers By The Dozen onto punched circles and tied them between the pennants. The Maraschino and Midnight Blue twine are just perfect, tying it all together.  Bold red stitching around the border of each letter and punched stars at the bottom of each pennant are perfect finishing touches!