Showing posts with label Shaker Card. Show all posts

Wednesday, November 15, 2017

Teacher Shaker Card by Michele


Good morning friends!
Michele here with a card that is near and dear to my heart!
I am a 4th grade teacher and I love to recognize other teachers for the hard work and dedication they give every single day. 
My children were blessed to have some pretty remarkable educators in their lives!


I created a shaker card using oval dies and the little apple stamp from the Healthy Plans Clear Planner Stamp.   The apple was stamped repeatedly around the frame, colored in with Copics and given a coat of glossy accents.  Once it was dry, I used the White Reminisce Gel pen to add a highlight to each apple.  


I filled the center with coordinating colors!  I used the teacher sticker from the Quick Cards Back to School Stickers. 


Thank you so much for popping in today!
Have a great day!!

Friday, September 29, 2017

Shake It Up Baby Card by Shantaie


Hi!  I'm Shantaie and I want to share a few different ways to use SRM stickers the way you would use a stamp, patterned paper, even an envelope seal!


When we think about stickers sometimes we think about the ease of use ....and rightly so, but we can also think about the versatility and function of clear stickers. 


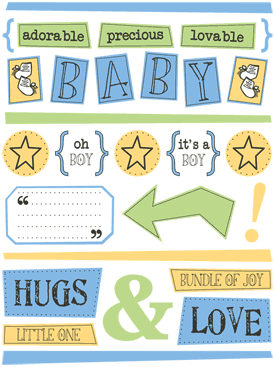
For my baby card I knew I wanted to make a sweet little shaker card, I cut 3 circles and used the three stars from the free style baby boy sheet as the base of my shaker, this takes the place of stamping AND coloring in one simple step! Saving me time, space, and money... yay!


I filled my windows with micro beads, sequins, and glitter. I used a double bow of jute and added a strip of white cardstock with a fancy sentiment on it, again in place of a stamped sentiment. Just below a little piece of the baby boy border.


Don't forget to add stickers to the inside of your cards to tie your sentiment or greeting together, here I have again used the baby boy we've got your border as well as the free style baby boy for the main greeting, adding both color and a fun font, SRM stickers are designed to work together, so the fonts are easy to read and are really pretty!


To create a handsome gift card holder I folded the top of this little kraft dots bag. Close to the bottom a strip of leftover patterned paper was added, and a layer of bitty stars and a strip of that we've got your border baby boy a star is born saying ties it together. 


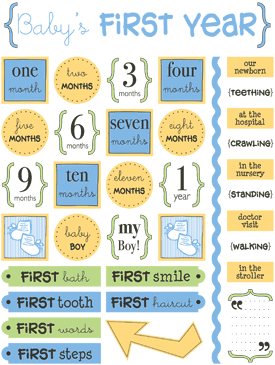
I just love the live life baby's first year sheet and I used another circle sticker from that sheet to add color, and again a sweet dual font. 


I plan to put this in with the card as it is flat and will fit inside the embellished envelope. New parents can use a gift card to stock up on all those supplies that seem to always be needed!

I encourage you to look at SRM stickers as not just an easy way to decorate but as a really useful tool in your creative projects. 

Monday, March 27, 2017

Celebrate Shaker Card by Amber


Hello SRM fans! It's Amber here, today I have a shaker card to share. Recently I have been loving and drooling over all the fabulous shaker cards I have been seeing on social media lately. For some reason that is beyond me I have never created one before today. I had lots of fun creating this fun A2 sized shaker card. Below you will find a few step by step instructions you can follow along with to create your own shaker cards.


Step 1. Cover a white A2 sized card base with some patterned paper.

Step 2. Choose a coordinating piece of patterned paper and cut it slightly smaller then your card base.

Step 3. Die cut or punch a circle or any other shape out of the upper center part of your smaller patterned paper panel.

Step 4. Flip your patterened paper panel over and add some double sided adhesive all around your die cut shape.

Step 5. Before attaching the acrylic take your die cut panel and center it over your card base. With a pencil lightly trace around your die cut window. This will make it easy to center your sentiment.

Step 6. Adhere a piece of clear acrylic to your die cut pattered paper panel. Set aside.

Step 7.  Use the pencil lines you drew in step 5 as your guide and add your sentiment to your card base. I used a clear Celebrate sentiment sticker from the Sentiment/Birthday sticker sheet.

 Step 8. Using the pencil lines as a guide again adhere some foam tape all around the outside edge of your pencil lines.

Step 9. Add a handful of sequins to your card base in between your foam tape.

Step 10. Adhere your die cut patterned paper panel with the acrylic to your card base sealing/locking in all your sequins.

Step 11. Add a cute little fussy cute image to the front of your card. I used Easter Basket Anya from The Greeting Farm to complete my card.


That's it, you now have a fun little shaker card. I hope you enjoyed my card today. Thanks for visiting!
SRM Sticker Supplies
Sticker Sentiment/Birthday

Friday, March 11, 2016

Home Sweet Home by Shantaie


Hi there! Shantaie here today to share a stamped card that is close to my heart.  I know for me home really is where my heart is, I travel for work and spend my time divided between two homes. I spend some months in Florida and some in New York.....it's not as romantic as it may sound as its all for business, but as long as my family is with me my heart is full!


"Home" comes in all shapes and sizes too, I made this card in honor of a friend who is selling her home and downsizing to a sweet little camper, what an exciting and fun adventure she is about to embark on! I felt a shaker card filled with pretties was the perfect way to go as a nod to her "shaking up" her life in such a bold and beautiful way! Sounds like so much fun doesn't it?


I used the super cute Jane's Doodles Home Sweet Home stamp set to create the house, clouds and hearts, and of course the sentiment stamped to a tag. 


The card is wrapped with a lace bow and accented with gold shimmer twine  and an epoxy button. The coloring is always so much fun for me, I used copics to shade the clouds and house, and those floating hearts!

A house or a hut home is most certainly where your heart resides! XOXO Shantaie

Wednesday, March 2, 2016

Shaker Box Card by Juliana


Hi everyone! It's Juliana here with you and today I'm sharing a shaker card I made using the adorable Jane's Doodles Coffee Time stamp set. I might be a little partial to this stamp set, since I kind of love coffee, but this has to be one of my favorite stamp sets yet!


I stamped each of the images onto watercolor paper and colored them in using a variety of Distress Inks. I then fussy cut each image and layered them on the card front.


To create the shaker aspect, I used Fun Foam, double sided adhesive and some circle dies.  I always find filling the shaker to be the most fun! I used the gold heart sequins to help focus on the sentiment "You warm my heart".  Aren't those gold heart sequins fabulous?

So what kind of fun cards do you like to create? Have you ever tried your hand at a shaker card? If not, I highly recommend giving it a try. They are super fun to make and even more fun to give!

HUGS!
Juliana

Tuesday, July 14, 2015

A BIG Thank You by Shantaie and WINNER!


Welcome to the new term of a new team of All Star SRM Designers.  First up is Shantaie Fowler.  So excited to have her back. 


And now let's hear from Shantaie in her own words…

******

Hello!  Shantaie with you today with a BIG Thank You!

SRM Stickers Blog - A BIG Thank You by Shantaie - #card #shaker #BIGStamps #thankyou

My love for paper crafting started with stamps, and oh my, I love these BIG SRM Thank you Sentiments in a BIG way!  

SRM Stickers Blog - A BIG Thank You by Shantaie - #card #shaker #BIGStamps #thankyou

I imagined a shaker card the moment I laid eyes on this BIG stamp, and I adore that big sentiment in the background all surrounded by sequins! It just makes me smile!

SRM Stickers Blog - A BIG Thank You by Shantaie - #card #shaker #BIGStamps #thankyou

I put my die cut machine to work for almost everything I make, I cut this card with my Silhouette as well as the leaves and swirls. My custom sequin mix is gold, pink, and copper to blend with the patterned papers, and the sentiment is stamped in a peachy coral to really stand out!

I hope you are loving these BIG Stamps as much as I am, let us know what you think!
toodles~ Shantaie

******

And the WINNER from the Virginia Lu blog post yesterday is: 

 Lisa's Creative Niche said...
Oh I love these! Beautiful mix of projects too!
Please email me with your mailing address Lisa and 
your goodies will be on the way!  susan@srmpress.com 

Wednesday, July 1, 2015

Make A Wish by Michele


Good morning fellow crafters!
Michele here and I have been on a shaker/water color kick lately! I shared one of these cards with you yesterday but I just had to make another!  I guess I like to shake it up! 

Here's my latest shaker card.  I seriously need to step away from the sequins!  I created the shaker portion with my rectangular dies, cardstock, and acetate. 

SRM Stickers Blog - Make A Wish by Michele - #card #shakercard #birthday #stickers #michelekovack

I use foam tape to adhere it and create depth for those little buggers to "shake" around! And of course the perfect finishing touch is a birthday sticker from SRM.

SRM Stickers Blog - Make A Wish by Michele - #card #shakercard #birthday #stickers #michelekovack

Here's one more look! 

SRM Stickers Blog - Make A Wish by Michele - #card #shakercard #birthday #stickers #michelekovack

 Thanks for popping by today!! Hope you "shake it up" soon!


Have a great day!

Tuesday, June 30, 2015

Birthday Shaker by Michele


Howdy! Michele here with a birthday shaker card to share with you today!  Honestly I never seem to tire of them! They are so fun and interactive!  I used my Silhouette to cut the bow and leaves.  I added loads of glitter for a bit of sparkle. 

SRM Sticker Blog - Birthday Shaker by Michele - #card #shaker #birthday #stickers

I used various Spellbinder's dies to create the circular shaker part.  I was a bit light on my sequins though....as you can see when the card is vertical, they sort of disappeared! LOL!  I've learned you can't be skimpy! I added a sentiment from SRM Stickers from the Stickers by the Dozen collection.  It was adhered to vellum and cut into a banner shape.   
A few pearls finishes the card off. 

SRM Sticker Blog - Birthday Shaker by Michele - #card #shaker #birthday #stickers

Have a great day my friends! Thanks for popping in! :)