Showing posts with label Faith Stamps. Show all posts

Friday, March 16, 2018

Faith Cards by Melanie


Hello! Melanie here today and I am sharing a couple of cards I made using the new Bible Margins Love Clear stamps.


These stamps are wonderful for stamping in Bible margins or for bookmarks, too. I used a masking technique to just use a portion of the stamps for my cards. I used a small sticky note to cover the part of the stamp I wasn't going to put on the card. Then I inked the stamp. After removing the sticky note, I could stamp the portion with ink onto the paper.


 By using the same basic overall design for both cards, I was able to complete them rather quickly. I varied the patterned papers and width of the strips.


 The Sticker Stitches are probably my #1 go-to product by SRM. I use them all the time. For these cards, the dot stitch was a perfect way to anchor the sentiment banner to the card.


Wishing you a "LOVE"-ly day! :)

SRM Products used:

Monday, April 10, 2017

Let the Earth Be Glad by Michele


Good morning! Michele here with a card using SRM's new set called, Heaven & Earth.  I decided to stamp the trees in a rainbow pattern....because who doesn't love rainbows?  I used my Mini Misti to line up the sentiment.  I wanted the bottom portion to stamp directly over the bottom of the trees.


Once the stamping was complete, I used Stickles on each of the trees to give it shimmer and dimension.   


I tore the top of the card and backed it with a piece of black card stock to make the image pop a bit.  I adhered several rhinestones and tied Marigold twine vertically. 


Thank you all for stopping today!


Tuesday, November 8, 2016

2017 Mini Calendar Gift Set by Shantaie


Hello!  Shantaie here today with a fun idea. I challenged myself to create a more updated look and use of the traditional mini calendar, and to make it pretty enough to give as a gift. I set myself up for quite the challenge. After all paper crafters have been creating mini calendars for many years, how could I do possibly anything that hasn't already been done?


The answer was I couldn't. Not really. So I sought not to reinvent it, but to reinvent the way I might use a mini calendar in my daily life. I would most likely use it in tandem with my daily/ weekly planner, and I figured I would want it to be happy, colorful and loose so I could attach the month to my planner or on my desk.


What I came up with is 12 separate and distinct 3 X 4.5" pages cut from bristol, stamped in black with splashes of gellato in silver and pink. 


For January and February I used the love birds stamp set and for march birthday plans stamp set.   As you create your calendar pages, it is perfectly fine to stamp into the calendar area as long as you don't have large areas of solid black. The mini calendar is a clear sticker so your design will come right through! 


April's flowers are from the just believe stamp and May's sentiment is from love one another.  I love the big bold happy on June from the aptly named "big Happy" stamp set! 


For July I used Noah's ark and August Autumn blessings September (one of my favorite pages) uses the healthy plans stamp set.


We revisit Autumn blessings for October and Big Thank you for November, finishing up the year with Big Merry for December. 

I popped my calendar into a glassine bag, decorated it with patterned paper, ribbon, twine, a pom-pom and a sticker and my gift is ready to give!


 A mini calendar set not reinvented, but revamped maybe!
This bold and useful calendar is just a little different from the ones I might have made years ago, and 2017 is already looking pretty good! 

Here are all of the SRM goodies I used in my project.  


Oh what a lovely stash!

SaveSave

Tuesday, September 27, 2016

Simple Brush Lettering & Lunch Box Notes by Karen


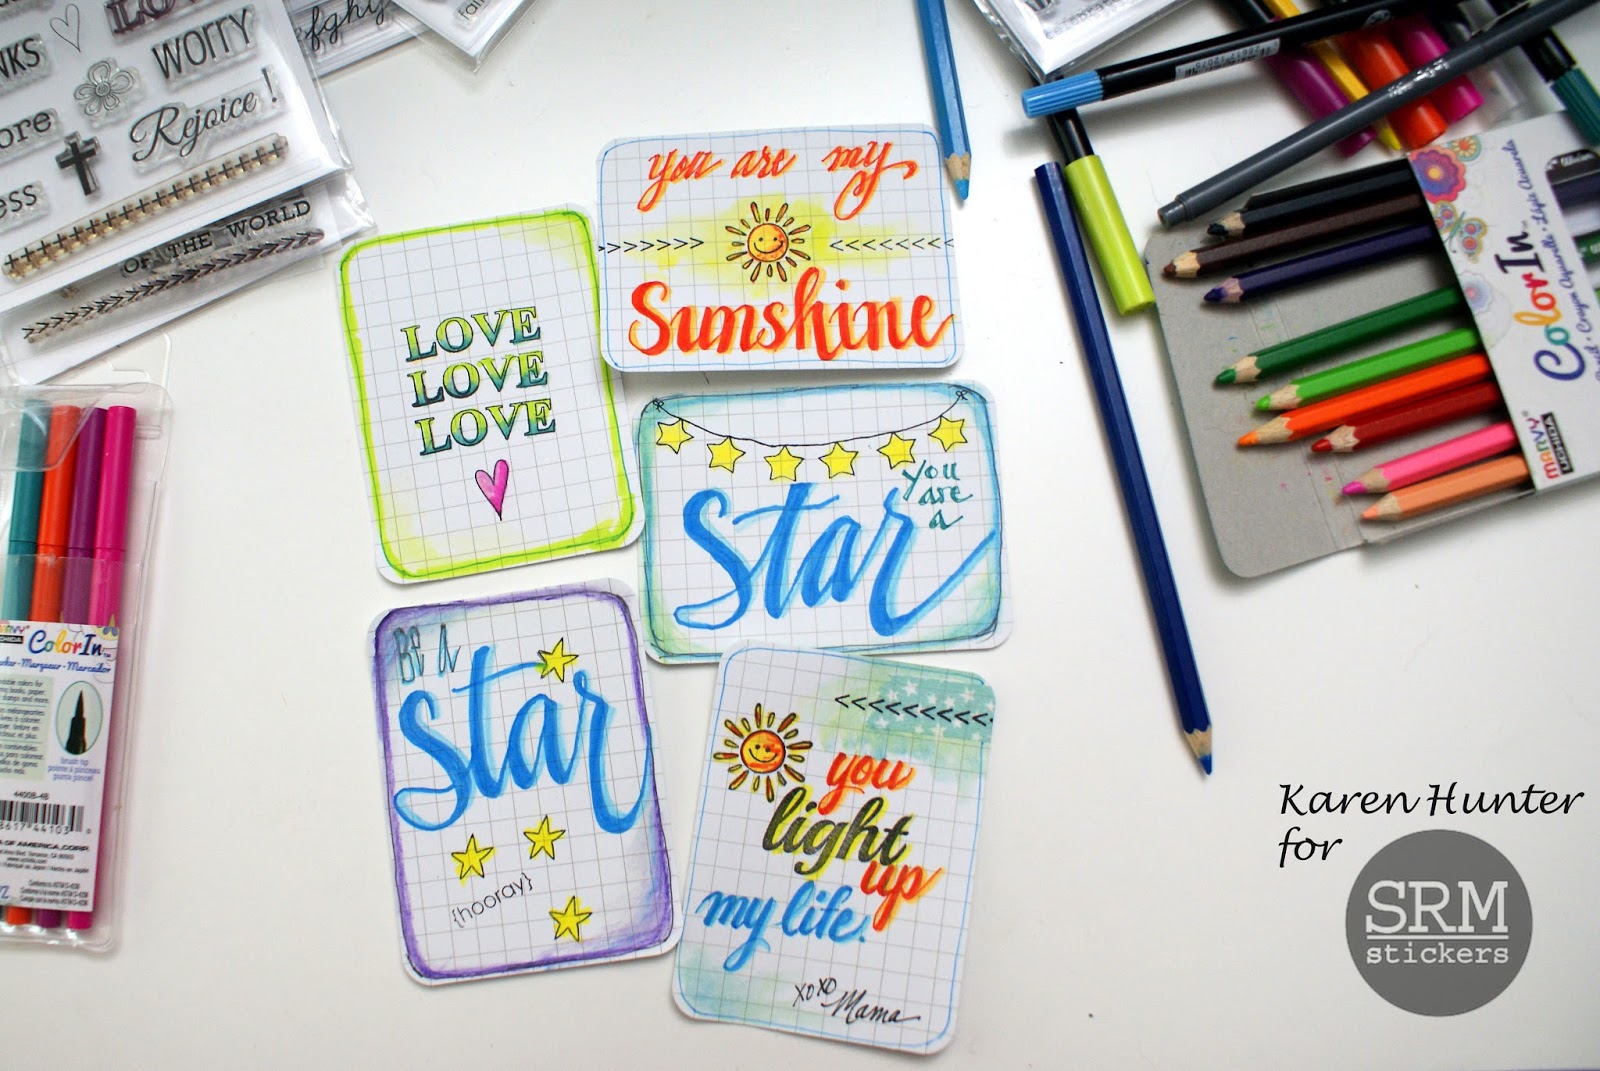
Hello!  Karen here today to share a little treat that I made for my daughter.  I love stashing little notes into my daughter's lunch bag. Sometimes it's just a quick little message scribbled on a scrap of paper, but I also like to pre-make cute notes to tuck in for her to discover and let her know I'm thinking about her and think she's amazing.


My SRM Faith and Planner stamps are giving me great inspiration for these notes. I used several stamps, brush markers (LePlumeII) and my ColorIn watercolor pencils to create a set for next week.


I've gotten lots of comments complementing my lettering on my Bible journaling pages. I'm no expert and I have to admit to having trouble achieving the look I want with just a brush marker. However - the dual tipped markers give me a great "cheater strategy" in getting the brush lettering look I like. Take a look at my simple brush lettering technique using Marvy Uchida LePlume II dual tipped markers in this video.


Now you can make your own little notes - for lunchboxes, the bathroom mirror, to send in the mail, or leave one for a coworker to find. Enjoy!


For this project I used:
SaveSaveSaveSaveSaveSave
SaveSave