Showing posts with label Seasonal Plans stamp. Show all posts

Friday, April 6, 2018

Spring Cards in Gift Box by Angie


Hello SRM friends! Angie here with you again today to share some spring cards and a cute box to gift them in!!


I made all three cards using stamps from the Just Believe stamp set. For the blue card in the middle, I stamped the flowers and leaves on vellum. Then I used watercolor markers and water to give them the watercolor look. Then I just fussy cut them out. I placed the flowers and stems vertically down the card and used foam under the smaller flowers to add some dimension. 


I made the blue background by using distress oxides and water to give it the bleached look. I added some gold and pink ink mist splatters as well. 


The word 'spring' is from the Seasonal Plans stamp set.


For the front of this pink and white card, I added this fun doodle stamp from the Stamped Stitches set. I love how it adds so much to the card will such little effort!! I stamped and fussy cut the flower and stems and gave the card a fun edge by using a punch to make the scalloped border. 
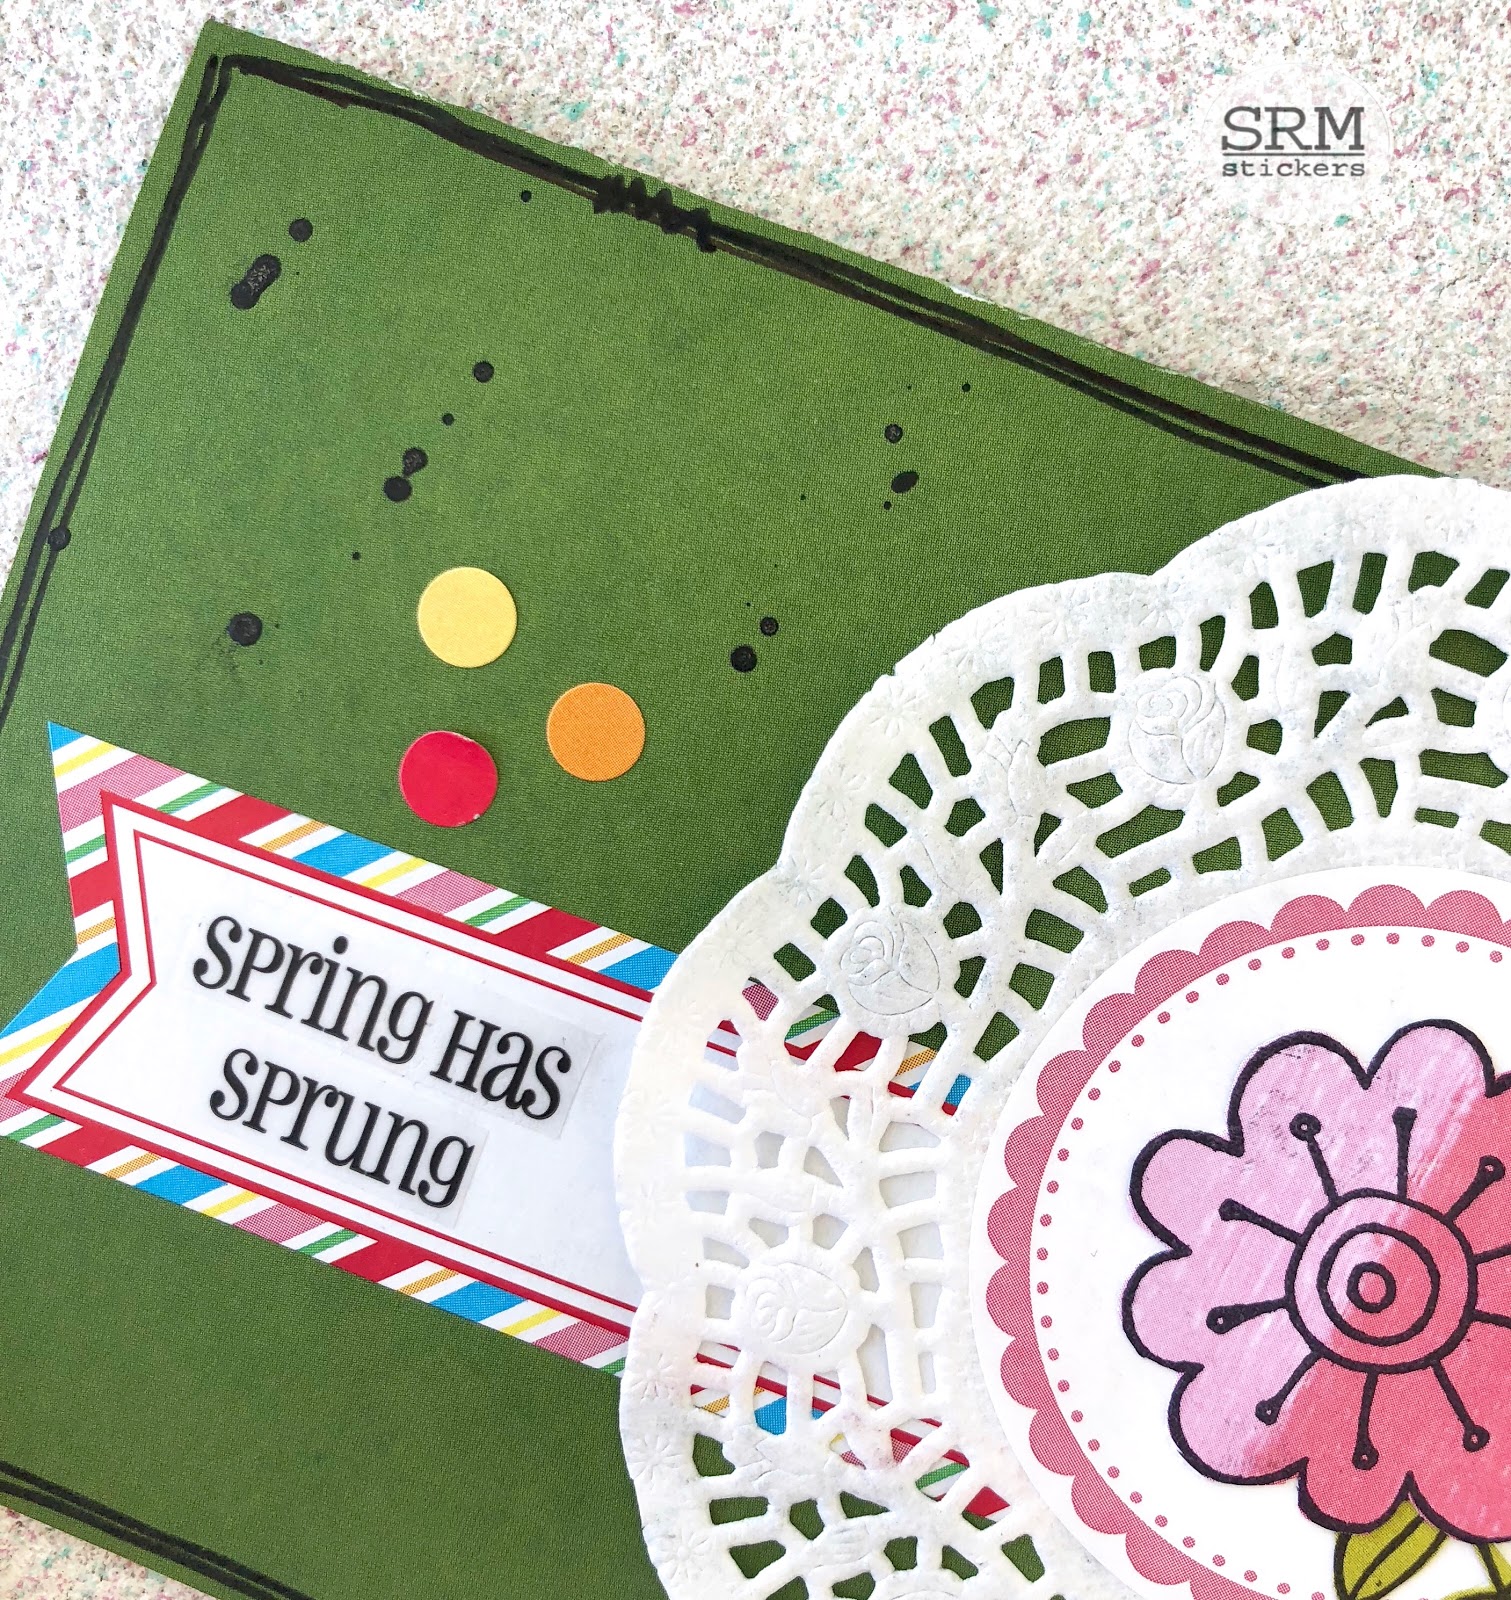

The green card uses lots of fun SRM products such as the small lace doilies, bright blank labels by the dozen and the Easter Express Yourself stickers. 


For the gift box, I used the A2 Clear Card Box. I punched two holes in the top and simply threaded the twine through the holes and made a bow. SRM has lots of twine to choose from. The flower borders on the box are from the Thank You Stickers by the Dozen set and the green label in the middle is another Labels by the Dozen sticker. I added another fussy cut flower, stem and a bird to finish off the box. 

Thank you for visiting the blog today. I hope my project gives you some inspiration to create your own!!

Wednesday, December 13, 2017

Stamped Gift Boxes by Samantha


Hello! Samantha here today to share some stamped gift boxes for cute and easy Christmas gifting. 

  
For these all you'll need are some kraft boxes, Seasonal Plans Planner Stamp set, watercolor pencils, jute twine, and stamping ink. 


The kraft boxes come in lots of different sizes, perfect for wrapping up small gifts like jewelry, gift cards, and Christmas ornaments. Just simply stamp your images while the box is flat, then assemble and gift. 


 If you're creating more than one box for the same person, stack up the boxes and add a little jute to tie them all together. 


If you're like me and don't love wrapping, these sweet stamped gift boxes are a fantastic way to package up gifts without ever touching a roll of wrapping paper!

Friday, October 27, 2017

Calendar Fun by Angie


Hello SRM friends and fans! Angie here with you today.

The new year will be here soon enough, so why not design a SRM calendar for yourself or as a gift?? SRM has so many amazing stickers and stamps that would look amazing on your calendar!

I started with the adorable 6 x 6 calendar, which is the perfect size for your desk or to sit in a small space around your home. 

I'm just sharing a few of my completed pages but I hope these examples will show you how quick and easy it is to decorate this calendar.


I stamped the months for the whole calendar using the seasonal plans stamps. I also used the small sticker numbers for all of the dates on my calendar pages. 


For the month of January, I embellished the calendar page with the snowflake found on the seasonal plans stamp set. I love that the stamp set has an icon to go with each month. I used some sequins from my stash to add some sparkle to the middle of each snow flake. The 'brrr..it's cold' is a sticker from the Live Life Calendar Year sticker sheet.


For the month of October, I used the adorable candy corn icon from the seasonal plans stamp set. I stamped them using black archival ink and then colored them in with markers. The candy corn border and the 'Happy Halloween' are stickers from the Stickers by the Dozen/Halloween set.


Lastly, November is embellished using the leaf icon from the seasonal plans stamp set and two stickers from the Thanksgiving Express Yourself sticker sheet. 

I hope these simple but functional examples will help you create a calendar that you will look forward seeing the whole year. 


Wednesday, September 6, 2017

Winter Treat Bags (A Bit Early!) by Michele


It's never too early to get a jump on your holiday projects right?  
I always find it funny when I am creating for Christmas and I am in shorts, AC, and it's 95 degrees outside! ;)
I am totally in love with these new linen bags!
I decided to add a dot of Silver Stickles to the center of each dot for added sparkle. 


The flowers and snowflakes were cut using my die cut machine. 
I added more Stickles to the centers of the flowers.  


I stamped the word "WINTER" on a tag and embossed it in white.  I stamped the snowflake in a pale pink on a circle and then adhered it to the tag.  I added silver STickles to the center of the snowflake. 


I added silver jingle bells, silver string and tinsel and glued it underneath my snowflake/flower combo. 


Thank you for stopping by today!