Friday, October 31, 2014

Best Witches by Michelle


Happy Halloween!  
Michele here with a fun Halloween card to share with you!It's no secret that I adore shaped cards.  Anytime I am in a creative rut I find a cute cut at the Silhouette store. I found this adorable witch's shoe. SRM Stickers are the perfect compliment and so easy to incorporate. I used the Best Witches sentiment from the Express Yourself collection. I placed it on cream card stock and cut it into a banner. I tucked it under my cute fuzzy spider. 

SRM Stickers - Best Witches by Michele - #halloween #card #doilies

And since I can't leave anything simple and plain. Ever. I had to tuck a bit of doily behind the boot opening, because my witch happens to be a very girly, dressed up witch. ;)  A little orange satin ribbon for laces, a few sequins, and a couple of stick pins were all that was needed to finish this little number off. 

SRM Stickers - Best Witches by Michele - #halloween #card #doilies

I hope you all have a great day!  Happy Trick or Treating!  And remember, it is all about the candy and the crafting! :)
Thanks so much for stopping by!

Don't forget to hop on over to Paper Issues where you can join the SRM Halloween Linky Party fun!

Thursday, October 30, 2014

Celebrate Autumn by Stacey


Hello, SRM Stickers fans!
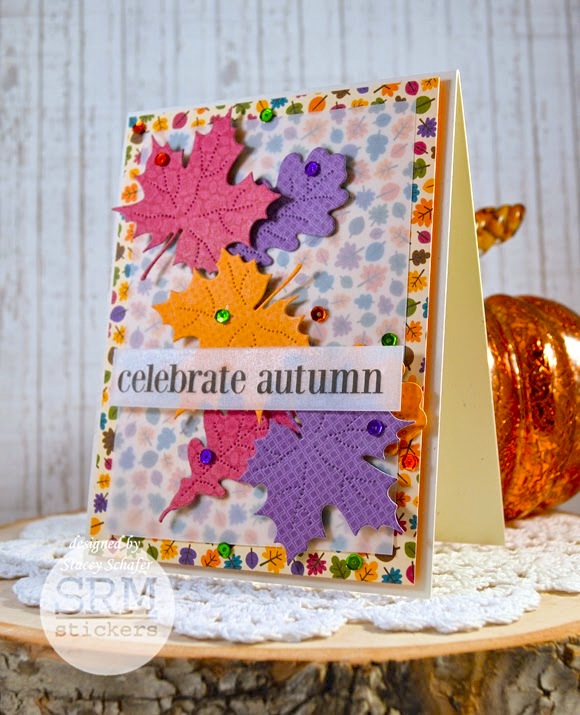
Stacey here with a splash of fall color using some yummy leaves, vellum, and SRM Stickers!

SRM Stickers - Celebrate Autumn by Stacey - #card #stickers #fall #diecuts #vellum

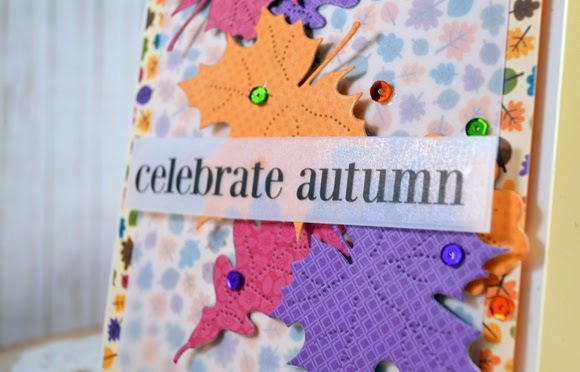
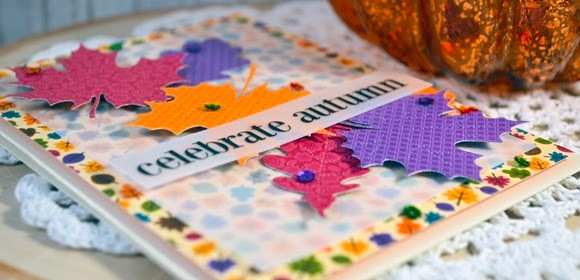
I layered up some fall-themed patterned paper and vellum, then added several bright-colored leaves embellished with sparkly sequins.  The "celebrate fall" SRM Stickers Sentiment/Fall themed sticker was the PERFECT sentiment to use!  I adhered the sticker to a second piece of vellum and glued it directly to the top of the leaf pile!

SRM Stickers - Celebrate Autumn by Stacey - #card #stickers #fall #diecuts #vellum

The leaves were cut from some Doodlebug Designs paper with Top Dog Dies! Die cuts, patterned paper and SRM Stickers are three of my best friends!

SRM Stickers - Celebrate Autumn by Stacey - #card #stickers #fall #diecuts #vellum

Here's the SRM Sticker I used.  It's the Fall Sticker Sentiment sheet.  You can make over 25 cards from just one sticker! 


I hope you are inspired to create a fall card of your own using some clear SRM Stickers!

Don't forget to hop on over to Paper Issues where you can join the SRM Halloween Linky Party fun!

Wednesday, October 29, 2014

Mr. & Mrs. Pillow Box by Cassonda


Hi Everyone! 
Cassonda here to share with you a sweet little project I made.

I had a FUN photoshoot at a wedding last weekend! The wedding was small and quaint and the bride looked beautiful. As I went through all the photos and saved them on a flash drive for the bride & groom I couldn't help but think...this needs to be presented in a pretty package. I'm all about the pretty packaging. :)


First I ran a medium pillow box through my embossing machine, leaving little hearts all over. Isn't it adorable??  The colors of the wedding were red, white and black so I used the same colors. I even added some soft red chalk to a few of the hearts. ♥♥♥


For the sweet tag, I just cut up some leftover scrap paper into tag shapes and added a date stamp.  I also added a red punched piece and placed a flower sticker on top.


Then I took a silver doily, punched a circle shape out of it, cut it into a swirl and rolled it up into a flower.  Even doilies can be used in fascinating ways!  When all the glue had dried I tied it up with some sheer red ribbon and Marachino Twinery Twine.  The only thing left to do was slip the flash drive inside and present it to the lovely couple. :)


If you have something small to give to someone why not use a little kraft pillow box? They are so fun and easy to decorate for any occasion. 

And don't forget to hop on over to Paper Issues where you can join the SRM Linky Party fun!

Tuesday, October 28, 2014

Halloween Crafty Treats by Cathy H.


Cathy Harper here today with some Halloween paper crafting. It's my very favorite time of year and SRM has all of the perfect stickers and treat holders to make it even more fun!  I created two treat holders to share with you today!   

The first is a little test tube holder and a SRM's Mini Tube.  I found a test tube holder file on the Silhouette Store, it was the perfect size for the Mini Tube.  I embellished the holder with a little washi tape, layered with SRM'S Take 2 Halloween Stickers by the Dozen.  Layering washi tape and SRM stickers is one of my favorite things to do, it creates that extra pop of color.  

SRM Stickers - Halloween Crafting by Cathy H.- #srmstickers #halloween #tubes #stickers

I continued layering washi tape and SRM Stickers with my next treat holder.  This time with yellow and orange washi on SRM's Clear Triangle Box filled with candy corn.  I used Take 2 Halloween Stickers again and Halloween Sticker Stitches.  I just love the little pop of color with using the washi tape and SRM stickers.


SRM Stickers - Halloween Crafting by Cathy H.- #srmstickers #halloween #clear container #stickers


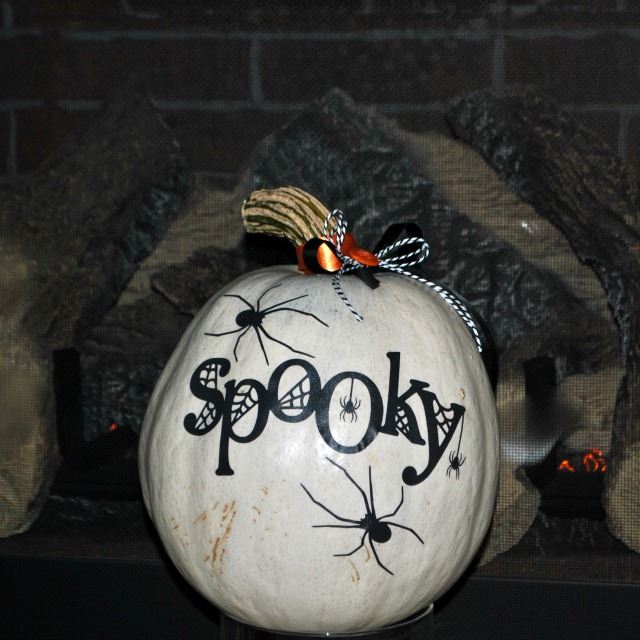
Oh and for just a little bonus, here's a pumpkin that I embellished using SRM's vinyl.  Spookalicious!

SRM Stickers - Halloween Crafting by Cathy H.- #srmstickers #halloween #vinyl #twine

Happy Halloween Crafting to you all!  

And don't forget to hop on over to Paper Issues where you can join the SRM Linky Party fun!

Monday, October 27, 2014

A Little Halloween Ensemble by Lorena


Hello SRM friends!  For the next few weeks SRM is being featured in a "Linky Party" over at Paper Issues.  Be sure to join the fun HERE!  

It's Lorena here just in time for some trick or treating and for the Linky Party! :) Today I bring you a treat + mini card set with lots of sticker goodness!  Again, another project that could be mass produced in no time and used as a fun party favor or school treat.


Let's start with the treat. I used  the Tiny Tube and filled it with seasonal Reeses Pieces. I love this stuff! And yes, some of the round little guys may have been harmed in the process of making this project *nom nom* I started adhering a border from We've Got Your Border/Halloween around the tube cap, and topped it with one of the cute scary pumpkins from FreeStyle/Halloween. They fit perfectly!


The "Trick or Treat" pannel comes also from FreeStyle/Halloween. I adhered it to a piece of vellum and trimmed it. That way it has stability but not too much bulk. At first my idea was making a tag with it (just punch a hole on the top and you're done) and then tie it around the tube. But when I was playing around with it to see the placement I wanted, I found that I loved how it looked adhered to the tube with foam tape. So I went that way.


For the card I stuck with similar elements so everything would coordinate nicely. I layered a green border from FreeStyle/Halloween and the same border I used on the tube. The sentiment and the pumpkin come again from FreeStyle/Halloween. I trimmed it, adhered it to a piece of white cardstock and trimmed again so the white border would make it pop against the black background. Finally, I added dots with a white gel pen to mimic the pumpkin sticker I used on the tube cap.


And we're done! Thanks for visiting, have fun this Halloween and remember that it's all about the candy ;)

And don't forget to hop on over to Paper Issues where you can join the SRM Linky Party fun!

Friday, October 24, 2014

Embossed Birthday Bag by Shery


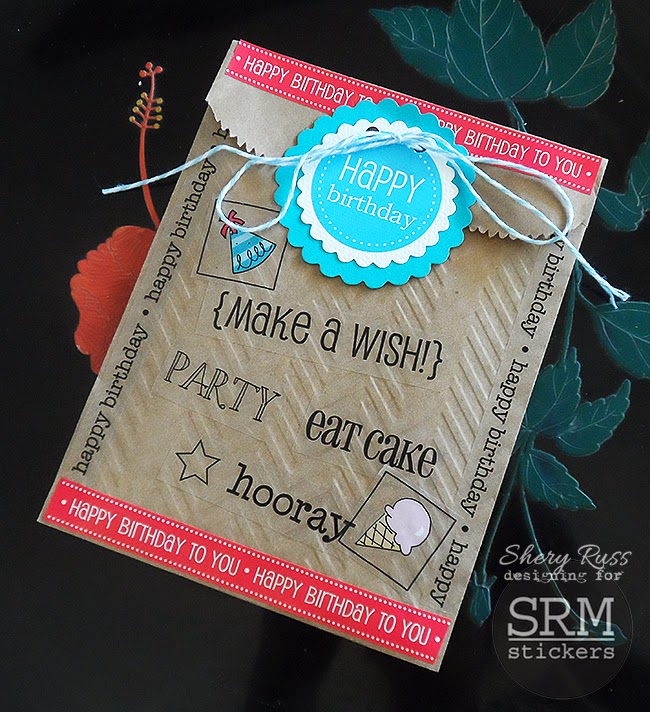
Hello, SRM friends! Shery here to share a quick and easy birthday treat bag project. One of my nephews turned 9 recently and while we were getting together the gifts we were sending him, I needed something for the gift card and a few sticker packs. Usually I'd make a gift card holder, but I decided to do something different.  The SRM Embossed Bag was perfect for this project!

SRM Stickers - #embossed #chevron #bags #giftbag #srmstickers

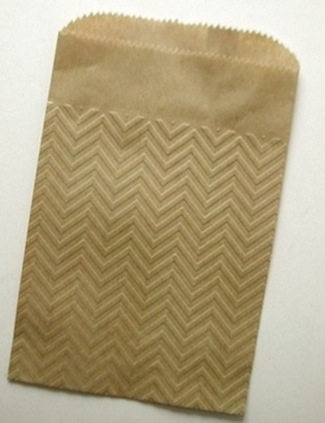
I started with the 4" by 6" chevron embossed kraft bag. I simply decorated the front with various fun birthday stickers from SRM's Birthday Border and We've Got Your Sticker/Happy.  I layered a couple of punched pieces together and used one of the happy birthday stickers from the Take 2 Stickers Birthday on top. I folded the kraft bag with the topper, punched two holes, and used shore  twine to close the bag. Using twine to close the bag is so much easier because I simply could untie it without ripping out the bag to put little gifts inside. No glue or tape to mess with. 

SRM Stickers - Shery Russ - #birthday #bag #embossed #stickers #srmstickers #twine

By the time we got my nephew's gifts all packaged, this little birthday kraft bag was thick and full of little gifts for him that I kept finding in my stash.  There you have it -- a quick and easy birthday treat bag. 

SRM Stickers - Shery Russ - #birthday #bag #embossed #stickers #srmstickers #twine

Check your SRM stash for fun stuff you can use to make something similar. Thanks for letting me share!

Thursday, October 23, 2014

Elf on the Shelf by Christine


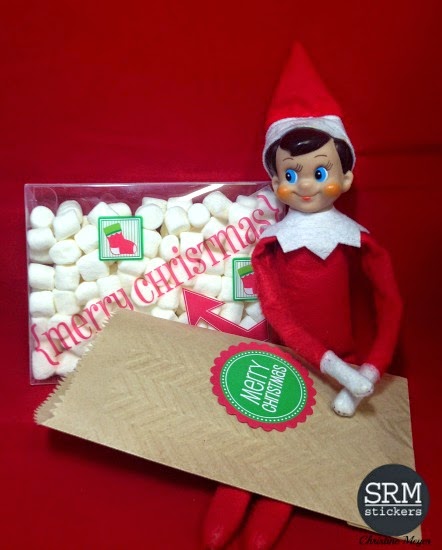
Hello from Christine Meyer!  The holidays are rapidly approaching and I for one am getting ready.  I don't have time to do a lot in advance, but when this idea came to me, I just knew I had to create it and SRM Stickers had just the right stuff to put those plans into action!  The new Kraft Boxes available from SRM were the perfect container for making an "I'm Back" box from our Elf on the Shelf.

SRM Stickers - Christine Meyer - #kraft #stickers #christmas #srmstickers

My plan is to put this little box out on Thanksgiving night (or at some point that weekend) as we begin our annual visitiation time from the Elf on the Shelf.  I decorated the outside of the box using lots of stickers:  

I also cut out the words "I'm Back" using glossy vinyl in Lime Tree Green.  And of course there are some of those fabulous Punched Pieces that we all love so much!

SRM Stickers - Christine Meyer - #kraft #stickers #christmas #srmstickers

I plan to stick him inside like this so it won't be obvious what's in there until they open it!  

SRM Stickers - Christine Meyer - #kraft #stickers #christmas #srmstickers

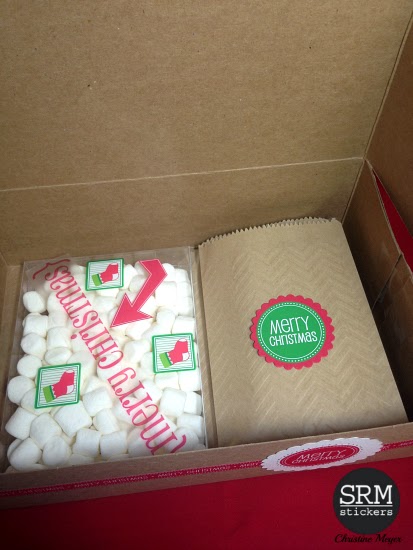
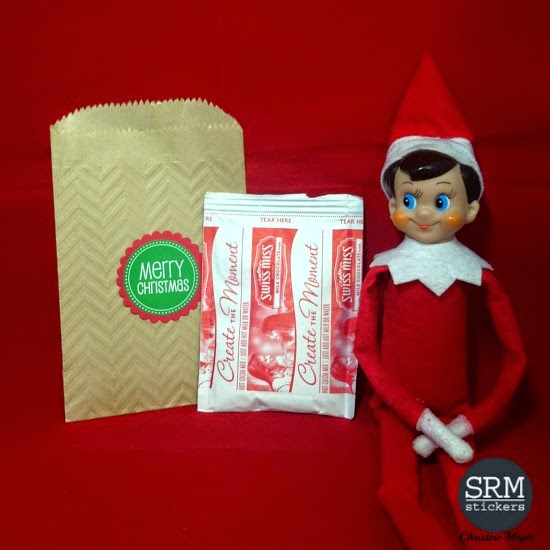
Tucked nicely beneath him will be a package of marshmallows and four bags with hot cocoa in them.

SRM Stickers - Christine Meyer - #kraft #stickers #christmas #srmstickers

The 4 X 6 embossed kraft bags are the perfect size for holding one package of hot cocoa! I used the chevron design.  Punched Pieces and Take 2 Christmas stickers decorate the outside of those bags as well as the side edges of the big box above.

SRM Stickers - Christine Meyer - #kraft #stickers #christmas #srmstickers

Any variety of SRM's clear containers would work great for marshmallows but I opted for the A2 Card Box.  I decorated that with stickers from Say it With Stickers/Christmas and Live Life/Christmas.  I love that this project all began with this undecorated kraft box from SRM!  


It's little moments like this that help make special memories for the holidays!  I can't wait to see their eyes when they find it!

Wednesday, October 22, 2014

Embossed Bag Layout by Cathy H.


Hello from Cathy Harper.  I love creating layouts using SRM Kraft and Glassine bags.  They are perfect for adding journaling or just to add a bunch of fun embellishments, which is what I chose with this layout.


I used a Kraft 4x6 Embossed Chevron Bag and layered it behind my photos.  Then filled it with some fun bits from the paper collection.  The perfect finishing touch to my layout and the embossed bag was some Stone Twine.  I wrapped the twine around the bag a couple of times and tied a double bow. I then added a fun clear sticker from the Fall Sentiment set.  I love how SRM's clear stickers look like printed text on your pages.  Awesome for someone like me who can never stamp a sentiment straight!


There are so many sizes and patterns to choose from with SRM's Kraft and Glassine bags!  You can use them for so many things, the possibilities are endless.  And there are lots of different themes of Sticker Sentiments too.  Be sure to check them out! 

Thanks for stopping by.  Hope you have a scrappy day!

Tuesday, October 21, 2014

Thanksgiving Table Decor by Shantaie


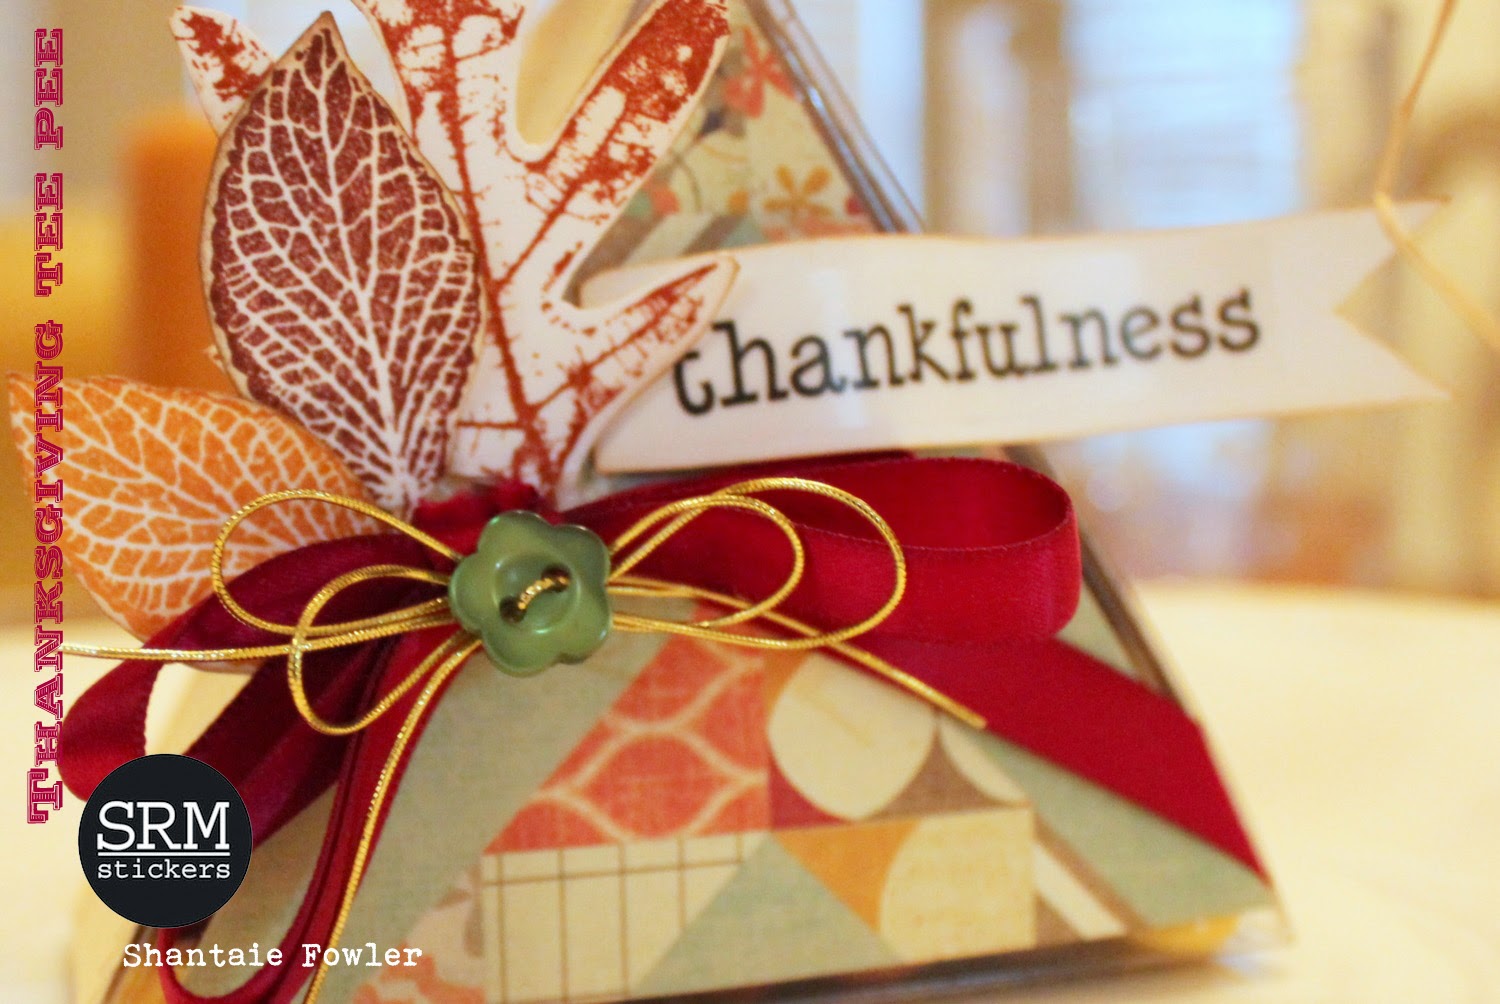
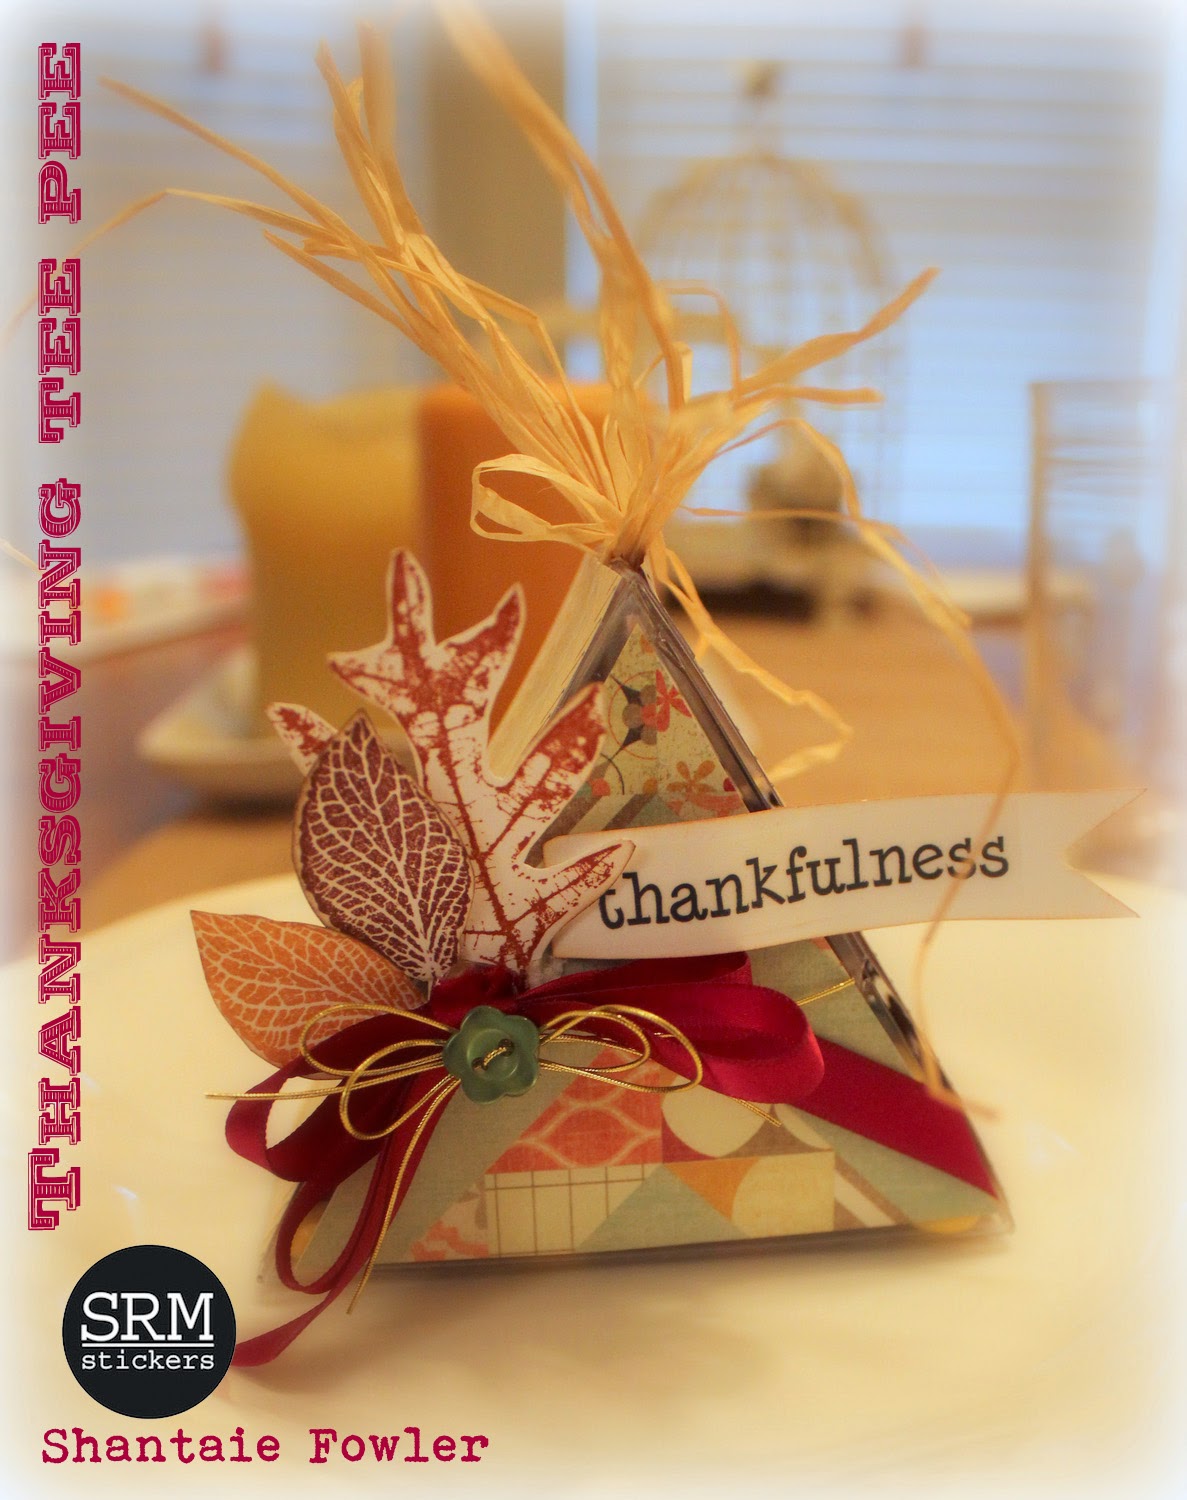
Ever since the first time I laid eyes on SRM's new clear triangle box, I have imagined a tee pee treat container and Thanksgiving is the perfect occasion for such a project. A beautiful seat place marker or an appetizer placed at each table setting to greet your guests. Holidays offer such wonderful opportunities to create the special touches that your family and friends will remember long after the plates are cleared and the turkey leftovers are gone.

SRM Stickers - Thanksgiving Table Decor by Shantaie - #srmstickers #stickers #thanksgiving #trinagle #clear box

 Punch a small hole at the top of the triangle with a hole punch (cropodile was used here) and thread a few strands of raffia through, tie in a loopy bow. add patterned paper along sides using the box measurements.  Add paper to the front and back if desired, and embellish with stamped leaves, a ribbon and some gold cording. Add a banner with a SRM fall sentiment and fill with treats of your choice. 

SRM Stickers - Thanksgiving Table Decor by Shantaie - #srmstickers #stickers #thanksgiving #trinagle #clear box

Quick, functional, and fun, Thanksgiving tee pees made from triangle boxes!
 Happy fall y'all! 


Monday, October 20, 2014

SRM is on INSTAGRAM!


Great news!  SRM is now on Instagram.  You can find us HERE
You read that right! SRM is on instagram!! (I know, I know, *FINALLY*!)


Here's the exciting part, we'll be featuring photos from our Designers and Flickr and we'll be checking out the #srmstickers hashtag for shares too! We LOVE our SRM fans and want to give you even more ways to find inspiration!! 

★ You can start following us! ★
at SRMPRESS

 To celebrate this occasion, we're giving away A Big Birthday Prize Packet!


The way to win is pretty easy! Follow us on Instagram, like the "heart" photo and tag your friends!! A random winner and friend will be drawn on November 3rd and we will post the lucky winners on Instagram and Facebook. GOOD LUCK!!   

Ohand if you leave a comment here on the blog we will offer 1 more prize packet!  

Friday, October 17, 2014

Soccer Team Treats by Lorena


Hi SRM crafty friends! It's Lorena with an idea to make quick treats for a soccer team. And when I say quick, I mean it. I find that basic when a project is meant to be mass produced! 

I chose soccer because it's the biggest sport both in my country, Spain, and also in the country where I'm posted right now, Bolivia. It's a big thing around here, I tell you. Much to my dismay. Why?  Because of my son. Well, he is terribly bad at soccer, so he needs as much encouraging he can get. And here's where team treats come into scene.  *wink*

SRM Stickers - Soccer Team Treats by Lorena - #soccer #pillowbox #kraft #srmstickers #sticker #twine

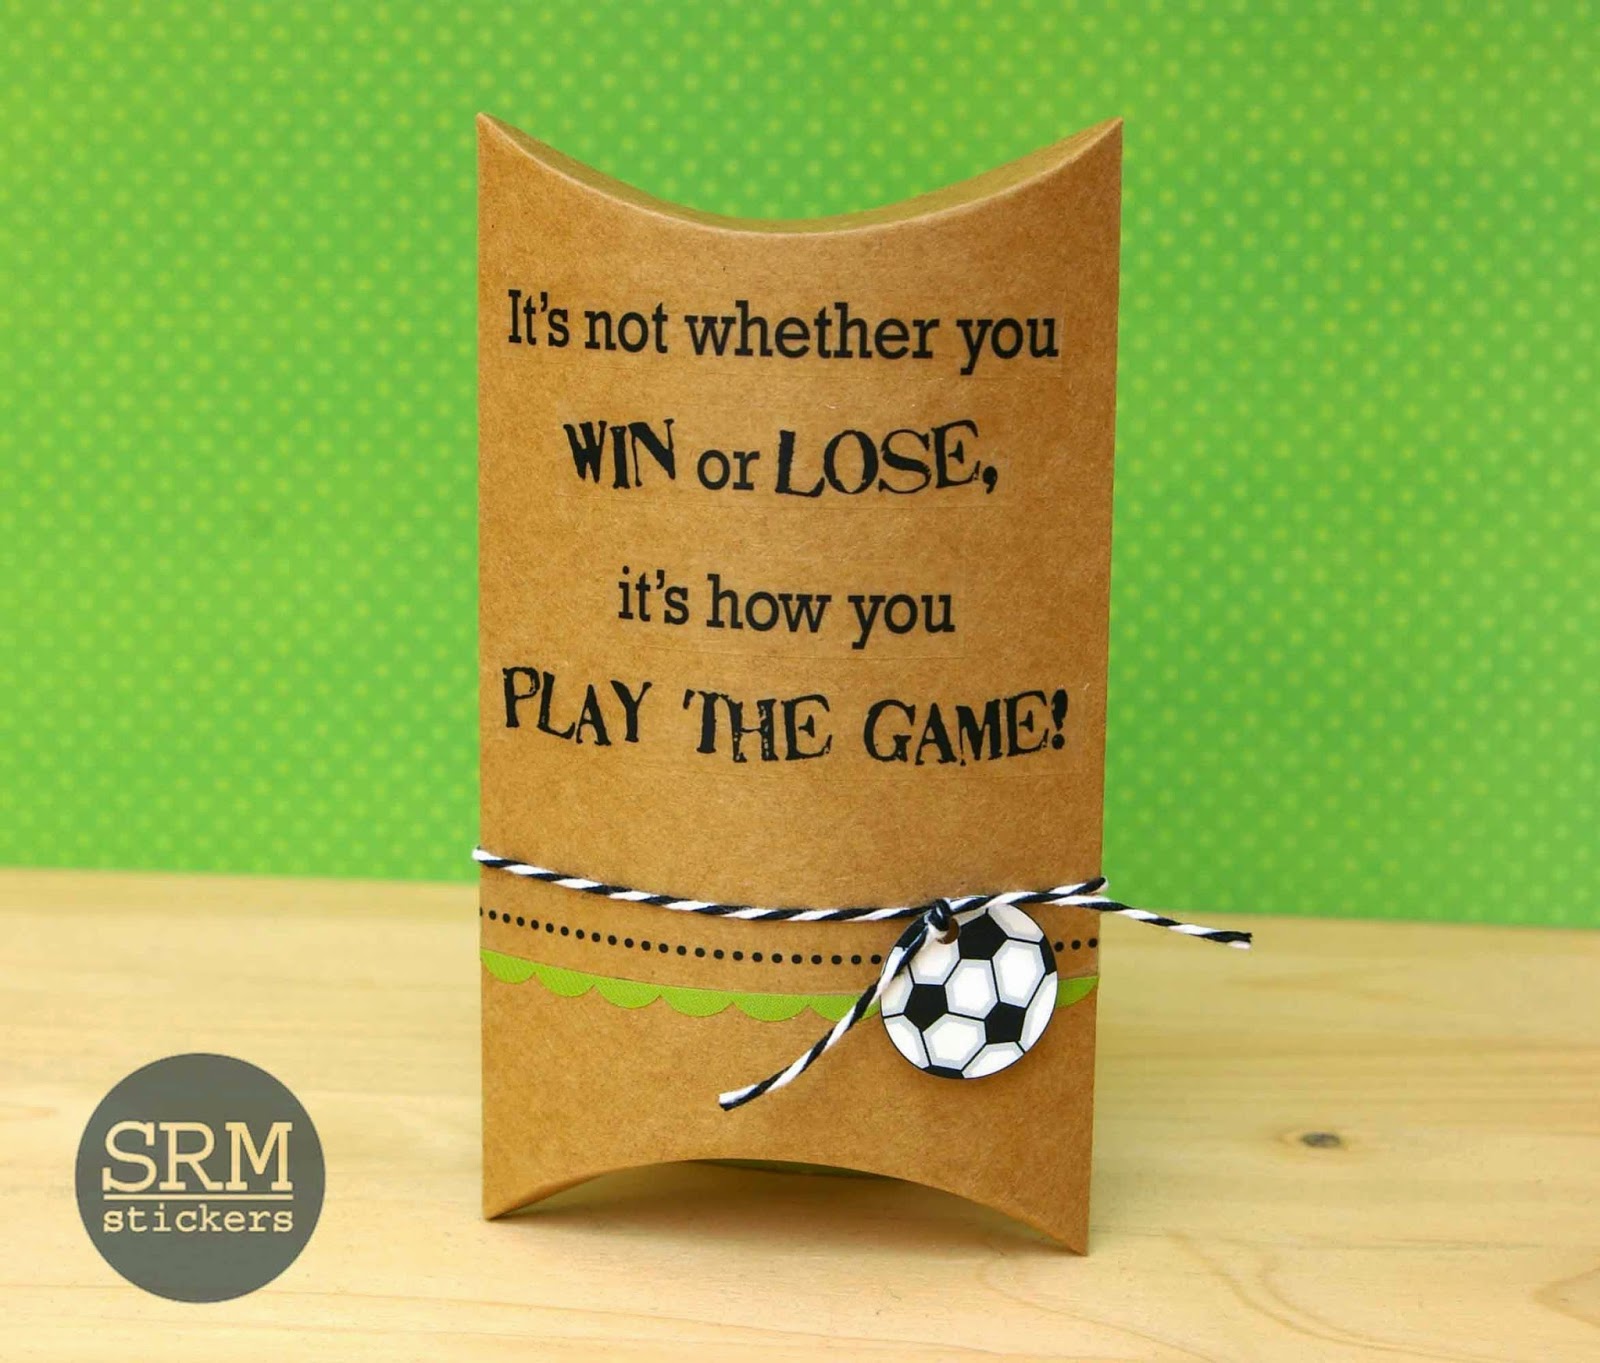
I started with a medium kraft pillow box. I adore these cuties! They're perfect for holding a bit of candy, enough for a pick me up after the game but not so much that the other kids parents will be mad at you, ha!

SRM Stickers - Soccer Team Treats by Lorena - #soccer #pillowbox #kraft #srmstickers #sticker #twine

I trimmed the sentiment from Say It With Stickers/Mini: Soccer, made it into a 4 line sentence and adhered it to the box. Then, I embellished it with a green scalloped border from We've Got Your Border: Halloween and a dotted line from Sticker Stitches: Black.

SRM Stickers - Soccer Team Treats by Lorena - #soccer #pillowbox #kraft #srmstickers #sticker #twine

The final touch was some SRM Twinery black and white twine and a ball also from Say It With Stickers/Mini: Soccer. I adhered it to a bit of cardstock, fussy cut the ball, punched it and tied it with twine.

See? I told you this was quick and easy. Thanks so much for stopping by and have a wonderful day! 

Thursday, October 16, 2014

Fancy Cards by Cassonda


Cassonda here today!  I've had some pretty awesome things done for me lately and it's time I show my appreciation. Today I'm sharing with you some cute "mini" cards I created with scraps of cardstock that were cut incorrectly. Never throw away...just make something else out of it. :) This thank you card is for a very special friend of mine and the love card, well, that will get tucked away in hubby's car. (shhhhh)

For the tall card, I sprayed the bottom portion with pink shimmer mist to give it some color (since it's for a girl). I used the Thank You Fancy Sentiment 


On the small card I used the Love Fancy Sentiment Sticker set.  On both cards I added a little bit of white doily peeking out from under the paper.


And on both cards I sewed on all buttons with a little bit of Shore Twinery


So the next time you need a quick project to show you appreciation to someone I hope you will grab for your scraps! Here's the pair of cards I created!  Enjoy!


Be sure to join us tomorrow for more SRM Sticker inspiration.  And be sure to share your SRM creations over on the SRM Flickr.  We have over 7000 posts which will provide you with even more inspiration!