Wednesday, September 13, 2017

Mini Rainbow Calendar by Shelly


Hey y'all! Shelly, here.
Today I'm sharing a happy little calendar with you! 


I kept things very clean and simple. I started with my white card base, which I chose to crimp. After, I put aside all my crimped card bases and then worked on my white squares. Adding a touch of rainbow patterned paper to each one. Once done, I added my sticker calendar to each square. Then added some foam squares on the back and then added it to my card bases. 


After I was done making my calendar cards, I needed to come up with something to hold them. So I used a clear box and cut it to where my cards could sit nicely inside and not cover up my calendar month. 


To top things off, I slipped everything (cards and card holder) into a clear box and then inside of a patterned bag, which I closed with a 2018 sticker. Simple, yeah?!...

Thanks so much for stopping by!
Enjoy your day!

SRM Stickers supplies:

Clear Mini Box (for card holder)

Tuesday, September 12, 2017

Guest Designer - Amy Tsuruta


Today SRM is excited to welcome Amy Tsuruta to the SRM Blog.   Here's a little bit about Amy in her own words: 
"I live in the beautiful state of Washington and work part-time for a Seattle biotech company.  I've always been crafty but discovered a passion for stamping in the early 2000's.  I love the Paper Crafting Community!"


Amy is a BIG coffee fan and an avid card maker.  She even has a blog that's all about coffee and card making called Coffee Loving Cardmaking.   Four times a year she puts together a blog hop and the Fall one is just around the corner.  It begins September 15th. Be sure to check it out! 

Today Amy shares with us two darling cards with us using SRM's new 
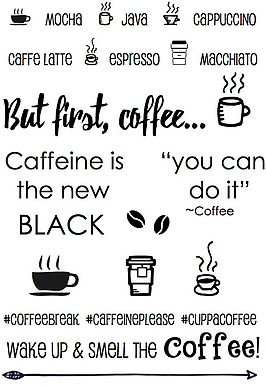
Coffee Plans Clear Stamp.  


With so many fun expressions, Amy chose two of her favorites and created these fun and fabulous cards.   The cards are perfect for Fall... so warm and cozy!  First up a card that uses one of my favorite expressions:  
"you can do it" ~coffee
Love how it appears that coffee is cheering you on! :)


The second card features the sentiment:  "Caffeine is the new BLACK".  
Every coffee loving carmaker can relate to that! :)  And I love how she has lids for cups of coffee in the photo to "perk" her up! 


Thanks for sharing your darling cards Amy!  And thank you for being a fan of SRM throughout the years!  See you at the Blog Hop!  It is always so much fun! And lots of prizes too!

Monday, September 11, 2017

Coffee for the Teacher Gift Idea by Shanna


 Hello SRM friends!  
This is Shanna here to show you a great back to school gift for your favorite teacher!  

Back to school is a stressful time for everyone, teachers especially.. How better to show your gratitude and appreciation for their time and dedication with our children than to brighten there day with a little caffeinated lovin'??


I am a huge coffee drinker, but realizing not everyone is as avid a java-junkie as I am, a gift card seemed the way to go for my son's teacher for the first day back to school so she could pick her favorite treat out... I started with asking my local coffee shop for a clean cup and lid to be used as packaging for the gift, and went from there.  The stamps in the Coffee Plans set are perfect for any coffee related craft, this one being no exception!  I stamped an array of coffee words and icons on my gift card holder that I had previously cut out on my Silhouette Cameo, and then heat embossed my main sentiment to give it a little bling and dimension.


I needed a tag, and loved grabbing a couple of the Scalloped Circle Punched Pieces and the Reminisce white gel pen for a chalkboard feel tag for the teacher. Added a dry embossed strip of coffee cups layered with a sticker from the Live/Life School stickers set.  Quick, simple, and ADORABLE!


After the gift card holder was complete it was time to package!  YAY!  I placed a red apple in the base of the cup with some tissue paper filler under it and topped the cup off with some Starbucks K-Cups for fun.  An apple for the teacher is tradition right?? My little guy sure does think so!


I love how quick this came together, and how much my little guy enjoyed writing a note to his teacher in the card!  I opted to tie a bow with some jute twine for my final touch and added the tag with the twine. My little guy loved giving this to his teacher the first week of school!  


What do you like to make teachers??  Let me know in the comments!  

Until next time...

Materials used:
Live/Life School stickers

 Silhouette Store file: 3d Gift Card Box

Friday, September 8, 2017

Birthday Card Set by Karen


Hello!  Karen here today with a fun birthday card ideas!


Do you still send out birthday cards to friends and family? I'm not always perfect at it, but I do enjoy sending out handmade birthday greetings. Last week I dug into my stash to look for a birthday card and discovered I was out (sorry to all those early August b-days).

When I need to make a lot of cards, I settle on one design that I can duplicate easily. For this set of birthday cards, I used my die-cut machine to cut and assemble several cupcakes. I find it easier to do several images at the same time and make a sort of assembly line process. To fancy up these cupcakes, I even added some glitter at their final stage.

Once all the cupcakes were assembled and dry, the cards were super easy and quick to put together. I used plain white cardstock for the base and two layers of patterned cardstock on the front. Then I added one or more cupcakes and a clear sentiment sticker or two. There are so many to choose from in SRM's collections.


As seen in the first photo, I packaged up a few to share. Five cards plus envelopes easily fit into a flat glassine bag touched simply with a ribbon, "just for you" sentiment, and a green stripe at the bottom.

Do you need more SRM Birthday stickers?
Check out the birthday section of the SRM Store!  

For this project, I used:

Thursday, September 7, 2017

Jesus Teach My Children by Jennifer


Hello all, Jenn here! I am excited to share with you a page from my Bible. August 7th was a very exciting day, as it was the first day of school for my Preschooler, 1st grader and 2nd grader. As a homeschool mom every year is full of a little anxiety, and excitement. I loved this verse I found in Isaiah 52:14 "All your Children shall be taught by the Lord, and great shall be the peace of your children."


To begin this page I started with the lettering I simply wrote the words and found some amazingly cute washi tape at Target for the word teach as well as the fun alphabet pictures at the top and bottom of the page. Next I pulled out the school stickers and fussy cut the apples and added them to the page to create a fun element and to keep your eye moving around the page. I thought the side of the page looked a little empty so I stamped the pencil from the Sermon Notes stamp set in a red and yellow to coordinate with the apples and fun "teacher" look of the page. 


I also pulled out the curvy arrow to help mark the verse and colored the verse with my watercolor pencils.The red and yellow border stickers were added to the top and bottom under that fun alphabet washi. After adding a very heartfelt prayer to the page and a super fun fabric paperclip the page was finished and my heart was at rest.
Supplies used:

Wednesday, September 6, 2017

Winter Treat Bags (A Bit Early!) by Michele


It's never too early to get a jump on your holiday projects right?  
I always find it funny when I am creating for Christmas and I am in shorts, AC, and it's 95 degrees outside! ;)
I am totally in love with these new linen bags!
I decided to add a dot of Silver Stickles to the center of each dot for added sparkle. 


The flowers and snowflakes were cut using my die cut machine. 
I added more Stickles to the centers of the flowers.  


I stamped the word "WINTER" on a tag and embossed it in white.  I stamped the snowflake in a pale pink on a circle and then adhered it to the tag.  I added silver STickles to the center of the snowflake. 


I added silver jingle bells, silver string and tinsel and glued it underneath my snowflake/flower combo. 


Thank you for stopping by today! 

Tuesday, September 5, 2017

Baby's First Year Mini Album by Giorgia


Hello SRM friends, Giorgia here to share a mini album of a baby: my husband cousin had a little girl almost a year ago, so I decided to make a mini album to document each month of her first year.The mini isn't finished yet, since by niece Greta is now 9 months, but I want to show you what I made so far.

This is the cover: I used some baby themed SRM stickers and glittered hearts die-cut with cutting machine.


The mini is a very small, cute, accordion mini album: to create the structure cut a 12x12" pink cardstock in 3 strips of 4"x12" and score them at every 4". Adhere together two strips, cut the other one in two identical parts and glue them to the beginning and end of the previously made accordion. This is the final result:


For the inside pages, I chose this cute patterned paper with months on it. I cut each month and adhered it onto a piece of patterned paper: this papers measures 3x8", scored in half in the long side, and they will contain the picture inside, on the bottom flap.


Adhere each paper to the structure: you will have 4 pages free from pictures, I decided to place them in the beginning to document Greta's first day of life, between month and in the back cover.

This is the first page, to document the first day of life: I used Baby plans stamps and I added handwritten dates with black pen from Le Pen 4 Piece Set - Dark Colors.


The top flap of each page is filled with SRM stickers: I used Baby's First Year-Girl stickers and Calendar Numbers/Small for the date. 


  In each page I used a lot of lovely baby themed SRM products. I didn't add dimensional parts, because I wanted the mini to stay flat once closed: I only used stickers and die-cuts:


I love the cute "milestones" stickers from Baby's first year stickers.


I adhered some of the stickers to scalloped punched pieces circles to create fun embellishments:


 Here you can see another examples of how I decorated the pages without picture.


My niece is the cutest, isn't she? I love her so much!
I already made also the gift box to contain the album: the mini perfectly fits into a kraft window box A2. I embellished it with a sticker, sequin and a jute twine bow.
I will gift it to her parents at her first birthday.


Until next time,
ciao, Giorgia


SRM products used 

Monday, September 4, 2017

Summer Baseball Layout by Samantha


Hello! Samantha here today to share a summer baseball layout with you. I'm just using some SRM stickers and creatively cut card stock for this layout. 


I love mixing and matching patterned papers, so I thought I'd give myself a bit of a challenge and create a layout without any patterned paper. It was a bit hard for me, but a lot of fun, and a great way to let my SRM stickers really pop on the page. To add some interest to the plain card stock, I used a Silhouette Cameo to cut some designs. 

Then, I let my stickers, photo, and journaling tell the story. The grungy 2017 from the Year of Memories Sticker set was a great fit for this post game photo.  


The big baseball sticker and baseball themed words from Take 2: Stickers By the Dozen Baseball leave no question as to what sport this layout is all about, and they match perfectly with the color theme of our team's uniforms! 


Finally, I added a "LOVE" sticker from Love Sentiments, because coaching my son's 3 grade baseball team this year has been so very much fun, and I've loved every minute of it. 


Next time you're telling a story on your layout, reach for a few SRM stickers to help you tell it, just like I did with this summer baseball layout! 
SaveSave

Friday, September 1, 2017

Personalized Pencil Pouch with Vinyl by Karen


Hello!  Karen here today with something for back to school! 
My daughter needed a pencil case for school, so we found this one in her favorite color with the added bonus of it being shimmery and came with a fun tassle. But, the top was a little plain - or perhaps, as we decided, it was the perfect canvas for a bit of personalization using SRM Vinyl.


Before I applied the vinyl, we decided to add a bit more color. It was a fun and easy activity to do together as we used the eraser side of a pencil to add dots of  acrylic paints in greens and blues for the perfect backdrop to the gold vinyl initials.


I used my die cut machine to cut her initials and a cat (her favorite!) silhouette with gold shimmery vinyl


Now she has a one-of-a-kind personalized pencil pouch and couldn't be more excited to get back to school and make use of it. We love vinyl for all kinds of back-to-school personalizations - water bottles, lunch containers, folders and notebooks, bookbags. What will you personalize today?

For my project I used: SRM Vinyl