Showing posts with label Angie Pond. Show all posts

Thursday, July 5, 2018

Masculine Gift Bags by Angie


Hello SRM friends. Angie here with you today!!

Wanted to share with you some super easy to create gifts bags for all the dads in your life. These would be fun for small kids to make!  These would be great for a dad's birthday, for any occasion and especially for Father's Day.  This is what I made them for.


I used the awesome patterned bags from SRM, a free cut file that I found online and some letter stickers to make these bags. Pop a card or gift card inside and you have a quick but super cute gift for dear ol' dad! 


These bags are really easy to recreate and simple enough for the smallest of kids to help with. 

I hope you give these gift bags a try and impress dad on his special day!


Friday, June 8, 2018

Thank You Tubes by Angie


Hello SRM friends!! Angie with you today!!
I have a cute idea using SRM's clear tubes.


I used the clear tubes and filled them with wildflower seeds which would make adorable thank you gifts for a garden themed party!! 

I used several SRM stickers to embellish the tubes with and then attached the scalloped circles with twine. They were so quick and easy to make but they turned out so cute!


I hope you give these thank you gifts a try for your next party!

Other supplies used:

Wednesday, May 23, 2018

Love is in the Air by Angie


Hello SRM fans! Angie here with you today!
Can you believe that it's May already? Wedding season is definitely upon us. 

Today I'm sharing a card with you that would be perfect for to give for a wedding or wedding shower!


I used the 'Just Believe' stamp set to create the flowers that are on the left side of the word love. The word love is from the 'Big Love' stamp set. I just stamped both of them using black ink on white cardstock and then fussy cut them out.

I used a floral sticker on the bottom circle which is  from the Forever sticker set.


This was a very simple card to make but I think its classy and elegant. 

Thanks for stopping by the SRM blog today!


Wednesday, May 2, 2018

Spring Layout by Angie

Hello friends!! Angie here with you today! 

I'm sharing a spring layout in hopes that it will actually make spring appear!! I'm sure a lot of you can commiserate with me that it's been an exceptionally long winter!! I hope this layout will give you a glimmer of hope!!


I started with a white piece of card stock and painted the black stripes using some acrylic paint. I added some black and gold paint splatters as well.

For the flowers and stems on my layout, I stamped them using the Just Believe stamp set. I used black archival ink on polka dot paper and then stamped the other flowers using some pink and yellow inks. I stamped the stems in black and green. I fussy cut those flowers and stems out and used them in some different clusters around my layout. 


I used several of SRM's border stickers and sticker stitches to add some interest to layout as well. They add a nice pop of color as well.


This was a very quick layout to put together but I love how it turned out. I hope this will inspire you to use the great products found in the SRM store!!

Have a great day!!


Other products used:

Friday, April 6, 2018

Spring Cards in Gift Box by Angie


Hello SRM friends! Angie here with you again today to share some spring cards and a cute box to gift them in!!


I made all three cards using stamps from the Just Believe stamp set. For the blue card in the middle, I stamped the flowers and leaves on vellum. Then I used watercolor markers and water to give them the watercolor look. Then I just fussy cut them out. I placed the flowers and stems vertically down the card and used foam under the smaller flowers to add some dimension. 


I made the blue background by using distress oxides and water to give it the bleached look. I added some gold and pink ink mist splatters as well. 


The word 'spring' is from the Seasonal Plans stamp set.


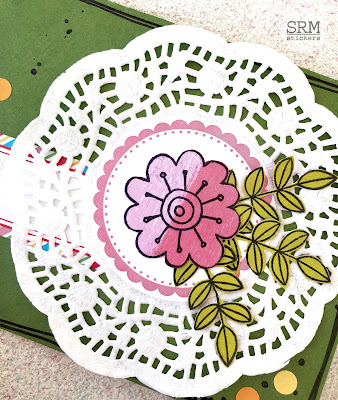
For the front of this pink and white card, I added this fun doodle stamp from the Stamped Stitches set. I love how it adds so much to the card will such little effort!! I stamped and fussy cut the flower and stems and gave the card a fun edge by using a punch to make the scalloped border. 


The green card uses lots of fun SRM products such as the small lace doiliesbright blank labels by the dozen and the Easter Express Yourself stickers. 


For the gift box, I used the A2 Clear Card Box. I punched two holes in the top and simply threaded the twine through the holes and made a bow. SRM has lots of twine to choose from. The flower borders on the box are from the Thank You Stickers by the Dozen set and the green label in the middle is another Labels by the Dozen sticker. I added another fussy cut flower, stem and a bird to finish off the box. 

Thank you for visiting the blog today. I hope my project gives you some inspiration to create your own!!

Friday, March 30, 2018

Spring Planner by Angie


Hello SRM friends!! Angie here with you today to share some spring inspired planner pages!  My planner pages are for March, but you can use this format for 
any month.

What makes you think of Spring? For me, it's the beautiful colors of new flowers growing, singing birds and amazing sunsets. I just love all of the pretty colors!!

Those colors inspired my planner pages!! I hope you will get inspired by spring and create some beautiful projects of your own. SRM has plenty of products to help you do just that!


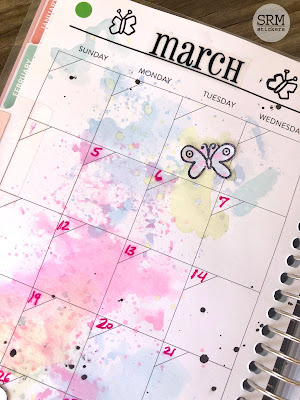
To make the watercolor on my planner pages, I used the watercolor twist pencils. I simply scribbled the pencil onto some plastic packaging, added some water and then mashed the packaging down on my pages. I added some splatters of the color as well. I used the same process to color the stamped images seen on my pages. Those stamped images are from the Just Believe stamp set and are probably my favorite stamp set from the store. 


The 'March' sticker is from the small months sticker set.


I hope you enjoyed my planner pages! Grab some products from the SRM store and create something amazing today!!


Other products used:


Thursday, March 15, 2018

Spring Cards by Angie


Hello SRM friends and fans! Angie here today to share some spring card inspiration. I love using SRM's bags as envelopes and decorating them too!


One of my favorite stamp sets from SRM is the Just Believe set. I used the stamps from that set on both of my cards.  It is a religious themed stamp set but by looking at my cards, you would never know that. That is one reason why I love SRM's stamp sets--they are so versatile. 

I also used the XXX stamp from the BIG Love stamp set to give my cards a stitched look. The XXX stamp is one long strip but I cut mine down so I could have just three stamps. 


I stamped and fussy cut both butterflies, one of the flowers and the leaf stem. I also stamped one of the other flowers on the pink tag. 

To color the butterflies on the thank you card, I used the watercolor pencils. Just simply add your color and then spread it around using a water brush. 


I used SRM's awesome labels by the dozen on both cards. Those labels have so many uses. They can be used on cards, scrapbook layouts, tubes or even for labeling stuff in your kitchen!! SRM also has many colors of jute twine. I used light pink jute on both cards. 


As you can see, I also used two awesome bags from SRM as cute 'envelopes' for my cards. Have you checked out the selection of bags? Go ahead and have a look. I used the embossed chevron glassine bag and the lime green stripe bag.


I hope you enjoy the ways that I incorporated spring on my everyday type of cards.

Thanks for stopping by the SRM blog!!


Other products used:


Thursday, March 1, 2018

Lucky in Love Card by Angie


Hello SRM friends! Angie here with you today to share a non-traditional St. Patrick's Day card.

I made a loved themed card but tied St. Patrick's Day in as well. This card would be perfect for the person you are lucky to be in love with!!


I used white cardstock for the base of my card. I added some ink splatters using some watered down Distress Oxide ink in Lucky Clover (how appropriate, right??). 

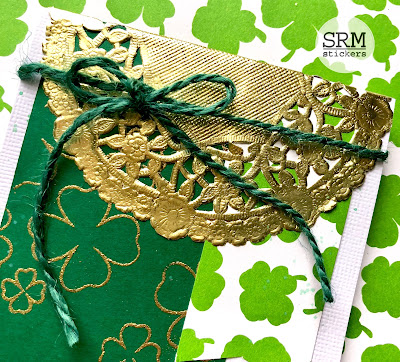
The clover paper is from my stash and since I knew I wanted to use the gold doily on the top of the card, I stamped and heat embossed gold clovers on the green cardstock.  I cut those papers into banner shapes, added the doilie  and then tied some green jute twine around it. 


For the stamping, I used the word 'love' from the BIG Love stamp set. I used the word 'in' from the Walk By Faith stamp set. SRM's stamps are so versatile and can be used in so many different projects. I used a stamp from my stash for the word 'lucky'. I used gold heat embossing on 'lucky' and 'love' to tie in that gold theme. 

I hope you enjoyed my card!!

Monday, February 12, 2018

Plan With Me by Angie


Hello friends!! Angie here with you today!  I hope your new year is off to a great start!  

Speaking of starts, have you gotten your planner for the year organized and ready to go? Making your planner pretty yet functional doesn't have to be difficult.  Today I'm sharing how I'm organizing my 2018 planner showing you my January pages.

 I'm using a small planner from Michael's this year and I don't have a lot of time to spend on decorating. If you want quick and simple but beautiful planner pages, try SRM's amazing planner stamps. 

I used the seasonal plans stamps for my pages. I love that this stamp set has all the months of the year and little icons that represent each month. 


 SRM also has amazing clear stickers that can be used in your planner. I used the winter sentiment stickers and the year of memories stickers. Some of these stickers come in long strips but don't be afraid to cut them down to make them fit your planner pages.


The small calendar numbers are awesome for numbering your days in your planner. They are just the perfect size! 


I hope you will give these amazing products a try for your next planning session!


Friday, October 27, 2017

Calendar Fun by Angie


Hello SRM friends and fans! Angie here with you today.

The new year will be here soon enough, so why not design a SRM calendar for yourself or as a gift?? SRM has so many amazing stickers and stamps that would look amazing on your calendar!

I started with the adorable 6 x 6 calendar, which is the perfect size for your desk or to sit in a small space around your home. 

I'm just sharing a few of my completed pages but I hope these examples will show you how quick and easy it is to decorate this calendar.


I stamped the months for the whole calendar using the seasonal plans stamps. I also used the small sticker numbers for all of the dates on my calendar pages. 


For the month of January, I embellished the calendar page with the snowflake found on the seasonal plans stamp set. I love that the stamp set has an icon to go with each month. I used some sequins from my stash to add some sparkle to the middle of each snow flake. The 'brrr..it's cold' is a sticker from the Live Life Calendar Year sticker sheet.


For the month of October, I used the adorable candy corn icon from the seasonal plans stamp set. I stamped them using black archival ink and then colored them in with markers. The candy corn border and the 'Happy Halloween' are stickers from the Stickers by the Dozen/Halloween set.


Lastly, November is embellished using the leaf icon from the seasonal plans stamp set and two stickers from the Thanksgiving Express Yourself sticker sheet. 

I hope these simple but functional examples will help you create a calendar that you will look forward seeing the whole year. 


Monday, October 23, 2017

Plan On It! by Angie


Hello SRM friends and fans!! Angie here with you to share  some planner pages using some of the amazing stamps, stickers and pens from SRM. 


Since my planner pages already had a pink and teal theme, I knew I wanted to play up those colors. I also added in some black and white to give the pages that 'pop' of extra color. 

I started with the Color in Markers. I used the pink marker. I scribbled a little bit of the pink marker on an acrylic stamping block, added some water and mixed it together to make a 'paint'. I painted that on my pages in certain spots and used some to make some splatters as well. If you try this technique, just keep in mind that the more 'paint' you add, the more your pages will warp. 

Next, I gathered my SRM planner stamps and the Bible background stamps. I love how the Bible background stamps just add a little more interest to the pages. I used the Coffee Plans Stamps to stamp a reminder to drink all the coffee (not that I need a reminder!!). For the weekend banner, I stamped the banner from the Travel Plans Stamps and wrote in the word weekend using the neon LePen set. The cute little apple comes from the Seasonal Plans set. That set contains so many cute icons! The word September at the top of the page also comes from that same stamp set. 


For the flowers seen on my pages, I used the Just Believe stamp set. I colored those images using the Color In Markers and Neon LePen set mentioned above. Just remember to use an archival ink when stamping images if you plan to watercolor them, that way your stamped image won't bleed. 


To decorate my pages even more, I used several of SRM's awesome stickers. SRM has stickers for all occasions.

The soccer stickers you see are from Say it with stickers-soccer and Take 2-soccer. Don't be afraid to cut down your stickers to use what you want. The adorable pink circular label is from the Labels by the Dozen Bright Blank set. Those labels are useful for so many different projects.

Do you see the adorable coffee cup, shopping cart, money sign and checklist? Those are from SRM's super cute and versatile Planner Icon Sticker Sheet!

I also added in some pink and black sticker stitches and some border stickers. After adding a few bits and pieces from my stash, my planer pages look amazing and are still functional!

Head on over to the SRM Stickers store and find all of the great products that you can use on your planner pages!