Wednesday, November 12, 2014

Holiday Decor with Vinyl by Cathy A.


Hello!  Cathy Andronicou joining you today with a fun idea for the holidays.   I can't resist a bargain at Ikea and this battery operated candle is no exception! The only thing is, it looks a little too plain!  So I whipped out my super shiny SRM Gold Vinyl, a few dies and enhanced it!

Here's what the candle looked like before enhancements,  fresh from Ikea!
 SRM Stickers Blog - Holiday Decor with Vinyl by Cathy A.- #srmstickers #vinyl #homedecor #christmas

With the help SRM Stickers Gold Metallic Vinyl-Glossy a Penny Black die and a Spellbinders Grand Circle die, it can be transformed!

SRM Stickers Blog - Holiday Decor with Vinyl by Cathy A.- #srmstickers #vinyl #homedecor #christmas

Die cut the deer from the Gold Metallic vinyl, don't throw away the waste, use the circle die to create a stencil for another project.

Adhere the vinyl to the candle and voilá it is done in a jiffy!

SRM Stickers Blog - Holiday Decor with Vinyl by Cathy A.- #srmstickers #vinyl #homedecor #christmas

Now for that waste that was put to one side.  I found an inexpensive glass cookie jar, and placed the stencil waste on one side, then added some Armour Etch - Glass chemical etching cream and left for around 15 minutes.

SRM Stickers Blog - Holiday Decor with Vinyl by Cathy A.- #srmstickers #vinyl #homedecor #christmas

Once the etching cream has worked it's magic, wash off thoroughly with water and then remove the vinyl.  If you remove carefully it can be reused.

SRM Stickers Blog - Holiday Decor with Vinyl by Cathy A.- #srmstickers #vinyl #homedecor #christmas

Your jar is now ready to fill with yummy cookies!  Love how the light from the candle glows!

SRM Stickers Blog - Holiday Decor with Vinyl by Cathy A.- #srmstickers #vinyl #homedecor #christmas

And even with the candle turned off, it still looks festive!

SRM Stickers Blog - Holiday Decor with Vinyl by Cathy A.- #srmstickers #vinyl #homedecor #christmas

What a fun treat to leave out for Santa!

Tuesday, November 11, 2014

Thanksgiving Table Treats by Tessa


Hello!  It's Tessa with you today, sharing an idea for your Thanksgiving table.  It's always fun to give a little treat on the holidays and I thought I'd use a kraft pillow box for mine this time.
SRM Stickers - Thanksgiving Table Treats by Tessa - #srmstickers #thanksgiving #pillow box #kraft #twine #stickers #doilies

I used stamps from Darcie's, patterned papers from Pink Paislee's Solstice 6x6 pad, gold doiliesStrawberry Coral twine, and the Fall sentiment stickers from SRM to decorate my boxes.  


I colored the stamped images with Prismacolor colored pencils and fussy cut around them.

SRM Stickers - Thanksgiving Table Treats by Tessa - #srmstickers #thanksgiving #pillow box #kraft #twine #stickers #doilies

Isn't this sentiment perfect for this cute image of the kid dressed up as a turkey?  I love how they look together!  I also love how the gold doily looks peeking out from behind.

SRM Stickers - Thanksgiving Table Treats by Tessa - #srmstickers #thanksgiving #pillow box #kraft #twine #stickers #doilies

Although the boxes are very secure and don't easily pop open, I used the Strawberry Coral twine to keep them closed through dinner.  We have a lot of kids at our holiday party and I thought the extra twine might keep their hands away from the treats until after dinner. :)

SRM Stickers - Thanksgiving Table Treats by Tessa - #srmstickers #thanksgiving #pillow box #kraft #twine #stickers #doilies

The sentiment stickers were adhered to white cardstock.  I cut them into shapes using a couple of my favorite diecuts.  I used foam dimensional adhesive to adhere them down.  I love the dimension it adds!

SRM Stickers - Thanksgiving Table Treats by Tessa - #srmstickers #thanksgiving #pillow box #kraft #twine #stickers #doilies

Thanks for joining me today!  I hope you have fun planning your upcoming holiday table decor!

Monday, November 10, 2014

Merry & Bright Stocking Stuffer by Lorena


Hello, SRM friends! With Christmas quickly approaching, we'd better get started on holiday crafting, right? What about a cute and oh, so merry stocking stuffer? I made a notepad cover that goes perfectly with the Pencil Sentiments/ Christmas. You just have to adhere a blank mini notepad inside it, or even a sticky notes pad, and there you have it, a very useful little gift!

SRM Stickers Blog - Merry & Bright Stocking Stuffer by Lorena - #christmas #pencils #twine #stickers #stockingstuffer #gift

I started by double scoring a long piece of cardstock to form the cover and make space for the notepad inside. Second, I die cut the bottom flap with a cute border, and lined the inside of the cover with patterned paper. And now comes the fun part: decorating! I used lots of SRM stickers for this!

SRM Stickers Blog - Merry & Bright Stocking Stuffer by Lorena - #christmas #pencils #twine #stickers #stockingstuffer #gift

For the base of the focal point I adhered a label sticker from FreeStyle Christmas to white cardstock and trimmed it. The "merry and bright" sentiment comes from Quick Cards/Merry. I chose this particular one because the font coordinates with the one in the pencil. On the top of the cover, I adhered a border sticker from Sticker Stitches/Christmas and tied a bit of baker's twine. Love the playful look that bow adds! I finished the notepad with a die cut ampersand, some enamel dots and tiny stars die cut from sparkly craft foam.

SRM Stickers Blog - Merry & Bright Stocking Stuffer by Lorena - #christmas #pencils #twine #stickers #stockingstuffer #gift

Oh, and the pencil got a little Christmas treatment too! I had a couple spare die cut stars on my desk, so I adhered them to the pencil. I adore those festive pencils!

SRM Stickers Blog - Merry & Bright Stocking Stuffer by Lorena - #christmas #pencils #twine #stickers #stockingstuffer #gift

And that's it! How will you be using your SRM stickers this Season? 
Thanks for visiting!

Friday, November 7, 2014

Guest Designer - Roberta Rosi


What a treat to have Roberta Rosi join us today as a guest designer. Based in Milan, Italy,  Roberta has that Italian fabulous sense of style and design. We are so pleased to have her back on the blog, if even for just a day. 


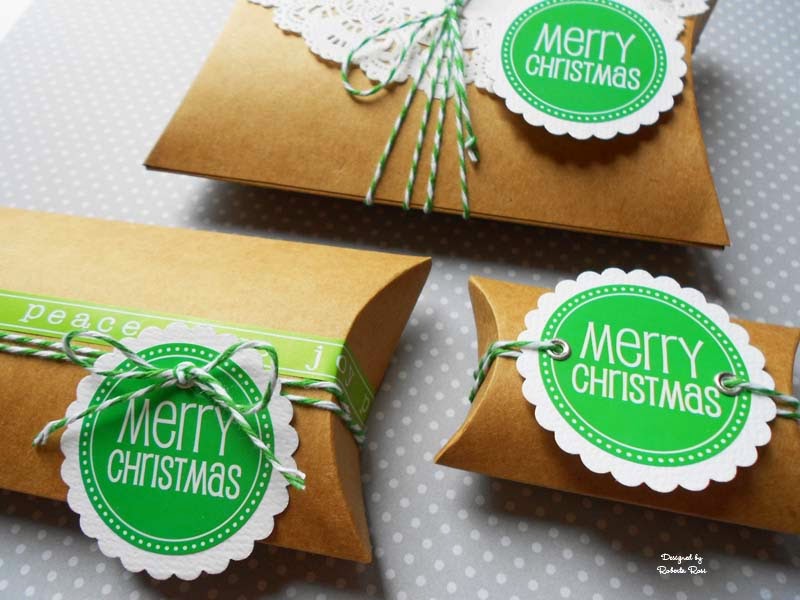
 Roberta has created a trio of DIY gift boxes for Christmas using all 3 sizes of SRM's kraft pillow boxes, some Take 2 Christmas stickers,  6" paper doilies, green twine and white punched pieces.

SRM Stickers Blog - Guest Designer Roberta Rosi - #christmas #stockingstuffers #doilies #twine #stickers #srmpress #srmstickers #DIY

Love how bold and beautiful the small pillow box is decorated with a Merry Christmas sticker mounted on a medium white Punched Piece.  Roberta added eyelets to both sides of the sticker and threaded some green twine through.    


The medium pillow box is coordinated by using one of the Take 2 borders, some green twine and another Merry Christmas sticker attached. Love how everything is green and coordinates. 


And for the large pillow box Roberta added a 6" white doily, wrapped it with green twine and topped it off with another Merry Christmas sticker.  


What a lovely trio of Christmas cheer!  What perfect little gift boxes.  Or stocking stuffers!  What would you tuck inside?


Thank you Roberta for joining us today.  We love what you do with SRM!
Come back soon!  We'd love to see what else you are doing with your SRM Sticker stash.

Thursday, November 6, 2014

Doily Love by Shery


Hello, SRM friends! It's Shery Russ and I'm here to share four cards I made that feature SRM's fun doilies! Now, I'm a one layer card girl at heart, but these doilies are so fun that once I started using them, I couldn't stop at just one card :o)


First up is this super simple but elegant looking card. I used a SRM White Heart Lace Doily. I thought it was perfect to use for a love or wedding themed card. I placed the doily on the bottom left corner of the card, trimmed the edges, and rounded the corner. I was after a clean look so I kept the design uncluttered and simple using the white stitches in the Sticker Stitches/ChristmasStickers by the Dozen/Wedding, and Fancy Sentiment/Love.

SRM Stickers Blog - Doily Love by Shery - #cards #doilies #stickers

For card #2, I wanted a clean and graphic look, so I stamped a newsprint stamp on my card base in brown ink and adhered Sticker Stitches/Christmas on either side. I adhered the labels with the fishtails in the Labels by the Dozen/Bright Blank then adhered the 4" white lace doily on top and trimmed it to the edge of the card. Next, I took a large 2.5" white scalloped circle punch piece, added a sentiment from the Fancy Sentiments/Thanks, adhered it onto the doily, and trimmed. I finished the card by adding black stitching from the Sticker Stitches/Black.

SRM Stickers Blog - Doily Love by Shery - #cards #doilies #stickers

As for card #3, I decided to create a fall-themed card so I went with fall colors of yellow, orange and red. I stamped the newsprint and leaves on the card base and added black stitching from the Sticker Stitches/Black. I layered two scalloped circle punched pieces (2.5" and 2") and added a sentiment from the Sentiment/Fall. I cut a 4" white lace doily in half, folded each half, and adhered on the back of either side of the layered punch pieces.

SRM Stickers Blog - Doily Love by Shery - #cards #doilies #stickers

And finally, for card #4, I went with a freestyle collage look and just layered different elements together. The 6" white lace doily was the perfect background for all the diecuts I found in my stash. First I stamped a newsprint background stamp in black ink on the card base and then added white cross-stitch stickers from the Sticker Stitches/Christmas around the edge. I adhered the doily, trimmed it, and then added black cross-stitch stickers. I went through my stash of diecuts and just layered the different elements onto the doily. I used a label from the Labels by the Dozen/Black & White and adhered it on the card base. I finished the card by adding a sentiment from the Sentiment/Thinking of You

SRM Stickers Blog - Doily Love by Shery - #cards #doilies #stickers

And there you have it! I hope my cards have given you some ideas on how you can incorporate those fabulous doilies from SRM! Thanks so much for letting me share!


Wednesday, November 5, 2014

Thanksgiving Tubes by Annette


Happy Day SRM Stickers friends!  Annette Allen here with you today to share some fun Holiday treat ideas using SRM Stickers clear Tubes. Since it is November I decided to have some fun with Thanksgiving. 

SRM Stickers Blog - Thanksgiving Tubes by Annette - #thanksgiving #tubes #stickers #tabledecor

Today I am playing with SRM Stickersclear Tubes Original and SkinnyWhite Lace DoiliesQuick Cards Thanksgiving and Sticker Stitches Halloween.  I wrapped the middle of the tube with the pretty Doilies and added some fun orange Sticker Stitches top and bottom.  

SRM Stickers Blog - Thanksgiving Tubes by Annette - #thanksgiving #tubes #stickers #tabledecor

I die cut a couple of shapes to added the big sentiment and turkey from the Quick Cards Thanksgiving. I just love how the stickers make your projects come to life. I added a little of washi tape and some trimmings to make the color pop. 

This makes for a fun Thanksgiving...
Don't you think?

Can't wait to put them on my holiday table!
Thanks for letting me share.

Tuesday, November 4, 2014

Inspirational Cards in a Box by Tessa


Hi!  It's Tessa Wise with you today!  Recently I created a set of cards to give as a gift to our choir director at church.  She's such a nice lady and I thought a package full of inspirational cards using the Shine Your Light Sticker Sentiment sheet would be perfect for her!

Here are the cards all bundled up in the A-2 Clear Box.  I fit 6 cards and matching envelopes in here perfectly.  It's been decorated with a few things I had left over from the cards.  The patterned papers and stamps are by Lawn Fawn.  The white doilysticker stitchessentiment sticker, and Pink Sorbet twine are all from SRM Press.

SRM Stickers - Inspirational Cards in a Box by Tessa - #cards #gift #A2 #twine #stickers #doilies

Here is a look at the cards I put inside:

SRM Stickers - Inspirational Cards in a Box by Tessa - #cards #gift #A2 #twine #stickers #doilies

I started with a yellow card base and embossed it with a large polka-dot embossing folder.  I splattered it with a bit of yellow mist and let it dry.  Next, I added a black sticker stitch from the Valentines Sticker Stitches sheet across the left side of the card.  I added a banner of pink and white polka-dotted paper next.  The sentiment sticker was added to a white diecut tag.  I adhered that to the card base at an angle and then added a strip of striped patterned paper and some diecut hearts.  I finished off the look with a few sequins for some sparkle.

SRM Stickers - Inspirational Cards in a Box by Tessa - #cards #gift #A2 #twine #stickers #doilies

For my second card, I stamped and fussy cut out the sun and clouds.  I added them to a blue card base, popping out some of the clouds for a bit of dimension.  I added a few sequins as well- they really sparkle in the light!  Next I added a strip of the patterned paper to the bottom edge of the card.  I added a white sticker stitch just above it and tied a bit of Pink Sorbet solid twine over the top.  I added the sentiment sticker last to finish off the card.

SRM Stickers - Inspirational Cards in a Box by Tessa - #cards #gift #A2 #twine #stickers #doilies

This card was a quick one.  I started with a white card base and added the pink striped paper to the bottom edge.  I added the sentiment sticker next, lining it up with the edge of the pink paper.  Next, I stamped the adorable hedgehogs and hearts and colored them in with my Prismacolor colored pencils.  I added just a bit of glitter to the hearts and the Caribbean solid twine to finish off the look.

SRM Stickers - Inspirational Cards in a Box by Tessa - #cards #gift #A2 #twine #stickers #doilies

I started this card by stamping and cutting out the rainbow and clouds.  I cut a white panel to fit the middle of my card and matted it with gray cardstock.  I splattered a little pearl mist over it and then adhered my rainbow.  I added a strip of the happy day patterned paper to the bottom and a strip of the blue stripes just above it.  I added just a bit of a black sticker stitches over the top of it too.  Next, I stuck the sentiment sticker on to white cardstock and cut around the label shape.  I adhered it to the panel with foam adhesive and then added a few sequins for accent.  Finally, I added the panel to the middle of a yellow embossed card base.

SRM Stickers - Inspirational Cards in a Box by Tessa - #cards #gift #A2 #twine #stickers #doilies

This one might be my favorite!  :)  I started with a white card base embossed with large polka-dots.  I diecut the banner out of pink striped paper and tied some Stone solid twine around the top.  I added it to the middle of the card base.  I stuck my oval sentiment sticker to some white cardstock.  I stamped the bunnies on either side so it looked like they were holding it between them.  I colored them with my colored pencils and then fussy cut around the entire image.  I added it to the card with foam adhesive so it popped up a bit.

SRM Stickers - Inspirational Cards in a Box by Tessa - #cards #gift #A2 #twine #stickers #doilies

I wanted to use this pretty sentiment on my last card.  I started with a blue card base and spattered over it with blue mist.  I added the sentiment sticker next and then the white doily that had been folded in half.  I added a strip of yellow patterned paper next and the pink sticker stitches just over that.  I finished everything off with a healthy dose of sequins.

Here is a look at the whole bunch together.  These were so fun to make!

SRM Stickers - Inspirational Cards in a Box by Tessa - #cards #gift #A2 #twine #stickers #doilies

I'm sure my friend will love these cards!  Have you ever made a set of cards for a gift?  If it's on your list of things to do this holiday season or any time for that matter, don't forget SRM's A-2 Clear Card Box.  It's perfect for packaging up your handmade cards.

Don't forget to hop on over to Paper Issues where you can join the SRM Linky Party fun!

Monday, November 3, 2014

Mini Calendar Star Album by Christine


You just can't go wrong with making someone a calendar for a holiday present. Just add pictures to it and you've got the perfect personalized gift to share with special family and friends.  Christine joining you today with a little Mini Calendar Star Album that I made special for one of the grandparents.

SRM Stickers - Mini Calendar Star Album by Christine - #srmstickers #mini calendar #calendar #album #2015 #stickers

I used a cut file from former SRM design team member Jamie Cripps to create the album.  Her instructions can be found here. I love that it can easily set up on a desktop just like this! I used the Mini Calendar/Decorative 2015 stickers for my calender part.

Look how cool it is from above!  They can easily check out other months or leave it on the current one.

SRM Stickers - Mini Calendar Star Album by Christine - #srmstickers #mini calendar #calendar #album #2015 #stickers

It folds down like this so it looks just like a normal mini album. I kept the cover simple, just adding a 2015 sticker (how is it almost 2015????).  You can get a whole selection of 2015 stickers from SRM's Year of Memories 2015 set.

SRM Stickers - Mini Calendar Star Album by Christine - #srmstickers #mini calendar #calendar #album #2015 #stickers

I decorated each page with a month and then a picture that I punched out.  If it was there birthday month I made sure it had their picture on it, but otherwise I just went with cute pictures.  I kept each page pretty similar so that the assembly wasn't too time consuming.

SRM Stickers - Mini Calendar Star Album by Christine - #srmstickers #mini calendar #calendar #album #2015 #stickers

Have you been busy making calendars for presents too?  We'd love to see what you have made!  Share your SRM Mini Calendar on our FLICKR.

Don't forget to hop on over to Paper Issues where you can join the SRM Linky Party fun!

Friday, October 31, 2014

Best Witches by Michelle


Happy Halloween!  
Michele here with a fun Halloween card to share with you!It's no secret that I adore shaped cards.  Anytime I am in a creative rut I find a cute cut at the Silhouette store. I found this adorable witch's shoe. SRM Stickers are the perfect compliment and so easy to incorporate. I used the Best Witches sentiment from the Express Yourself collection. I placed it on cream card stock and cut it into a banner. I tucked it under my cute fuzzy spider. 

SRM Stickers - Best Witches by Michele - #halloween #card #doilies

And since I can't leave anything simple and plain. Ever. I had to tuck a bit of doily behind the boot opening, because my witch happens to be a very girly, dressed up witch. ;)  A little orange satin ribbon for laces, a few sequins, and a couple of stick pins were all that was needed to finish this little number off. 

SRM Stickers - Best Witches by Michele - #halloween #card #doilies

I hope you all have a great day!  Happy Trick or Treating!  And remember, it is all about the candy and the crafting! :)
Thanks so much for stopping by!

Don't forget to hop on over to Paper Issues where you can join the SRM Halloween Linky Party fun!

Thursday, October 30, 2014

Celebrate Autumn by Stacey


Hello, SRM Stickers fans!
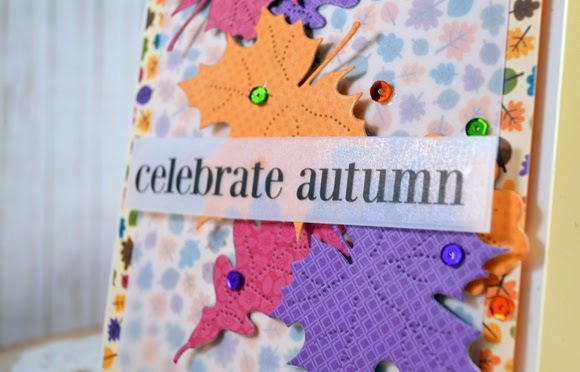
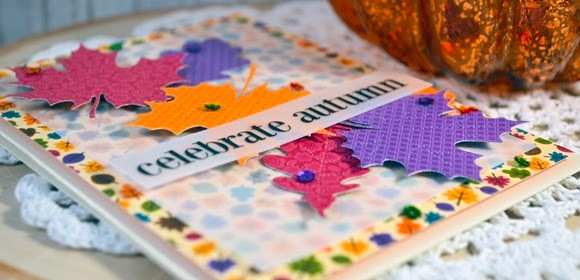
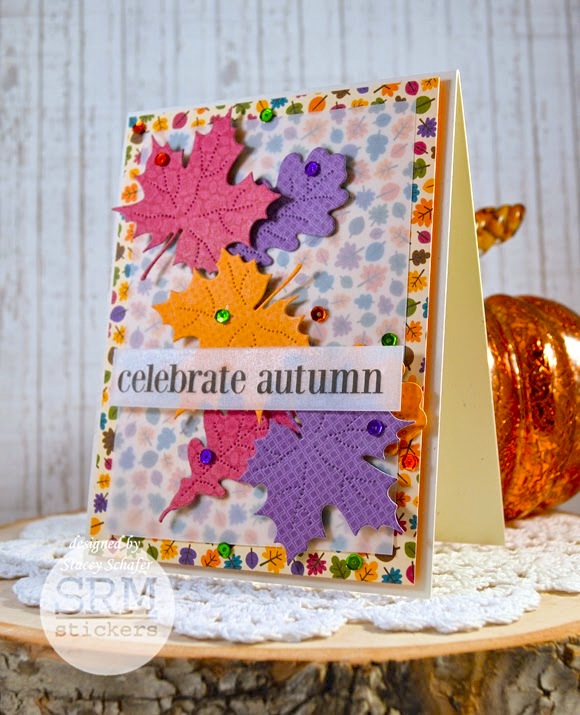
Stacey here with a splash of fall color using some yummy leaves, vellum, and SRM Stickers!

SRM Stickers - Celebrate Autumn by Stacey - #card #stickers #fall #diecuts #vellum

I layered up some fall-themed patterned paper and vellum, then added several bright-colored leaves embellished with sparkly sequins.  The "celebrate fall" SRM Stickers Sentiment/Fall themed sticker was the PERFECT sentiment to use!  I adhered the sticker to a second piece of vellum and glued it directly to the top of the leaf pile!

SRM Stickers - Celebrate Autumn by Stacey - #card #stickers #fall #diecuts #vellum

The leaves were cut from some Doodlebug Designs paper with Top Dog Dies! Die cuts, patterned paper and SRM Stickers are three of my best friends!

SRM Stickers - Celebrate Autumn by Stacey - #card #stickers #fall #diecuts #vellum

Here's the SRM Sticker I used.  It's the Fall Sticker Sentiment sheet.  You can make over 25 cards from just one sticker! 


I hope you are inspired to create a fall card of your own using some clear SRM Stickers!

Don't forget to hop on over to Paper Issues where you can join the SRM Halloween Linky Party fun!