Friday, October 30, 2015

Planner Pages by Tessa Buys


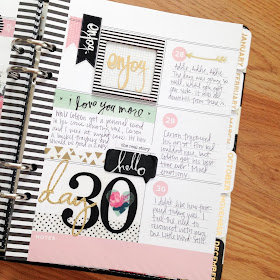
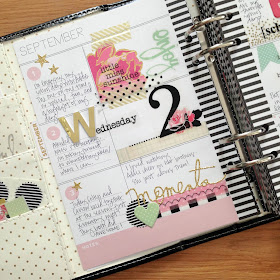
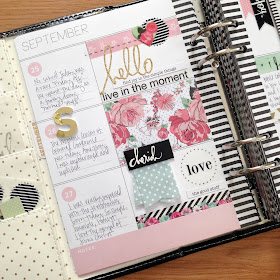
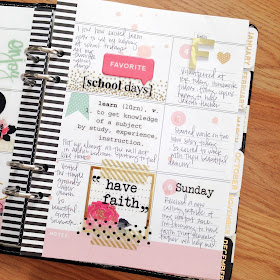
I love to plan with SRM stickers! Just about any sheet of stickers has something that I can add to my monthly calendar or weekly spreads. From seasons to themes, numbers to stitches, I love them all. I used dozens of SRM stickers to help decorate the September pages of my Memory Notebook:
SRM Stickers Blog - Planner Pages by Tessa Buys - #planner #DIY #stickers #stitches #numbers #faith #love #sentiments

 My favorite stickers to use are the "We've Got Your Number/Extra Large-Black" stickers. Layered with washi tape and other decorative stickers, they are the perfect embellishment for a huge impact:
SRM Stickers Blog - Planner Pages by Tessa Buys - #planner #DIY #stickers #stitches #numbers #faith #love #sentiments

I also love the sticker stitches. Layered over washi tape or on their own, they make great accents and page breaks.
SRM Stickers Blog - Planner Pages by Tessa Buys - #planner #DIY #stickers #stitches #numbers #faith #love #sentiments

Themed stickers are great for birthdays, Sundays, seasons and holidays.
SRM Stickers Blog - Planner Pages by Tessa Buys - #planner #DIY #stickers #stitches #numbers #faith #love #sentiments

My favorite part about using SRM stickers in my planner is that they coordinate with any planner and any other paper crafting product. In fact, I'd say SRM stickers make the other stuff look good!
SRM Stickers Blog - Planner Pages by Tessa Buys - #planner #DIY #stickers #stitches #numbers #faith #love #sentiments

If you'd like to see a flip-through of my September pages, as well as a slideshow with more photos, please see my YouTube video here.

Hope that my September pages have given you some inspiration for the upcoming months of your planner.  Thanks for checking mine out and have a wonderful day!

Thursday, October 29, 2015

Give Thanks Linen Bag & Tag by Amy


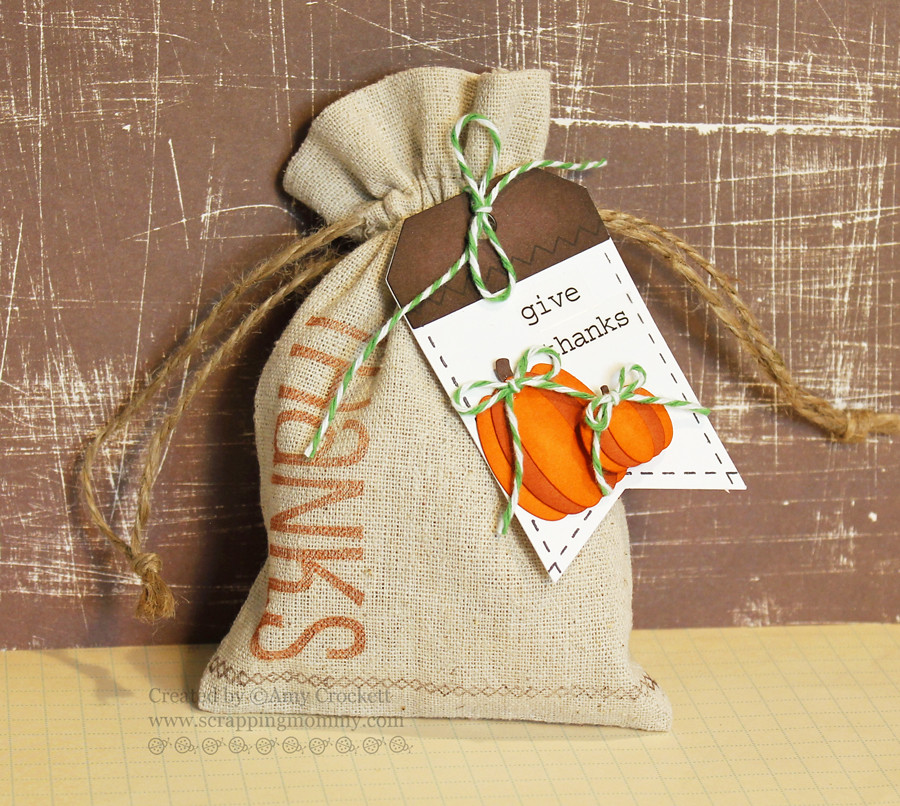
Hello crafty friends!!  This is Amy here to share a fun treat bag and tag with you that would be perfect to give during the Thanksgiving holiday.

SRM Stickers Blog - Give Thanks Linen Bag & Tag by Amy - #linen #bag #BIGStamps #Thanks #thankyou #clearstamps, #fall, #autumn #stickers #stampedstitches #giftbag #treatbag #DIY

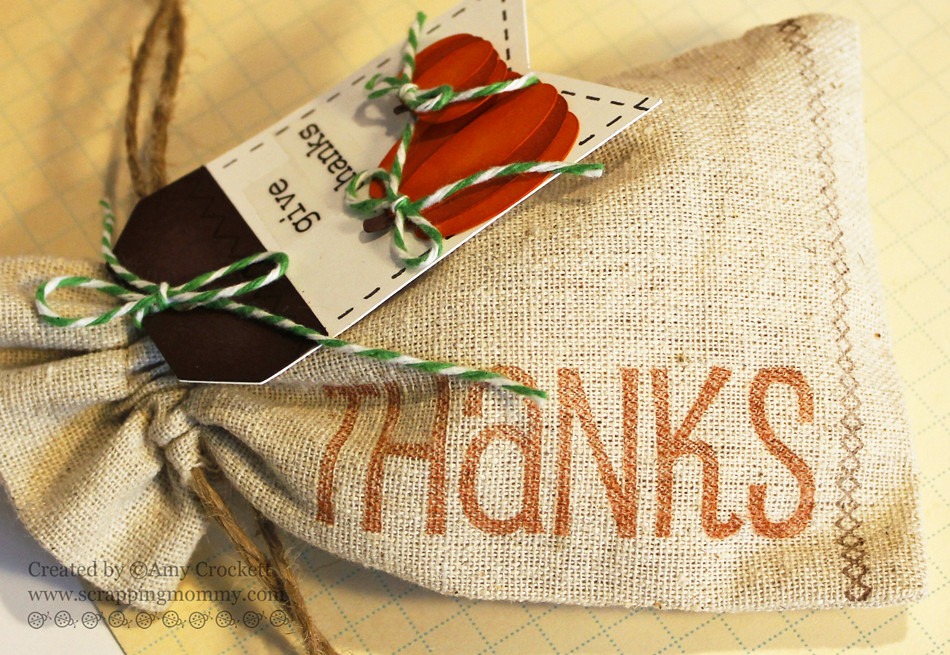
I started with the 3x5 Rustic Linen Bag and stamped it with the Big Thank You clear stamp set.  I made sure that the stamp was well saturated and then pressed firmly down on the bag and held it for a minute to let the ink sink into the fabric a bit.  I think that it turned out really well.  


Take a look at the stamped image up close…..

SRM Stickers Blog - Give Thanks Linen Bag & Tag by Amy - #linen #bag #BIGStamps #Thanks #thankyou #clearstamps, #fall, #autumn #stickers #stampedstitches #giftbag #treatbag #DIY

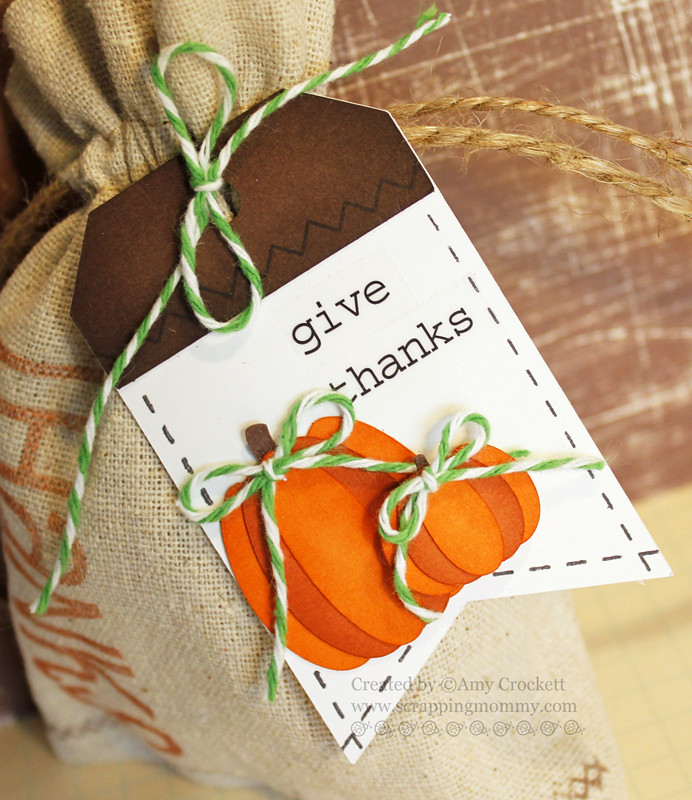
I cut a tag on my Silhouette using THIS file and added some stamped stitches from the Stamped Stitches clear stamp set.  


I then added pumpkins that I cut from THIS file.  I tied them up with some Peapod bakers twine and then added a sentiment from the Fall Sticker Sentiments.

Here is a closer look at the tag….

SRM Stickers Blog - Give Thanks Linen Bag & Tag by Amy - #linen #bag #BIGStamps #Thanks #thankyou #clearstamps, #fall, #autumn #stickers #stampedstitches #giftbag #treatbag #DIY

Thanks for stopping by!  

Amy

Wednesday, October 28, 2015

October Planner Pages/Calendar by Juliana (and bonus card)


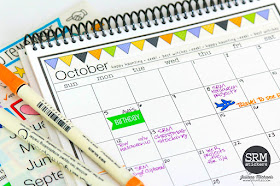
Hello SRM Fans! It's Juliana here with you today and I'm sharing how I've used the SRM Stickers 8x8 Calendar to create my version of a planner. I recently realized that I needed a better way to keep track of some of my DT assignments, along with other important events and activities. Although this project is for October, the idea can work for you throughout the year!
As I was trying to come up with a system that would work for me, I remembered having an 8x8 calendar from SRM Stickers. When I pulled it out, I knew it was just the right size for what I needed. I truly believe you have to find a system that works for you. Some of us have more activities, meetings and appointments in our lives than others, so I encourage you to check out your options and figure out what will work best for you. 

SRM Stickers Blog - October Planner Pages/Calendar by Juliana - #planner #calendar #october #halloween #months #numbers #stickers #DIY

Now, when it comes to decorating your planner or calendar SRM Stickers has you covered! From their wonderful Calendar Month and Calendar Companion Stickers to their We've Got Your Border and Sticker Stitches, you are sure to find exactly what you need!

SRM Stickers Blog - October Planner Pages/Calendar by Juliana - #planner #calendar #october #halloween #months #numbers #stickers #DIY

For my October page, I went with a Halloween theme. Along with the SRM Stickers, I used some colored markers in colors that coordinated with my Halloween theme. It came together so quickly with the help of the awesome SRM Stickers and it has been really helpful for keeping me more organized this month. I will definitely be continuing to use this calendar and I've already started getting my November page ready to go.

So how are you using SRM Stickers in your planner? You can share them with us in the SRM Stickers Planner Sticker Fun Facebook group! We can't wait to see them!

And because I love Halloween so much, I thought to share with you this Halloween card I created using SRM's Jane's Doodles Get Candy Stamp along with clear Sentiments from SRM's Stickers by the Dozen and Sticker Stitches.  


HUGS and Happy Haunting to you all!
Juliana

Tuesday, October 27, 2015

Halloween Framed Decor by Annette


Happy October SRM Stickers Friends.
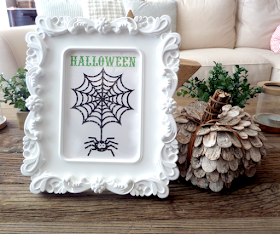
Annette Allen here with you today to share a fun Vinyl frame decor.

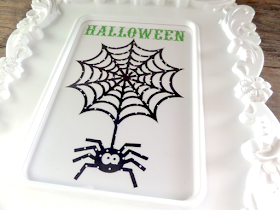
SRM Stickers Blog - Halloween Framed Decor by Annette - #halloween #homedecor #frame #altered #patternedvinyl #vinyl #DIY

I love decorating for Halloween.  Now I don't like the scary images but cute.  I found this frame at Ikea and thought it would be perfect for putting different Holiday images in as the months go by. 

SRM Stickers Blog - Halloween Framed Decor by Annette - #halloween #homedecor #frame #altered #patternedvinyl #vinyl #DIY

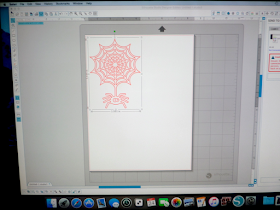
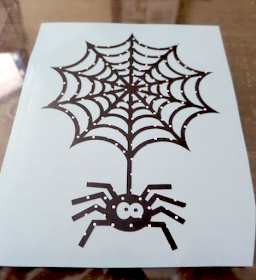
I found this cute image on Silhouette America and knew it would be perfect with SRM Stickers: New Patterned Vinyl.

SRM Stickers Blog - Halloween Framed Decor by Annette - #halloween #homedecor #frame #altered #patternedvinyl #vinyl #DIY

Aww look how cute it came out and the polka dots on the SRM Stickers: New Patterned Vinyl (Black) is perfect. I used acetate to stick the vinyl too and add a sheet of white card-stock for the backing. 

SRM Stickers Blog - Halloween Framed Decor by Annette - #halloween #homedecor #frame #altered #patternedvinyl #vinyl #DIY

I had plenty of room in the frame so I added Halloween using: 

SRM Stickers Blog - Halloween Framed Decor by Annette - #halloween #homedecor #frame #altered #patternedvinyl #vinyl #DIY

So many fun ways of using the new SRM Stickers: Patterned Vinyl.
It is in high demand right now so make sure and check out all the fun colors HERE.

Thanks for stopping by.
Happy Crafting.

Monday, October 26, 2015

Crafty Halloween Tubes by Angi


It's almost Halloween! Hello SRM fans! Angi Barrs here to show you a fun way to get crafty before the sugary filled holiday gets here.

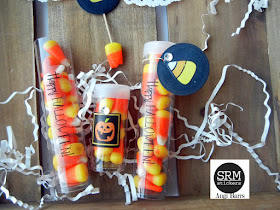
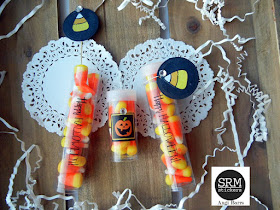
I made some fun Halloween tubes using SRM products. The tubes come in a variety of sizes too. Here's how I decorated mine. 

SRM Stickers Blog - Crafty Halloween Tubes by Angi - #halloween #treats #tubes #stickers #favors #DIY

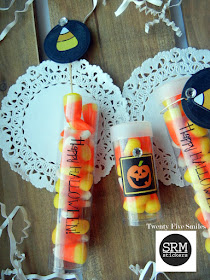
I used the standard size and the mini tube. They are the perfect size for your candy. I like to fill mine with candy corn since it fits in well with the Halloween theme. Small chocolate candy are just right too!

I added some Stickers by the Dozen Halloween and Say it with Stickers Halloween products to the front of each tube. 


SRM Stickers Blog - Crafty Halloween Tubes by Angi - #halloween #treats #tubes #stickers #favors #DIY

I also made "candy corn" tags using the same set as well. Fun!

SRM Stickers Blog - Crafty Halloween Tubes by Angi - #halloween #treats #tubes #stickers #favors #DIY

Thanks for dropping by!   Hope you enjoyed this quick and easy project!  Tubes are great for any time of year. 

Friday, October 23, 2015

Planner Pages with Gratitude Journal by Christine


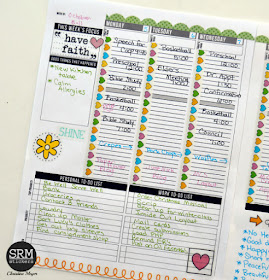
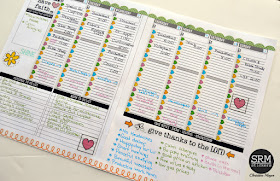
SRM Stickers are so fun to use in planner pages and today I am going to show you how I used them in a planner spread and made part of it work for a gratitude journal too! Christine joining you today with my very simple planner that I printed off here!

Here's the first side of my spread:

SRM Stickers Blog - Planner Pages with Gratitude Journal by Christine - #planner #journal #stickers #faith #DIY

I don't like all the hours being printed out for me because that is just more detail than what I need - so I used some heart border pieces from Take2 Stickers by the Dozen: Baby to cover those up. I then added in my commitments.  Black writing for schedule commitments, Blue writing for meal planning, and Pink writing for Blog/Design Team Commitments.  Some of the other sticker sets I used on this page are:


SRM Stickers Blog - Planner Pages with Gratitude Journal by Christine - #planner #journal #stickers #faith #DIY

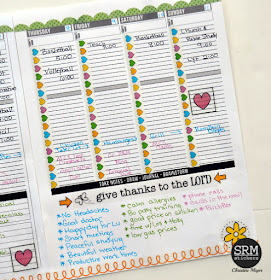
On the right hand side I used the "Take Notes" area to make a Gratitude Journal type area.  We can all use the time to be thankful for the big and little things and I thought this was the perfect spot to do that.  SRM has tons of stickers that would work for this but mine came from the Sentiments/Shine Your Light set again.

SRM Stickers Blog - Planner Pages with Gratitude Journal by Christine - #planner #journal #stickers #faith #DIY

What unique touches do you add to your planner to make it work for you?  SRM has some great stickers to help you get started in personalizing!

Thursday, October 22, 2015

Pumpkin Time by Michele


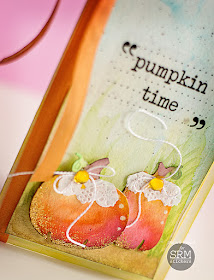
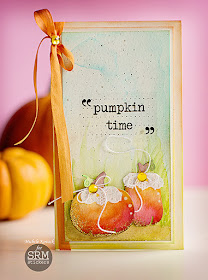
Good morning my crafty friends! Michele here with a card that celebrates my love for all things pumpkin! I am the crazy one who totally gets into the pumpkin craze! I Hope I am not alone in this mini obsession of mine! ;) I die cut a couple of pumpkins and water colored them.  The gold sparkle is from a bit of Stickles. I added a piece of doily to each pumpkin, a rhinestone, and a bit of white string. 

SRM Stickers Blog - Pumpkin Time by Michele - #card #fall #doily #pumpline #stickers #sentiments

I added a sentiment from the Fall sticker collection.
 I added a bit of silk ribbon and one more gemstone. 

SRM Stickers Blog - Pumpkin Time by Michele - #card #fall #doily #pumpline #stickers #sentiments

Thanks so much for stopping by! 

Wednesday, October 21, 2015

Box of Halloween by Annette


Happy Day SRM Stickers Friends.
Annette Allen here with you today.


I love making little note cards and gifting them in this cute SRM Stickers Mini Boxes.  Birthdays.. Halloween..Christmas..or just fun note cards. So many ways you can fill these SRM Stickers Mini Boxes. I put in four cards but I think that you can put up to six cards inside.

For all cards I used:
Jane's Doodles: Get Candy clear stamp
The background was created with a Tim Holtz stencil.

And on this first card I used SRM's Punched Pieces (Medium Black).


Each card has the Tim Holtz stenciled background with a different image 
and border sticker.  So fun!


Which one is your favorite?


And when you are done with your mini cards, just pop them into one of SRM Stickers Mini Boxes.  Such a perfect gift!


SRM Stickers has so many fun Halloween Sticker sets you can go crazy and get creative. It is that time of year to start those fun Halloween cards.

I hope I have inspired you today.
Thanks for stopping by.
Happy Crafting.

Tuesday, October 20, 2015

Eat Cake by Lesley


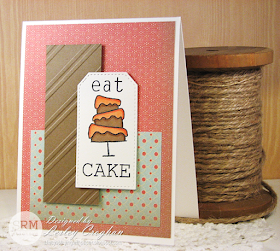
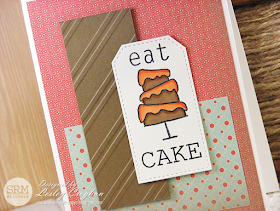
Hello!  Lesley here Today I am sharing a card I made using the cute Jane's Doodles stamp set called Eat Cake. 

SRM Stickers Blog - Eat Cake by Lesley - #card #birthday #janesdoodles #eatcake #clearstamps

I absolutely love this stamp set and it is so much fun to color!!!

SRM Stickers Blog - Eat Cake by Lesley - #card #birthday #janesdoodles #eatcake #clearstamps

I kept my card clean and simple! It's nice to use up some old, retired designer papers! Like I said….I love this stamp set!!  Can't wait to use it again and again!

Thanks for dropping by!

Monday, October 19, 2015

Altered Clipboard with SRM Patterned Vinyl by Juliana


Hello SRM Friends! It's Juliana here today to share a fun project that I created by taking an ordinary clipboard and transforming it with SRM Stickers Vinyl.  I was recently out shopping and the back to school supplies caught my eye. As I was strolling the isles, I came across some plain clipboards and thought they would be fun to alter with the new SRM Patterned Vinyl.


To alter the clipboard, I began by painting it with the Easy Chalkboard Marker. While the paint was drying, I cut a piece of the new 12x12 Patterned Vinyl in Black Dots to cover the front of the clipboard.


Gold foil is all the rage right now, so I thought it would be fun to dress up the clipboard even more by adding a quote using the Glossy Gold Vinyl.  I selected a quote and then designed a digital die cut file and cut it out using my Silhouette Cameo. I even cut the bow out of the gold vinyl!

You can download the digital cut file quote that I created for free by clicking on this link:  Believe You Can Digital Cut File
Enjoy!


If you take a closer look at the clipboard, you might also notice that the clip on the board is gold. I covered the front of the clip with a piece of gold vinyl and then trimmed off the excess. I used a Gold Krylon Pen to color the rest of the hard to reach parts of the clip gold. 

This was such a fun project to create and I think it would make a great gift idea or home decor piece. With all the fabulous colors of SRM Vinyl available you can customize it for just about anyone or anything! What will you create and share with us using SRM Vinyl? We can't wait to see it!

HUGS!

Friday, October 16, 2015

Snowflakes in the Air by Shannon


✳...Snowflakes in the Air...✳

...Carols everywhere
Olden times and ancient rhymes

Of love and dreams to share...

Hello!  Shannon here to let you know it's quickly approaching! I'm not beating down the door to Christmas and the holiday season, but I'm just standing outside pacing. 

94 days....do you have a sense of wonder? Or a sense of panic? 

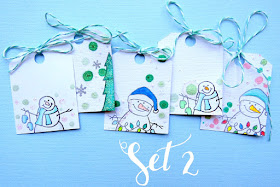
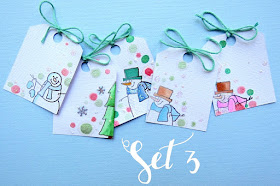
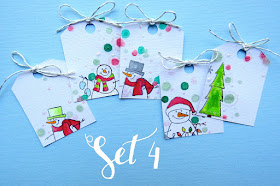
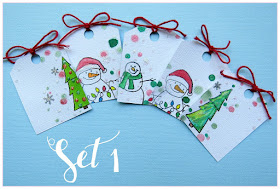
I'm here today to make your life a little easier. All you need is some cardstock (or pre-made tags), twine, stamps, mist, glitter glue, markers and some ingenuity. 

SRM Stickers Blog - Snowflakes in the Air by Shannon -#christmas #tags #gifttags #clearstamps #janesdoodles #warmwishes #twine #shimmertwine #DIY

I used one sheet of white card stock to create these tags. I used a file and my cutting system to get an easy 20 tags out of the 12X12 sheet. Another easy way to get 20 tags? Buy some pre made ones. 

SRM Stickers Blog - Snowflakes in the Air by Shannon -#christmas #tags #gifttags #clearstamps #janesdoodles #warmwishes #twine #shimmertwine #DIY

Using Jane's Doodles stamps from SRM (I used stamps you can purchase here: "Warm Wishes"

SRM Stickers Blog - Snowflakes in the Air by Shannon -#christmas #tags #gifttags #clearstamps #janesdoodles #warmwishes #twine #shimmertwine #DIY


I stamped on each tag. If you notice, I did not stamp them perfectly at all. They are all off center. This is perfect for people who aren't stamping gurus. I am among that category. I love stamps, I just get easily intimidated. 

SRM Stickers Blog - Snowflakes in the Air by Shannon -#christmas #tags #gifttags #clearstamps #janesdoodles #warmwishes #twine #shimmertwine #DIY

Once you get them all stamped and they are nice and dry, you can begin coloring. That is always the fun part! After they're colored...you can use some mist and spatter it all over the tag, or if you aren't into that..skip it! You can also add the glitter glue at this time...this is also optional. 

SRM Stickers Blog - Snowflakes in the Air by Shannon -#christmas #tags #gifttags #clearstamps #janesdoodles #warmwishes #twine #shimmertwine #DIY

Once everything is good and dry, add your twine. I simply threaded the twine through and tied a bow. You can either add another piece of twine to tie on a bag or gift...oooorr you can add a glue dot to the back and stick it right to a package!

I shared each set of 5 because I wanted to share all the fun little details.  And here's the products I used to create these fun little tags:

Thanks for dropping by.  Time to get started on your Christmas crafty projects?  I'm off to do more of mine! :)