Friday, March 30, 2018

Spring Planner by Angie


Hello SRM friends!! Angie here with you today to share some spring inspired planner pages!  My planner pages are for March, but you can use this format for 
any month.

What makes you think of Spring? For me, it's the beautiful colors of new flowers growing, singing birds and amazing sunsets. I just love all of the pretty colors!!

Those colors inspired my planner pages!! I hope you will get inspired by spring and create some beautiful projects of your own. SRM has plenty of products to help you do just that!


To make the watercolor on my planner pages, I used the watercolor twist pencils. I simply scribbled the pencil onto some plastic packaging, added some water and then mashed the packaging down on my pages. I added some splatters of the color as well. I used the same process to color the stamped images seen on my pages. Those stamped images are from the Just Believe stamp set and are probably my favorite stamp set from the store. 


The 'March' sticker is from the small months sticker set.


I hope you enjoyed my planner pages! Grab some products from the SRM store and create something amazing today!!


Other products used:


Thursday, March 29, 2018

Throwback Thursday - TUBES!


Sometimes it's fun to walk down memory lane and today we are going to re-visit some of my favorite TUBE projects.  The Tubes were introduced in 2010 and they have been a BIG hit ever since. 

First up... Tessa Buy's take on a Christmas tube from 2011.


And here's a great idea from Tanya Tahir in November of 2011.


Party Tubes from Amy Heller in November of 2010!


Want to see more ideas for TUBES?  Here are a couple of links where you can find hundreds of TUBE projects!
Enjoy!

http://srm-stickers.blogspot.com/search/label/TUBE
http://srm-stickers.blogspot.com/search/label/Tubes


Wednesday, March 28, 2018

Personalized Bible Cover by Samantha


Hello! Samantha here with you today to share how I used SRM vinyl to create a personalized Bible Cover. My journaling Bible has lots of paint, vinyl, stamps, and stickers on the inside for personalization, so I figured, why not use some vinyl to make the outside personalized for me, too? 


 I used both black and gold vinyl for my cover. Besides vinyl, you'll also need some transfer tape and a way to cut your vinyl (I used a Silhouette Cameo, but any digital die cutting machine will work). 


Make sure you wipe down the cover of your Bible before adding your vinyl. If it's well used like mine, you'll want to make sure you get those oils from your hands and bits of paint and ink wiped off as best you can. 


You can do this on a smooth or textured cover in any color vinyl you'd like. I chose black and gold, because the binding of my Bible is black with gold details. 


Chose a Bible verse that's personal to you (like a confirmation or wedding verse) or one that helps you remember why you spend time Bible journaling. What would you put on your personalized Bible cover?

Tuesday, March 27, 2018

Sermon Notes by Jenn


Hello friends! Jenn here... back to share how I like to use my planner to take sermon and podcast notes. During the week when I have downtime I really enjoy listening and watching sermons and podcasts...thus lots of notes. I started putting them all in my Happy Planner Faith edition so I could easily reference the notes and come back to them as possible Bible journaling entries.


I began by attaching large die cuts to the page with my tape runner. Then I pulled out my LePens ....these colors have me all kinds of heart eyes! I picked out three colors that fit with my overall color scheme. As important key points and main ideas were brought up I used my key and light bulb icon stamps to further pull out these thoughts. I journaled the main theme I took from the message using the tiny alpha and circles. To finish off the page I stamped a few words that fit with the theme of the page, added some washi and few stamped hearts.


I find myself more likely to pull out my notes if I find them appealing to look at, which in turn causes me to reflect more and dwell on the messages. I hope this encourages you take those crumpled notes out of your Bible and put them in a journal. This could be a great place to start Bible journaling if writing in a Bible makes you a little nervous.


Supplies Used:
Le Pen 10 piece set - Neon colorsClear stamp/ Pray, Journal, Repeat, Clear stamp/ Daily Devotion

Monday, March 26, 2018

Watercolor Spring Bouquet Card by Emma


Hello there!  Emma here today to share a sweet and easy Spring card using SRM supplies.

After a long hard winter here in southern Ontario, I'm sure I'm not alone in looking forward to Spring!  (As I'm typing this, it's actually snowing outside again, so yes, REALLY would like to see the end of that as soon as possible..)


So to start this card, I stamped some flowers onto watercolor paper from the SRM "Just Believe" stamp set.  As some stamping ink reacts with water, I recommend a waterproof ink such as Versafine or Ranger Archival.  I wanted to use a colored ink, so for this I used "Warm Sunshine" crisp ink by Altenew.


To color the flowers, I used the Watercolor Twist pencils by Marvy, and a waterbrush.  It makes it so easy to get a nice soft watercolor effect.


Once this was dry, I fussy-cut the flowers out of the paper and set aside.  I adhered a couple of pieces of co-ordinating patterned paper on a white card base, then used a Kraft embossed paper bag.

Inside the top of the bag, I cut freehand some green 'leaves' and arranged them.  I then adhered my watercolor flowers on top of the leaves to make a Spring bouquet!  I tied some jute string around the bag for an extra fun element.

As finishing touches, I added 'Hooray!' from Sticker Sentiments "Thinking of You" and 'Spring' from Express Yourself "Easter" stickers.


So there you have it, a very cute card to send to a friend who is happy that Spring is here (or almost..)!
Happy crafting,

~~ Emma ~~


Supplies:
White watercolor paper
White cardstock
Green cardstock
Patterned paper
Glue dots / liquid adhesive


Friday, March 23, 2018

Easter Bags by Shelly


Hey y'all! Shelly, here.
Today, I'm swinging in to share some fun and easy Easter bags with you. And they happened to be perfect for kids, too! ;) 


I started with choosing my patterned bags, in this case I chose the polka dots in purple, turquoise, pink, and yellow. After I used some felt to make some 'peeps/bunnies' and they attached them to my bags. I then added a little sticker sentiment to my bags, along with a few sequins. 


So simple, right?!...These easily can be filled with candies, little games/toys, a coloring page and crayons, etc. So many possibilities! I left my empty for now because I don't want my kids seeing anything. ;) 


Thanks so much for stopping by!
Enjoy your day! 


SRM Stickers supplies:


Thursday, March 22, 2018

Mini Calendar Layout by Giorgia


Hello SRM friends, Giorgia here and today I am sharing a layout with you.
 I love making layouts, it is my favorite way to preserve memories.
For this layout I had an idea as soon as I saw the fabulous mini calendar 2018 stickers:
I wanted to give the idea of being loved each and every day, so I created the background using all of them!


The background paper, that seems like a galaxy, matches the funny photo; the photo was taken on Valentine's Day 2018, so I marked the date on the calendar using an enamel heart and I add the 2018 taken from Year of Memories Sticker/2018 sticker sheet.


 I added die- cuts and I machine stitched every mini calendar (I love to add texture this way!). Put glue only in the centre of the die-cut, so you can lift up the borders and add dimension.  I used foam tape to adhere some of the die-cut, to add depth, and on some of them I added an enamel shape.


I hope to have given you an alternative idea to use mini calendar stickers (in the shop you can find also past years to scrap old pictures!)

Until next time,
ciao, Giorgia

SRM products used 

SaveSave

Wednesday, March 21, 2018

Modern Wedding Favors with Heat Transfer Vinyl by Emma


Greetings, fellow crafty people!  Emma here today to share an awesome idea for wedding favors with a twist, of course using SRM supplies.

When my husband and I got married 14 years ago, Pinterest didn't exist (I know, the horror!)  So, this kind of inspiration for cool and modern wedding accessories only appeared in expensive bridal magazines.  At the time, although I longed to create something like that on the glossy pages, it seemed very out of reach.  Well, not any more!

SRM stocks these amazing fabric bags, which are perfect for all kinds of embellishments.  For this project, I'm using a cool metallic orange heat transfer vinyl.  


My wedding favors are going to contain tea bags, as I thought it was a fun theme.  I cut the vinyl with my Silhouette Cameo machine and applied it to the fabric bag.  The font I used was called 'Sign Painter', and the swirls were available in the Silhouette Design Space software.  (Remember to flip your design to a mirror image before cutting!  Otherwise the letters will be back-to-front when you apply the design..)


So, of course my wedding was a while ago now, but maybe one day I'll get to use some of these crafty ideas for one of our children's weddings.  It's certainly fun to create things and share them with you!

Happy crafting!

~~ Emma ~~

Supplies:
Metallic orange heat transfer vinyl
Silhouette Cameo / Design Space
Craft iron

SaveSave

Tuesday, March 20, 2018

Textile Foil on Wood by Karen


Hello!  Karen joining you today with something very addictive! 
It's so fun when I get my box of goodies from SRM Stamps. Recently, as part of the Design Team, I was sent some textile foil. I'm new to textile foil, but was excited to discover different ways to add some shimmer and shine to my projects.


Today I'm sharing this wood plaque project using textile foil and EasyWeed Adhesive.  Watch this video to see how I created this project and what I did when it didn't turn out quite as expected. 


I love how this project turned out and I learned a lot in the process. I also love that I was able to use this wood plaque that has been sitting for quite some time, just waiting for sparkly inspiration.


For this project, I used:

Monday, March 19, 2018

James 1:17 Bible Margins Journaling by Christine


One of my favorite Bible Verses is James 1:17 - how perfect is it that one of my favorite Bible Journaling Margins to date also includes that verse?  Christine joining you today with a journaling piece featuring the Bible Margins Rejoice stamps.


I incorporated several additional stamps and some mixed media into this piece as well.  


To create my background I combined Distress Oxides along the edge with splatters of mist in a coordinating color.  Then I began to stamp!  Along the border I stamped with one of the stamps from Bible Borders. I love that cross one! I used the Just Believe Stamp to create additional flowers and then doodled some leaves of my own using the Black  Le Pen.


I colored in my stamps using simple brush markers and that's it! Not complicated but still a beautiful piece to reflect on as I read James!  

Friday, March 16, 2018

Faith Cards by Melanie


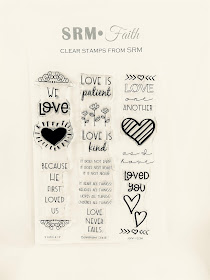
Hello! Melanie here today and I am sharing a couple of cards I made using the new Bible Margins Love Clear stamps.


These stamps are wonderful for stamping in Bible margins or for bookmarks, too. I used a masking technique to just use a portion of the stamps for my cards. I used a small sticky note to cover the part of the stamp I wasn't going to put on the card. Then I inked the stamp. After removing the sticky note, I could stamp the portion with ink onto the paper.


 By using the same basic overall design for both cards, I was able to complete them rather quickly. I varied the patterned papers and width of the strips.


 The Sticker Stitches are probably my #1 go-to product by SRM. I use them all the time. For these cards, the dot stitch was a perfect way to anchor the sentiment banner to the card.


Wishing you a "LOVE"-ly day! :)

SRM Products used:

Thursday, March 15, 2018

Spring Cards by Angie


Hello SRM friends and fans! Angie here today to share some spring card inspiration. I love using SRM's bags as envelopes and decorating them too!


One of my favorite stamp sets from SRM is the Just Believe set. I used the stamps from that set on both of my cards.  It is a religious themed stamp set but by looking at my cards, you would never know that. That is one reason why I love SRM's stamp sets--they are so versatile. 

I also used the XXX stamp from the BIG Love stamp set to give my cards a stitched look. The XXX stamp is one long strip but I cut mine down so I could have just three stamps. 


I stamped and fussy cut both butterflies, one of the flowers and the leaf stem. I also stamped one of the other flowers on the pink tag. 

To color the butterflies on the thank you card, I used the watercolor pencils. Just simply add your color and then spread it around using a water brush. 


I used SRM's awesome labels by the dozen on both cards. Those labels have so many uses. They can be used on cards, scrapbook layouts, tubes or even for labeling stuff in your kitchen!! SRM also has many colors of jute twine. I used light pink jute on both cards. 


As you can see, I also used two awesome bags from SRM as cute 'envelopes' for my cards. Have you checked out the selection of bags? Go ahead and have a look. I used the embossed chevron glassine bag and the lime green stripe bag.


I hope you enjoy the ways that I incorporated spring on my everyday type of cards.

Thanks for stopping by the SRM blog!!


Other products used: