Tuesday, September 30, 2014

Princess Christmas Ornaments by Tessa


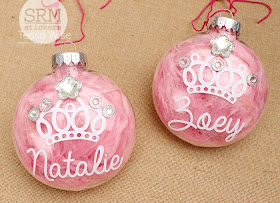
Hello!  It's Tessa Wise with you today, sharing some Christmas ornaments personalized with SRM vinyl I made with my little girls.  They are 7 and 9 and love to do crafts, especially ones we can display!  These will be proudly hung on our Christmas tree this year.

SRM Stickers - Tessa Wise - #srmstickers

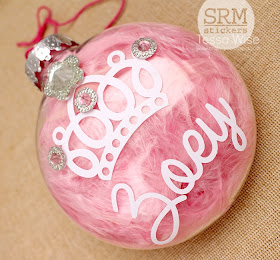
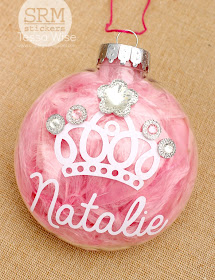
 I picked up these clear plastic ornaments at the craft store along with a pink feather boa and some jewel stickers.  I took the tops off the ornaments and let the girls stuff part of the pink boa in each of them. 

SRM Stickers - Tessa Wise - #srmstickers

I found this cute crown file in the Silhouette store and cut it, along with each of the girls' names out of a SRM White Glossy Vinyl Sheet.  I used Transfer Tape cut to size to adhere the cuts to the front of the ornaments.   I let the girls add the jewels over the top.  They loved it!

SRM Stickers - Tessa Wise - #srmstickers

We had so much fun creating these!  I can't wait to see what they look like on our tree!

Monday, September 29, 2014

Party Dress Card Tutorial by Cathy A.


Every little princess must have a party dress to twirl in on her birthday, so why not have a party dress card too!  Hello from Cathy Andronicou sharing with you today a fun and fabulous card I made using SRM's wonderful doilies and clear stickers. 

SRM Stickers - Princess card by Cathy A - #srmstickers

And here's a photo showing you the card base and doily prepared to be the ruffle on the skirt.


Want to make one?  Here's how you create this card!  

1) Fold  Card and cut out dress shape using template. Cut into the centre of a large white doily and then remove a circle from the middle.

2) Glue doily along the bottom of the dress ruffling as you go and then add left over pieces to the top.


 3) Cut dress out of patterned paper and add sticker stitches to the bottom and waist. I cut the stitches into small sections to allow them to go round the curve easily. Attach to main dress card, creating folds in the skirt to fit the base.  Add a touch of Lilac Solid Twine with a bit of bling.

SRM Stickers - Princess card by Cathy A - #srmstickers

 4) Add Princess "Make a Wish" sentiment to the skirt, a twine bow and gem to the waist and gems around the top of the dress.

SRM Stickers - Princess card by Cathy A - #srmstickers

What a perfect card for a little princess.  And now you know how to create it! 

SRM Stickers - Princess card by Cathy A - #srmstickers

Here's the SRM Sticker products used in this project: 


Hope you enjoyed my tutorial and that it will inspire you to create one for your little princess!

Friday, September 26, 2014

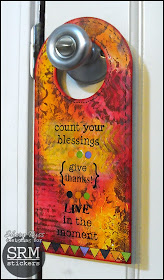
Autumn Mixed Media Door Hanger by Shery


Hello! Shery here to share another home decor project.  This time it's a mixed media door hanger with an autumn flavor! Autumn is my absolute favorite season. I love the richness of the fall colors and I wouldn't mind at all if it were fall all year!

SRM Stickers - Shery Russ - #mixed media #home decor #stickers #fall

When I spied this rather plain door hanger in one of my drawers, I knew just what to do with it. I love the sentiments and stitches in many SRM Stickers sheets. They're perfect for any project, especially mixed media projects! I used several fun ones: Sentiment/FallSentiment/Life Is GoodSticker Stitches/Black,Sticker Stitches/Halloween, and We've Got Your Border/Halloween.

SRM Stickers - Shery Russ - #mixed media #home decor #stickers #fall

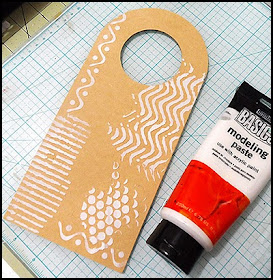
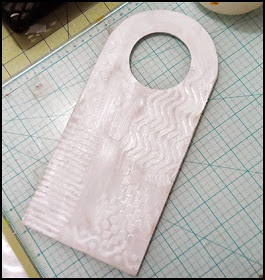
I started by applying Liquitex modeling paste through stencils from Crafter's Workshop and Plaid.  Next, I applied a generous coat of white gesso over the surface.

SRM Stickers - Shery Russ - #mixed media #home decor #stickers #fall

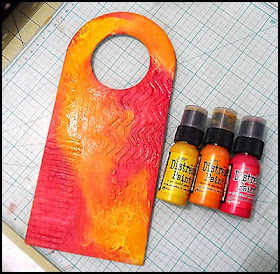
When the gesso was dry, I applied distress paints (mustard seed, spiced marmalade, and festive berries). I spritzed a bit of water and then blended the paints with my fingers.

SRM Stickers - Shery Russ - #mixed media #home decor #stickers #fall

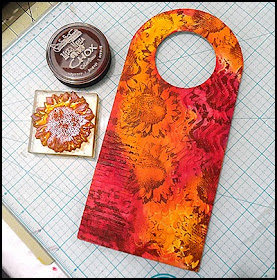
After the paints were dry, I stamped a sunflower in sparrow, a dark brown Mix'd Media Chox ink all over. I also applied schoolhouse, a dark red Mix'd Media pigment ink all around the edges. 

SRM Stickers - Shery Russ - #mixed media #home decor #stickers #fall

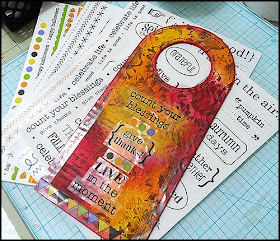
Lastly, I picked three inspiring sentiments from SRM's Sentiment/Fall and Sentiment/Life Is Good sheets, as well as used the fun banners and dots from the We've Got Your Border/Halloween sheet. I also used some fun stitches from the Sticker Stitches/Black sheet and the Sticker Stitches/Halloween sheet.

SRM Stickers - Shery Russ - #mixed media #home decor #stickers #fall

Here's my finished autumn mixed media door hanger.  I love the way it turned out.

SRM Stickers - Shery Russ - #mixed media #home decor #stickers #fall

Thanks so much for letting me share!  And Happy Fall!
Thursday, September 25, 2014

Teacher Purse by Cassonda


Hi everyone! Cassonda Tadlock here to share with you an easy and quick teacher gift. My new job has me sharing a room with another Kindergarten teacher so I decided to make her a little gift to show my appreciation. It is her room after all.


Take the Small Clear Purse and swipe some red paint across the front. After it dries use some stamps and white ink to add some designs to the front.  I love this effect and I love these swirl and dot stamps. So fun! !


Tie a pair of sweet little SRM punched pieces to the handle with some Twinery Maraschino Twine. Here I used a pink punched piece for the apple since it's her favortie color. :)


Place the gift or sweet treat inside and close up the purse box. 


I sure hope she loves it! ♥
Thanks for stopping by.  Be sure to drop in tomorrow for another dose of SRM Design Team inspiration!

Wednesday, September 24, 2014

Softball Team Treats by Tessa


Hello there!  Tessa Wise here today sharing some team treats I created for my girls' softball team. 


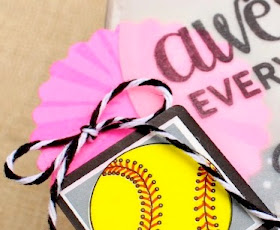
I pulled out my favorite new SRM Clear Triangle Treat Boxes for this project.  I love the size of these!  Perfect for a little goodie :)  I loved this sentiment stamp by Mama Elephant and wanted to use it as my focal point.  I stamped it with Staz On ink onto Vellum and diecut around it using a circle die.  The softball stickers are from the Say It With Stickers Mini/ Softball sheet.  I stuck them down to white cardstock and cut around them so I could use foam adhesive to pop them up.  I also used some Charcoal Baker's Twine as an accent, creating a small bow for each box.


The girls are on the Sparklers this season and their team color is hot pink.  I pulled out some Small Hot Pink Scalloped Punched Pieces and stamped the front of the with a starburst using Versamark ink.


After decorating the front, I filled up the container with Chex Muddy Buddies, one of our favorite treats!


Super fun to make and a BIG hit!


My girls were so excited to give these to their teammates at last week's game!  The team all loved them and they all saved their boxes  to display at home.


The little triangle box is so fun.  Just thinking that it might be cute for a camping treat or a Christmas tree treat.  Hmmmmm… I like those ideas!

Tuesday, September 23, 2014

Fall is Here by Cathy H.


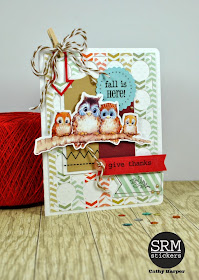
Cathy Harper here, sharing a Fall card with all of you SRM Sticker Fans!  I love this time of year, the colors, the cooler weather and the flavors and smells of Fall!  I created a simple card with lots of layers and several SRM Stickers and embellishments.

I love the Fall is Here! sticker from SRM's Fall Sentiment sheet.  I added it on top of the small baby blue Punched Piece.  These punched pieces are perfect for layering.

SRM Stickers - Fall is Here by Cathy H - #fall #card

 I also added to rows of Black Sticker Stitches on one of the tags.  The perfect accents.  And then I added two small pennant flags using the Fall Sentiment stickers again, the darling little leave and the "give thanks" sentiment.  And as almost always, a little bit of Cappuccino Twine for the perfect finishing touch and a cute little mini clothes pin! 


I love all of SRM's Fall Sticker Sentiments and can't wait to create a few more Fall themed cards.  In fact, with this very cool sheet I can make 25-30 cards!  


Thanks for dropping by today.  Happy Fall!


Monday, September 22, 2014

Autumn Gift Bag & Video by Cathy A.


Hello!  Cathy Andronicou here today.  I am in love with all the SRM bags, be they burlap or canvas.  There are so many possibilities and creative ways they can be used.  I want to share how to felt onto a burlap bag and have done a mini felting tutorial to go with this post and a video too!

To recreate this project, die cut the leaves and owl from various shades of felt, place a felting brush inside the bag and then use a felting needle to attach the pieces to the bag - see video. You can see that I have only felted down the centre and vein lines of the leaves to give more dimension to the leaves.


Love how the bag looks all plump with goodies!  And how the dimension of each leave stands out!


Layer the punched pieces using adhesive and add stickers from the Fall sentiments set.


Don't you love how this Sizzix Owl 2 die fits perfectly on the SRM medium burlap bag?  I do! 


To affix the Punched Pieces, punch a hole in the top and thread bakers twine through, tie into a bow and attach to burlap bag with glue.


And here's a video that walks you through felting the leaves on this bag from start to finish. 


Enjoy!  

Friday, September 19, 2014

Halloween Doily Treats by Christine


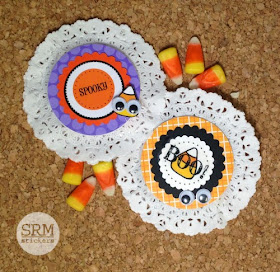
Fall is here and Halloween is in the air and on the minds of my kiddos.  Christine Meyer joining you today and I am always trying to think up fun new ways to surprise them and their friends with little goodies to celebrate this fun holiday.  Today I am going to share a simple one with you that makes use of SRM Stickers and doilies.

SRM Stickers Blog - Halloween Doily Treats by Christine - #halloween #stickers #punchedpieces #favors #treat bags

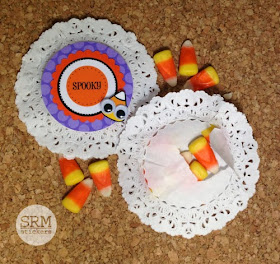
To start things off, I decorated the doilies using stickers and punched pieces.  Everything coordinates so nicely that this was a quick little job.  You could easily have your kids do this for their classmates making use of several different Halloween sets listed below! I attached the punched pieces to a coordinating circle of patterned paper and then to the front of a doily. 

SRM Stickers Blog - Halloween Doily Treats by Christine - #halloween #stickers #punchedpieces #favors #treat bags

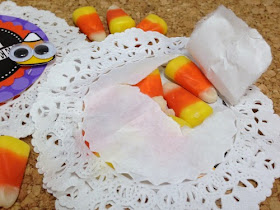
I then added adhesive all the way around the outside of the doily (staying away from the center).  I filled the center up with some candy corn (any small candy would work great).  Then I added a doily to the other one, enclosing the candy.

SRM Stickers Blog - Halloween Doily Treats by Christine - #halloween #stickers #punchedpieces #favors #treat bags

The receiver can then tear it open and get all the candy out!  I made these ones for Halloween but you could do just about any holiday with all the choices from SRM Stickers!   

SRM Stickers Supplies Used:

Now if only making a costume was this easy!  Thanks for joining us today and happy crafting!

Thursday, September 18, 2014

Everyday Life Art Canvas by Annette


Ready for some great inspiration?  Time for some canvas art with 


I thought I would try something a little different using a burlap canvas. I might add that the SRM Stickers stuck perfectly to the burlap which I was super excited about.

On today's burlap canvas I am using the following SRM products:

I also used my Silhouette Cameo to create a stencil for the Completely Awesome sentiment, the burlap and I used various acrylic paints to add the color.


I took the birthday borders and cut out the brightly colored little dots to spread throughout the canvas. I really love how it pops the color. Who doesn't love polka dots?


I also added a couple of Studio Calico circle wood veneers.
Don't you just love how cute they look with the sticker circles?  I love how SRM Stickers go with so many different products in my stash!


Lastly I added Pink Sorbet and Caribbean Twine with all purpose adhesive. I really wanted the circle to pop and the twine really made that happen.


Now to find the perfect place to display this happy canvas.  Everyday Life is Completely Awesome...don't you think?

Happy Crafting!

Wednesday, September 17, 2014

Bitty Birthday Box by Shantaie


Ever wished so very much that you could be with someone to celebrate their birthday but it's just not possible? What if you could send them a mini birthday party all wrapped up from you to show them how much they mean to you?!   Shantaie here with you today to show you something fun!  It's a Bitty Birthday Box packed with crafty goodness!

SRM Stickers Blog - Bitty Birthday Box by Shantaie - #birthday #gift #container #clear #A-2 #doily #stickers #twine #shimmer

Think about our Service men and women, kids who are off to college, family members who moved or are away for work, could have a festive little celebration that is sure to bring cheer and make them feel loved!  

SRM Stickers Blog - Bitty Birthday Box by Shantaie - #birthday #gift #container #clear #A-2 #doily #stickers #twine #shimmer

Of course each one can be customized, but here are the basics and what I used to fill my SRM Clear A2 box:

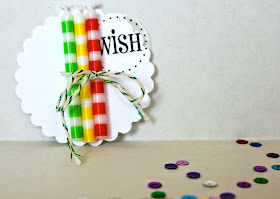
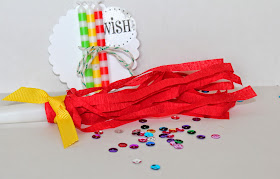
Birthday candles to make that all important birthday wish, I punched two holes through the large white punched piece and tied 3 candles with green shimmer bakers twine bow from the twinery. I added a round wish sticker at the top allowing just a bit to overlap that area was used to anchor the candles near the top of the box liner I created with patterned paper.

SRM Stickers Blog - Bitty Birthday Box by Shantaie - #birthday #gift #container #clear #A-2 #doily #stickers #twine #shimmer

Next is a fun party horn, you can use a blower, or any kind of little noisemaker ..try a kazoo! 

SRM Stickers Blog - Bitty Birthday Box by Shantaie - #birthday #gift #container #clear #A-2 #doily #stickers #twine #shimmer

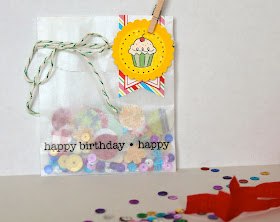
My favorite part of this little box is the glassine bag of confetti! I punched little circles, and flower shaped confetti from patterned paper, and filled it with multicolored sequins. I folded the glassine bag over and tied a bow with green shimmer twine and sealed it with a Bright blank label.  I added the cupcake sticker to a yellow small punched piece and attached it with a mini clothespin. 

SRM Stickers Blog - Bitty Birthday Box by Shantaie - #birthday #gift #container #clear #A-2 #doily #stickers #twine #shimmer

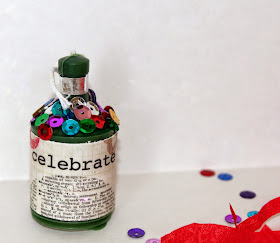
A party popper was given a makeover with patterned paper and sequins! Add a SRM sentiment from We've Got Your Sticker Happy and its ready to thrill! 

SRM Stickers Blog - Bitty Birthday Box by Shantaie - #birthday #gift #container #clear #A-2 #doily #stickers #twine #shimmer

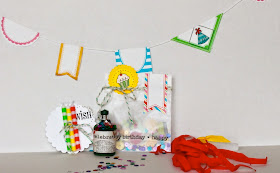
The last item in my kit is an itty bitty banner made from the Bright Blank Labels folded over a length of white cotton string.  It's quick, easy and adorable! 

SRM Stickers Blog - Bitty Birthday Box by Shantaie - #birthday #gift #container #clear #A-2 #doily #stickers #twine #shimmer

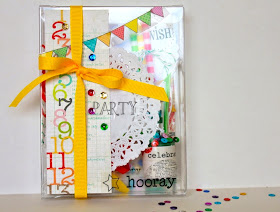
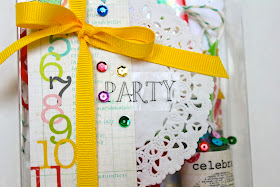
Fill up the box and decorate it with a bit of patterned paper, a SRM doily, a birthday border banner sticker and a bow! 

SRM Stickers Blog - Bitty Birthday Box by Shantaie - #birthday #gift #container #clear #A-2 #doily #stickers #twine #shimmer

Now it's your turn!  Send someone a bitty birthday party and know that a part of you is celebrating along with them!  Happy creating!