Friday, March 30, 2012

Spring Banner by Aimee


Aimee Kidd took our Spring Fling assignment this month and created a fun banner to decorate her home. Click on the photos to see details;


Aimee used our Spring Sticker Sentiment sheet to embellish her banner. You can view all of our Sticker Sentiments, HERE. Have a great weekend! Be sure to hop over to Paper Crafter's Corner to see Corrie's video tutorial on scrapbook layout layering - it's fabulous! Click HERE!

Thursday, March 29, 2012

Once Upon a Time by Valerie


Valerie Mangan used our border stickers in such a clever and beautiful way for this layout featuring her daughter. Valerie says, "The little polka dot border strip on the We've Got Your Border (#57003 Baby Girl) sticker sheet is so cute and festive. The dots reminded me of confetti so I cut the strip apart (with the backing still on) and dropped the dots where I thought they'd look best. Once I was sure I had the right arrangement, I got to work sticking them down."


"I mixed in a few hearts from the heart border on the same sheet. I used the same technique of arranging them first then sticking them down. I Also added a sticker from the We've Got Your Sticker 'Princess' sheet - which I used to cover over the words 'bundle of joy' on the yellow border sticker. I chose 'once upon a time' because my daughter is reading a story to her grandfather in this photo."


"Journaling is on the tag in the yellow dotted bag. I cut the word 'love' from the border phrase 'baby love' and made a little tag with it."


SUPPLIES: We've Got Your Border #57003 Baby Girl, We've Got Your Border #57004, Thank You (for the brown & dark yellow dots in the confetti) We've Got Your Sticker #53007 Princess.

Wednesday, March 28, 2012

Breast Cancer Awareness

We are sharing a few Breast Cancer Awareness projects today. Tenia Nelson created a clean & simple "Believe" card;


Amy Duff created a ribbon for a dear friend. Amy says, "I started with a Bravissimo ribbon from Making Memories. I used a cupcake liner and then added an extra large scallop punch in cream cardstock. I punched a large salmon colored circle from card stock, added the sticker sentiment from Celebrate Life #39046 and a ribbon border from Think Pink #49010, then popped it with foam dots. I placed the pink ribbon sticker, also from Celebrate Life, on a piece of cream cardstock, trimmed, and attached it to the top."


"The three tails are stickers from Think Pink and were also placed on cream cardstock, trimmed, and then tucked under the scallop. A few drops of pink glitter to accent and it was done!"


"I made this for a special friend that just received word she is now cancer-free. She deserves so much more than a ribbon after the battle she fought. She wears something pink on herself everyday, and I thought maybe she might want something a little bit more for those days she really wants to shout it out that she is a survivor!"

You can view/purchase our line of Breast Cancer Awareness products, HERE.

Tuesday, March 27, 2012

Make a Wish Mini Album by Tracey


First things first, be sure to hop over to Paper Crafter's Corner to see their fantastic Layering Feature this week. Our own Corrie Jones has a SRM Stickers layout featured, HERE. There's also a giveaway in the works so be sure to check back at Paper Crafter's Corner!

Tracey Taylor took the 'smash book' concept and decorated a mini album to document her daughter's 6th birthday. Random SRM Birthday Stickers were the perfect addition to make her book extra special;


Monday, March 26, 2012

Party in a Bag by Tenia


Welcome back! We have a full load of fun sticker projects this week... Tenia Nelson used our Party in a Bag "Baby Boy" to create a baby shower card and candy-filled tube;


To check out all of our Party in a Bag posts, click HERE. So many ideas!

Friday, March 23, 2012

Jan's Jump Rope!


Jan Tatomir had a clever idea for a party favor. Jan found cute pink & white rope at at her local home improvement store and knew right away that she wanted to make a jump rope using SRM Stickers mini TUBES as handles. Jan drilled a small hole in the bottom of the tubes, threaded the rope through, and knotted each end. Click on the photos to see them super-sized;


Jan filled the tubes with beads and twine for a craft activity;


Lastly, Jan created customized tags using our Birthday Border Stickers;


Have a great weekend!

Thursday, March 22, 2012

Basketball Mini Album by Carolyn


Carolyn King is here to share a mini photo album that she created for her son, Ben. He played basketball for the first time ever this year. Carolyn had to bribe him to play because he was nervous to try a new sport. But... HE LOVED IT!

Carolyn says, "For the cover, I used lots of SRM stickers. My favorite part is the SRM basketball that I added to a piece of white cardstock and put over the actual basketball in the photo. I added another SRM year sticker on the ball to show the year."


You can click on this photo to see all of the inside details;


SUPPLIES: Year of Memories #48004, Have a Ball - Basketball #47002, Say It With Stickers- Basketball #40003, Express Yourself- Athlete #42001.

Wednesday, March 21, 2012

Party in a Bag by Jamie


Jamie Cripps had fun with one of our Party in a Bag kits! Jamie says, "I used the tubes for table placement, filling each one with a punching balloon and using a metal rim tag for their names. I also used the same size metal rim tag to tie onto the invitations."


Filling the tubes with punching balloons is such a clever alternative to candy - love that! Join us tomorrow for a fun mini album by Carolyn.


Tuesday, March 20, 2012


Tracey Taylor combined our fun cooking stickers with border stickers to create a "Cookin' with Mom" Layout;


Design Note: If you are nervous about placing a sticker directly on your page, mount it on a neutral cardstock then you can move it around your page until you are happy with the placement.


We carry a full line of cooking stickers (perfect for recipe boxes, layouts, menus, etc.) that you can see HERE. Our new border stickers can be found HERE. Happy scrapping!

Monday, March 19, 2012

Mother's Day Project by Jamie

Welcome! We hope you had a nice weekend and you're ready to be inspired! We have a full week of projects from our Designers.

Jamie Cripps created a clever Mother's Day gift that her mom will surely treasure. Jamie says, "I found an old planter that was pretty beat up, scrapped all the old paper from its sides then cleaned up the inside area. I then traced the form onto pattern paper and adhered it along each side. I filled the planter with matching shredded paper and placed kitchen utensils, a gift card, and a tag inside. I used the Mother's Day stickers on white cardstock then adhered them to small clothes pins. It is the perfect size to hold the new utensils my mother asked for for Mother's Day!"

Click on Jamie's photo to view it larger - so many fun details;


You'll want to purchase your supply of Mother's Day Stickers HERE. Our Father's Day products can be found HERE!

Friday, March 16, 2012

Zoo Party by Carolyn

Carolyn King created an adorable baby party set using our Party in a Bag (baby boy). The die cut tube toppers are fabulous and so fun!


Carolyn added the {baby shower} sticker on a piece of vellum to make a cute holder to slide the tube through;


For the elephant tube, Carolyn created a vellum slide on the back of the elephant to have him sitting at the top of the tube. Of course, she used more border stickers to decorate;


Have a wonderful and crafty weekend! We're back on Monday and all week with more stickers projects from our Designers.

Thursday, March 15, 2012

Altered Butterfly Frame by Amy


Amy Duff has a clever project to share today, an altered frame and coordinating tag. Amy says, "I took the We Got Your Border stickers from sheet #57001 Baby Boy and placed them on a tag. I then die cut a butterfly from the tag to make a frame and placed a picture behind it. A few butterfly punches and a little trim to embellish, and my tag is complete."


Amy then took the positive side and created a mini picture frame;


"This makes a cute little gift set give to new parents or grandparents and it's super easy to create! When I was making this, I was very careful to notice my sticker usage. Why you ask? Because I like to stretch my products as much as possible! This project takes a quarter of the sheet so you still have plently left to create cards, layouts, etc."

Wednesday, March 14, 2012

It's Easter Time!


Our Designers used our Easter and Spring Stickers to create an assortment of Easter projects, take a look!


Be sure to load your Easter projects using SRM Stickers into our Gallery for all to see!

Tuesday, March 13, 2012

Projects by Shannon


Shannon Morgan has a unique style and she's here today to share a few projects with us. First up, a gift card holder using SRM Stickers, ribbon, twine, and lots of doodling;


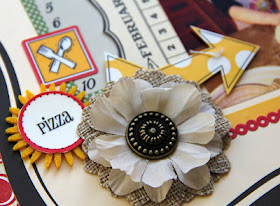
Shannon is keeping a monthly journal and here are her fabulous February pages!


It's all about Easter projects tomorrow, be sure to stop by to see what our Designers have created to celebrate the holiday.

Monday, March 12, 2012

Altered Matchbox by Amy


Welcome back to the SRM Stickers Blog! We have a sweet miniature item for you today, an altered matchbox by Amy Duff. Amy Duff created this wonderful keepsake box that would fit any occasion -- anniversary, birthday, or just to say "I Love You".


Amy covered the matchbox with patterned paper and distressed it with sandpaper. She punched a label bracket from striped patterned paper and added a sentiment plus two heart die cuts sewn together. Amy also added a strip of rhinestones for extra bling! The ribbon is tied around the top of the box and a button with floss was attached to the center.


For the inside, Amy painted it cream and then distressed it to match the casing. She added the border stickers on both the left and right side of the box as shown. Amy then placed the perfectly sized "XO" sticker.


The handle was created with a stick pin and earring back.


Be sure to check back tomorrow to see Shannon's fabulous February Journal pages!